Discover free printable embroidery stitch guides, perfect for beginners and experienced stitchers alike․ These guides offer step-by-step instructions, diagrams, and tips to master various embroidery stitches easily․
1․1 What Are Free Printable Embroidery Stitch Guides?
Free printable embroidery stitch guides are downloadable resources that provide step-by-step instructions and diagrams for various embroidery stitches․ They are designed to help crafters of all skill levels master different techniques, from basic to advanced stitches․ These guides often include detailed illustrations, written instructions, and tips for proper needle and thread usage․ Many are available in PDF format, making them easy to print and organize․ Some guides are compact, designed to be carried in a sewing box or laminated for durability․ They cater to both beginners and experienced stitchers, offering a convenient way to learn and reference stitches․ Whether you’re practicing foundational stitches or exploring complex designs, these guides serve as invaluable companions for embroidery projects․
1․2 Benefits of Using Printable Stitch Guides
Printable embroidery stitch guides offer numerous benefits for crafters․ They provide clear, step-by-step instructions and diagrams, making it easier to learn and master various stitches; These guides are convenient, as they can be downloaded and printed at home, allowing for easy reference while working on projects․ Many guides are compact, designed to be laminated or stored in a sewing box for quick access․ They cater to all skill levels, from beginners to experienced stitchers, offering tips and tricks to improve techniques․ Additionally, printable guides often include video tutorials and customizable options, enabling users to organize and personalize their stitch collections․ They save time by providing pre-designed patterns and instructions, reducing the need to search for individual tutorials․ Overall, printable stitch guides are invaluable resources for anyone looking to enhance their embroidery skills efficiently and creatively․
1․3 How to Use This Article

Popular Embroidery Stitches Included in Guides
Free printable guides feature basic, intermediate, and advanced stitches, catering to all skill levels․ They include step-by-step diagrams for stitches like the running stitch, backstitch, and French knot․
2․1 Basic Stitches for Beginners
Start your embroidery journey with fundamental stitches found in free printable guides․ The running stitch, backstitch, and French knot are essential for beginners․ These stitches form the foundation of most embroidery designs and are easy to learn․ Printable guides often include step-by-step diagrams and instructions, making it simple for newcomers to master these techniques․ The running stitch, the most basic of all, is perfect for outlining designs․ The backstitch is great for creating bold lines and text, while the French knot adds decorative details․ With these stitches, beginners can quickly create beautiful embroidery pieces․ Many guides also offer video tutorials to complement written instructions, ensuring a comprehensive learning experience․ Practicing these stitches with provided patterns helps build confidence and skill, paving the way for more complex embroidery projects․
2․2 Intermediate Stitches for Growing Skills
Once comfortable with basic stitches, intermediate embroiderers can expand their skills with techniques like the satin stitch, stem stitch, and herringbone stitch․ These stitches add texture and dimension to designs․ The satin stitch is ideal for filling large areas smoothly, while the stem stitch is perfect for outlining curves and creating delicate lines․ The herringbone stitch adds a reversible, woven texture, great for borders or backgrounds․ Free printable guides often include detailed diagrams and step-by-step instructions for these stitches, making them accessible to growing embroiderers․ Practicing these intermediate stitches helps build confidence and prepares stitchers for more complex designs․ Many guides also offer tips on combining stitches for unique effects, encouraging creativity and skill development; Mastering these stitches opens the door to more intricate embroidery projects and enhances overall stitching proficiency․
2․3 Advanced Stitches for Experienced Stitchers
For embroiderers with ample experience, advanced stitches offer a way to create intricate and sophisticated designs․ Techniques like the trellis stitch, needle lace, and bullion knots allow for complex textures and three-dimensional effects․ The trellis stitch is ideal for creating detailed, interconnected patterns, while needle lace enables the formation of delicate, standalone lace elements․ Bullion knots add raised, dimensional details, perfect for flowers or other decorative elements․ Many free printable guides include these advanced stitches, often with detailed step-by-step diagrams and tips for mastering them․ These stitches are perfect for embroiderers looking to challenge themselves and elevate their projects․ With practice, advanced stitches can transform embroidery into stunning, professional-quality pieces․ Printable guides also provide inspiration for combining advanced stitches to create unique and intricate designs․
Tools and Materials Needed
Essential tools include embroidery hoops, needles, and scissors․ Use high-quality fabric and embroidery floss for best results․ Stabilizing materials like interfacing can enhance stitching accuracy and fabric stability․
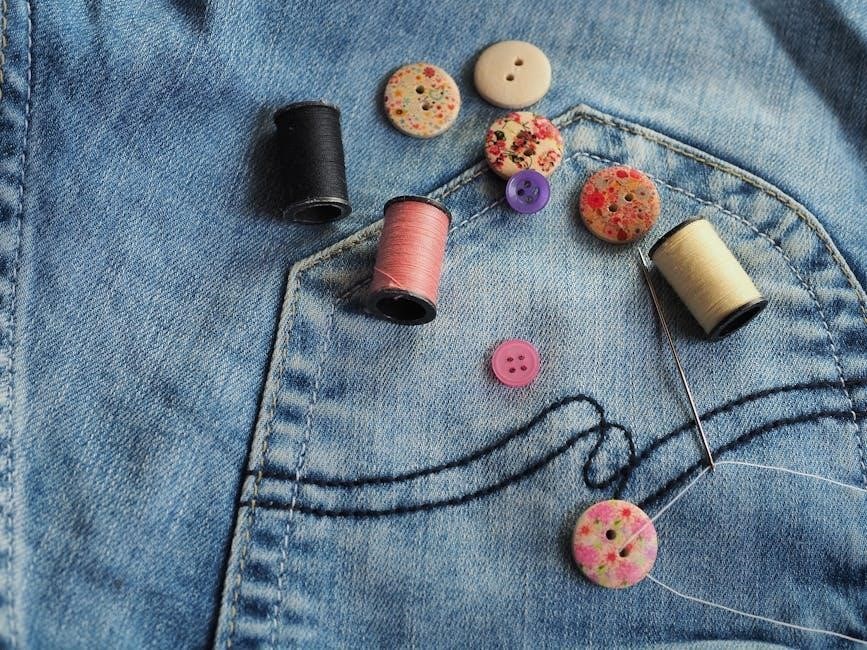
3․1 Essential Embroidery Supplies
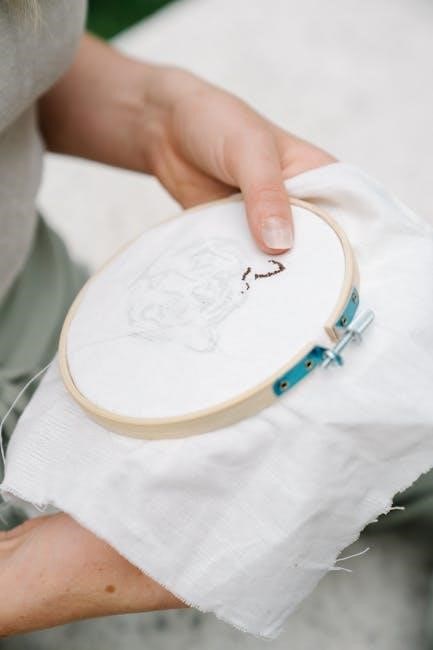
To get started with embroidery, you’ll need a few basic supplies․ A sturdy embroidery hoop is essential for keeping fabric taut, allowing for even stitching․ Choose a hoop that fits your project size, available in various materials like wood or plastic․ Tapestry needles are ideal for embroidery due to their blunt tips and large eyes, making it easy to thread embroidery floss․ Sharp scissors are a must for cutting floss cleanly․ Embroidery floss itself comes in a wide range of colors and materials, such as cotton or silk․ Stabilizing materials like interfacing or water-soluble toppings can help maintain fabric stability․ Additional tools like thimbles or magnifying glasses can enhance comfort and precision․ These supplies are readily available at craft stores or online, ensuring you’re well-prepared to create beautiful embroidery designs using your free printable stitch guides․
3․2 Recommended Fabric and Thread Types
For embroidery, choosing the right fabric and thread is crucial․ Aida cloth and evenweave linen are popular choices due to their clear, evenly spaced weave, making stitching easier․ Cotton fabrics, especially those with a tight weave, are also ideal for embroidery projects․ Embroidery floss is the most common thread type, available in a wide range of colors and materials like cotton or silk․ Stranded cotton is another excellent option, known for its durability and vibrant colors․ Metallic threads can add a decorative touch for intricate designs․ When selecting fabric, consider the project’s complexity and your personal preference for texture and weight․ Pairing the right fabric with high-quality thread ensures your stitches are even and long-lasting․ These combinations are widely recommended in free printable embroidery guides to help you achieve professional-looking results․
3․4 Tips for Choosing the Right Needle
Selecting the right needle is essential for embroidery success․ Tapestry needles are ideal for most embroidery projects due to their blunt tips and large eyes, which accommodate embroidery floss easily․ Sharp needles are better suited for piercing dense fabrics or detailed work․ Beading needles are perfect for intricate stitching with thin threads or beads․ Chenille needles, with their sharp tips and large eyes, are great for heavy fabrics and textured stitches․ Always choose a needle size that complements your fabric type—thicker fabrics require larger needles, while delicate fabrics need finer ones․ Consider thread size as well; thicker threads may need larger needle eyes․ Regularly inspect and replace dull or bent needles to maintain stitch quality․ Proper needle care ensures smooth stitching and prevents fabric damage․ By selecting the right needle for your project, you can achieve consistent, professional-looking results․
Visual Guides and Tutorials
Enhance your embroidery skills with step-by-step guides, video tutorials, and printable charts․ These resources provide clear instructions for mastering various stitches, from basic to advanced techniques․
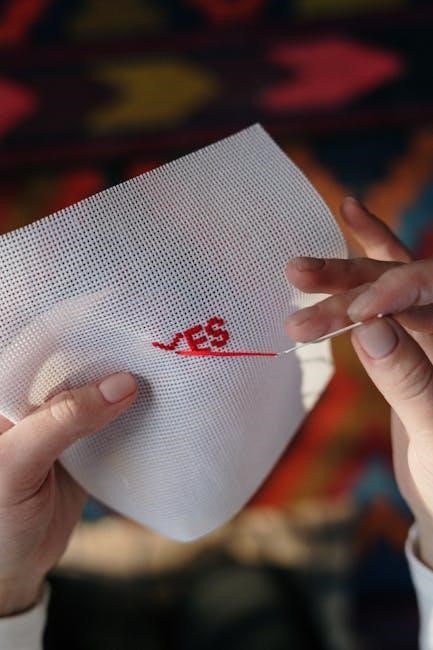
4․1 Step-by-Step Stitch Diagrams
Step-by-step stitch diagrams are essential for learning embroidery․ These visual aids break down each stitch into simple, manageable steps, making it easy to follow along․ Many free printable guides include detailed illustrations that show the direction of the needle, the spacing between stitches, and how to secure the thread․ Beginners can benefit from these diagrams as they provide a clear understanding of how each stitch should look․ Intermediate stitchers can use them to refine their technique, while experienced embroiderers can refer to them for intricate patterns․ The diagrams are often accompanied by written instructions, offering a comprehensive learning experience․ By following these step-by-step guides, embroiderers of all skill levels can master various stitches and create beautiful, professional-looking designs․ These diagrams are a valuable resource for anyone looking to improve their embroidery skills․
4․2 Video Tutorials for Complex Stitches
Video tutorials are an excellent resource for mastering complex embroidery stitches․ They provide a dynamic, visual learning experience that complements printable guides․ Many free embroidery stitch guides include links to video tutorials, allowing users to watch demonstrations of intricate stitches like the satin stitch, stem stitch, and French knot․ These videos often feature close-up footage, making it easier to understand the needle’s movement and thread placement․ Beginners can pause or rewind the videos to practice each step, while experienced stitchers can refine their techniques․ Some tutorials also offer tips for troubleshooting common mistakes, ensuring a smooth learning process․ By combining video tutorials with printable guides, embroiderers can gain a deeper understanding of complex stitches and improve their overall embroidery skills․ This combination of visual and written instruction is ideal for learners of all levels․
4․3 Printable Stitch Charts
Printable stitch charts are invaluable tools for embroiderers, offering clear, visual representations of stitches․ These charts often include step-by-step diagrams, making it easier to follow complex stitch patterns․ Many free embroidery guides provide printable charts that can be laminated for durability, ensuring they remain a lasting resource․ They are particularly useful for organizing stitches by type or project, allowing embroiderers to quickly reference techniques․ Some charts are customizable, enabling users to add notes or mark completed stitches․ Additionally, printable charts can be combined with video tutorials for a comprehensive learning experience․ By having both visual and written instructions, embroiderers can master stitches more efficiently․ Printable charts are also portable, making them ideal for workshops or on-the-go projects․ They serve as a practical companion for anyone looking to enhance their embroidery skills, whether they are beginners or experienced crafters․
Customizing Your Stitch Guide
Personalize your embroidery guide by adding colors, notes, and favorite stitches․ Use laminating for durability and organize pages to suit your projects, making it a tailored resource․
5․1 Organizing Your Stitch Collection
Organizing your embroidery stitch collection is key to efficient stitching․ Start by laminating each guide for durability and bind them with a sturdy ring․ Arrange stitches alphabetically or by difficulty, using tabs or labels for easy navigation․ Store them in a dedicated sewing box or folder to keep everything accessible․ Consider categorizing stitches into basic, intermediate, and advanced sections to streamline your workflow․ This system allows you to quickly locate the stitches you need, saving time and reducing frustration․ Additionally, you can add a table of contents or index for rapid reference․ Keeping your collection tidy ensures your guides remain useful and enjoyable, whether you’re working on a small project or a complex design․ This organized approach enhances your embroidery experience, making it more productive and satisfying․
5․2 Adding Personal Notes and Tips
Enhance your embroidery journey by adding personal notes and tips to your stitch guide․ Jot down shortcuts, thread preferences, and fabric recommendations for each stitch․ Note the needle size that worked best or any common mistakes to avoid․ Record variations or alternative uses for stitches, expanding their versatility․ Include tips on tension control or how to combine stitches for unique designs․ This customization makes the guide truly yours, reflecting your personal stitching style․ Over time, your notes will become a valuable resource, capturing your growth and expertise․ By documenting your insights, you create a tailored reference that enhances your embroidery projects and serves as a testament to your creativity and skill․ This personalization transforms a simple guide into an indispensable tool, enriching your stitching experience․
5․3 Laminating for Durability
Laminating your embroidery stitch guide ensures long-lasting durability and protects it from wear and tear․ Use a laminator or laminating pouches to cover each page, preventing damage from spills, fingerprints, or frequent handling․ Print your guide on high-quality paper or cardstock for a professional finish․ For best results, place the paper in the center of the laminating pouch, avoiding air bubbles․ Once laminated, your guide becomes water-resistant and easy to clean, making it perfect for use in busy sewing rooms․ Consider laminating individual pages or the entire booklet, then binding them with a ring or string for easy access․ This simple step extends the life of your guide, ensuring it remains a reliable resource for years of stitching projects․ Laminating is a practical way to preserve your personalized embroidery reference, keeping it vibrant and functional․
Advanced Embroidery Techniques
Explore advanced embroidery methods, combining stitches for unique designs and refining techniques․ Discover tips for incorporating diverse stitch families, troubleshooting mistakes, and creating intricate patterns with precision․
6․1 Incorporating Different Stitch Families
Mastering various stitch families enhances your embroidery projects․ Start with basic running, backstitch, and stem stitches, then explore herringbone, chain, and blanket stitches․ These stitches form the foundation for more complex designs․ Use free printable guides to learn each family’s unique characteristics and practice their applications․ Combining different families, like outlining with backstitch and filling with satin stitch, creates dimensional and visually appealing designs․ Experiment with layering and blending stitches to achieve intricate textures and patterns․ Printable charts and step-by-step diagrams make it easier to identify which stitches work well together․ This approach not only expands your skill set but also allows for personalized and creative embroidery projects․
6․2 Combining Stitches for Unique Designs
Combining embroidery stitches unlocks endless creative possibilities․ By mixing different stitch families, you can create intricate, layered designs that add depth and texture to your projects․ Start by pairing basic outline stitches, like the backstitch or stem stitch, with filling stitches such as the satin stitch or herringbone stitch․ Experiment with contrasting thread colors and fabric types to enhance visual interest․ Free printable guides often include tips on how to blend stitches seamlessly, ensuring your designs look polished․ For example, use the running stitch for delicate details and the chain stitch for bold outlines․ This technique allows you to personalize embroidery patterns and create one-of-a-kind pieces․ Printable charts and tutorials make it easier to plan and execute these combinations, helping you achieve professional-looking results․
6․3 Troubleshooting Common Mistakes
Embroidery projects can sometimes go awry, but identifying and correcting mistakes is easier with the right guidance․ Common issues include uneven stitches, loose thread tension, or misaligned patterns․ Printable guides often highlight these pitfalls and offer solutions, such as using a hoop for stability or adjusting thread length․ For example, if your stitches are too tight, causing fabric puckering, try loosening your tension or using a larger needle․ Similarly, uneven stitching can be corrected by practicing consistent needle insertion depth․ Free printable guides also provide visual aids to help diagnose and fix errors․ Many include troubleshooting sections or video tutorials that demonstrate how to repair mistakes without starting over․ By referring to these resources, embroiderers of all skill levels can refine their techniques and achieve professional-looking results․ Additionally, laminating your guide ensures it remains durable for frequent reference․
Resources and Downloads
Explore a wealth of free printable embroidery stitch guides, downloadable PDF patterns, and video tutorials․ Find these resources on craft websites, blogs, and embroidery communities for easy access․
7․1 Where to Find Free Printable Guides
Free printable embroidery stitch guides are widely available online, offering convenience for crafters․ Websites like Craftsy, Pinterest, and Etsy provide an array of downloadable PDFs․ Many embroidery blogs and crafting communities share these guides, often designed for both beginners and advanced stitchers․ Social media platforms like Instagram and Facebook host embroidery groups where members exchange resources․ Additionally, personal crafting blogs often feature customizable stitch guides tailored to specific projects․ These guides typically include step-by-step diagrams, stitch tutorials, and organization tips․ Some popular resources include Muse of the Morning’s laminated stitch booklets and Janice Vaine’s comprehensive stitch collections․ When downloading, ensure to select “actual size” for printing to maintain clarity․ These guides are perfect for building a personalized embroidery reference library, making them indispensable for any stitching project․
7․2 Downloadable PDF Patterns
Downloadable PDF patterns are a fantastic resource for embroiderers, offering detailed instructions and visuals for various stitches․ Many websites provide free embroidery PDFs, such as Muse of the Morning’s laminated stitch booklets and Janice Vaine’s comprehensive stitch guides․ These PDFs often include step-by-step diagrams, materials lists, and tips for mastering stitches․ Some patterns are designed as compact, carry-along guides, perfect for on-the-go practice․ Others, like the Stitching Raccoon Sampler, offer 14 days of embroidery stitches with accompanying video tutorials․ PDFs are typically printable on standard paper or cardstock, and many creators suggest laminating them for durability․ They cater to all skill levels, from basic stitches like the running stitch to advanced techniques․ These downloadable resources are ideal for organizing your embroidery library and enhancing your stitching skills with clear, structured guidance․
7․3 Accessing Video Guides and Tutorials
Video guides and tutorials are invaluable companions to free printable embroidery stitch guides, offering visual instruction for mastering stitches․ Many creators provide complementary videos alongside their PDF downloads, such as the Stitching Raccoon Sampler, which includes tutorials for each stitch․ These videos often feature step-by-step demonstrations, close-ups, and tips for troubleshooting common mistakes․ Platforms like Pinterest and YouTube host a wealth of embroidery tutorials, catering to all skill levels․ For example, quick videos for basic stitches like the straight stitch are perfect for beginners, while more detailed tutorials cover advanced techniques․ Some videos are even paired with downloadable patterns, allowing you to practice along with the instructor․ Whether you’re learning a new stitch or refining your skills, video guides provide dynamic, engaging instruction to enhance your embroidery journey․
Community and Support
Join embroidery communities to share projects, gain feedback, and learn from others․ Platforms like Pinterest and YouTube offer spaces to connect and grow your embroidery skills together․
8․1 Joining Embroidery Communities
Joining embroidery communities is a great way to connect with fellow stitchers, share your projects, and gain inspiration․ Online platforms like Pinterest, YouTube, and Instagram are filled with active embroidery groups where you can showcase your work and learn from others․ These communities often feature discussions, tutorials, and challenges that can help you improve your skills and stay updated on the latest trends․ Many embroidery enthusiasts also share their free printable stitch guides and patterns, making it easier for you to access new techniques and designs․ By participating in these communities, you can build relationships, get feedback on your projects, and find motivation to keep exploring the world of embroidery․ Whether you’re a beginner or an experienced stitcher, being part of a community can enrich your embroidery journey and help you grow as a crafter․
8․2 Sharing Your Projects
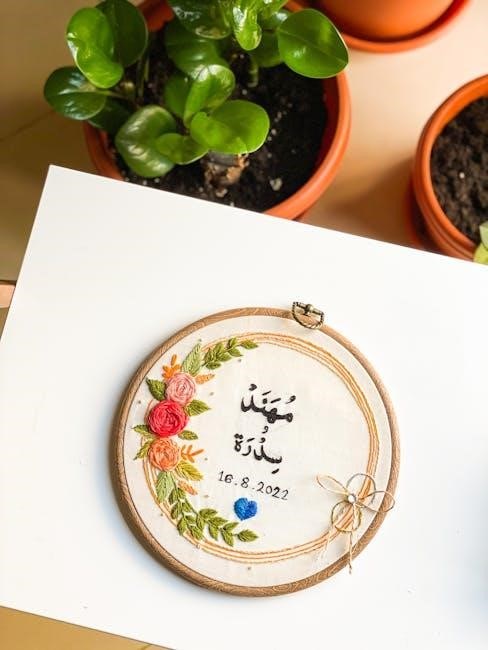
Sharing your embroidery projects is a wonderful way to showcase your creativity and connect with others who share your passion․ Many embroidery enthusiasts use platforms like Instagram, Pinterest, and YouTube to display their work, providing inspiration to others․ By sharing your projects, you can receive feedback, gain confidence, and learn from fellow stitchers; Additionally, sharing your finished pieces or works-in-progress can help others learn new techniques and discover free printable embroidery stitch guides․ Some communities even host challenges or themed projects, encouraging participants to share their interpretations․ Whether it’s a simple embroidery sampler or a complex design, sharing your projects fosters a sense of accomplishment and helps grow the embroidery community․ It’s also a great way to inspire others and build connections with like-minded crafters worldwide․
8․3 Getting Feedback and Learning
Receiving feedback and continuously learning are essential for enhancing your embroidery skills․ Joining embroidery communities allows you to share your work and receive constructive criticism, helping you refine your techniques․ Many online forums and social media groups dedicated to embroidery offer spaces to post your projects and gain insights from experienced stitchers․ Additionally, video tutorials and downloadable guides provide step-by-step instructions to improve specific stitches․ By leveraging these resources, you can identify areas for improvement and explore new methods to elevate your embroidery․ Learning from others’ experiences and incorporating their tips can significantly enhance your creativity and precision․ Embrace feedback as a tool for growth and use it to refine your craft, ensuring your embroidery projects become increasingly sophisticated over time․