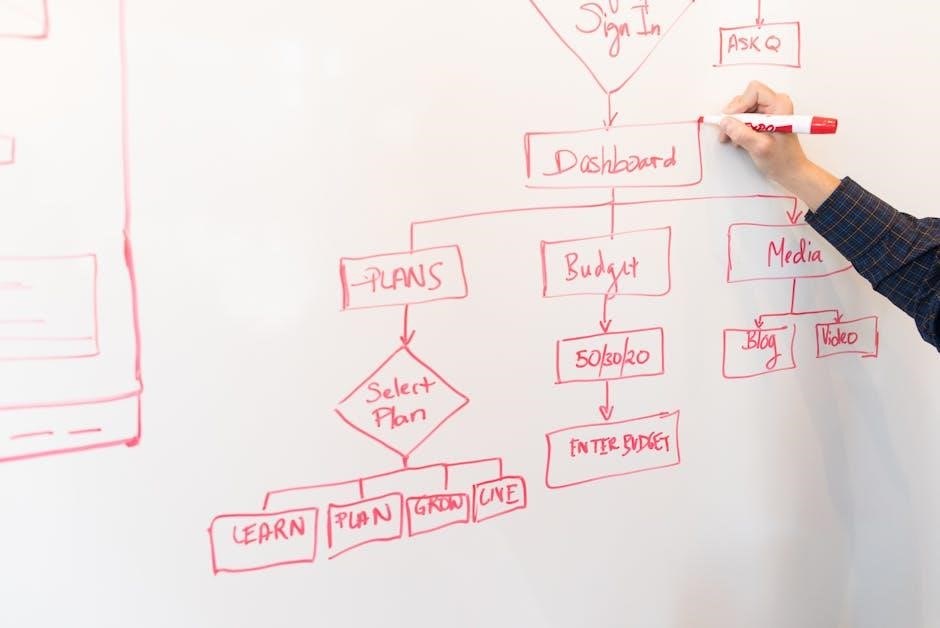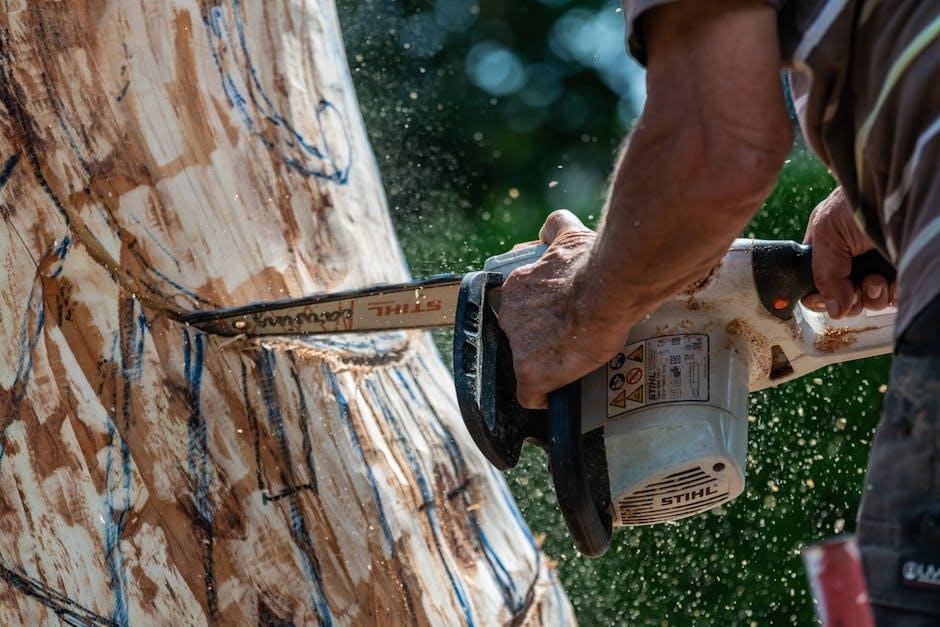
The Ferrari F430, a mid-engine V8 supercar, originally offered a six-speed manual or F1 automated transmission; Enthusiasts increasingly opt for manual conversions to enhance driving engagement and value, leveraging kits like Dr. S Gated or Cambio Manuale, which include hardware, ECU firmware, and hydraulic components for a gated manual experience.
1.1. Overview of the Ferrari F430
The Ferrari F430 is a mid-engine V8 supercar produced from 2004 to 2009, known for its exceptional performance and sleek design. It features a 4.3-liter V8 engine, producing 483 horsepower, and was available as a Berlinetta (coupe) or Spider (convertible). The F430 was the first Ferrari to feature the E-Diff electronic differential and was praised for its handling and responsiveness. Its design, penned by Pininfarina, combines aerodynamic efficiency with classic Ferrari styling. The F430 is a celebrated model among enthusiasts, blending power, elegance, and driving excitement.
- Production years: 2004–2009
- Engine: 4.3-liter V8
- Power: 483 horsepower
- Body styles: Berlinetta, Spider
- Key features: E-Diff, aerodynamic design
1.2. Why Manual Conversion is Popular Among Enthusiasts
Manual conversion for the Ferrari F430 has gained popularity among enthusiasts due to its promise of a more engaging and authentic driving experience. Drivers seek the tactile connection and control offered by a gated manual transmission, which enhances the emotional bond with the car. Additionally, manual conversions often increase the vehicle’s resale value, making it a desirable modification for collectors and purists. The exclusivity and nostalgic appeal of a manual gearbox further fuel its demand in the enthusiast community, especially for those who value traditional driving dynamics.
- Enhanced driving engagement
- Exclusivity and nostalgic appeal
- Potential increase in resale value
- Tactile connection with the vehicle
1.3. Brief History of the F430 and Its Transmission Options
The Ferrari F430, produced from 2004 to 2009, was a mid-engine V8 supercar that succeeded the 360. It was available with a six-speed manual or an F1 automated manual transmission. The manual transmission was popular among driving purists, while the F1 system appealed to those seeking convenience. The F430 was the last Ferrari model to offer a factory manual option, as subsequent models transitioned to automated transmissions. This shift has made manual F430s highly sought after, driving the popularity of aftermarket manual conversions to restore the traditional driving experience.

Benefits of a Manual Conversion
Manual conversion enhances driving engagement, offering precise control and a more immersive experience. It boosts resale value and restores the classic gated manual appeal, cherished by enthusiasts.
2.1. Enhanced Driving Experience and Control
A manual conversion transforms the F430’s driving dynamics, offering a more direct connection to the road. Drivers gain precise control over gear shifts, enabling a more engaging and immersive experience. The tactile feedback of the gated shifter and clutch pedal enhances driver involvement, making every drive feel purposeful and exciting. This setup particularly appeals to purists who value the traditional driving experience that modern automatic systems often lack. The result is a car that feels more responsive and attuned to the driver’s inputs, revitalizing the joy of manual driving in a classic Ferrari.
2.2. Increased Resale Value of the Vehicle
Converting an F430 to a manual transmission significantly boosts its resale value. Ferrari enthusiasts often prioritize manual models, as they embody the classic driving experience. A factory manual F430 is rare and highly sought after, commanding premium prices. Even conversions, such as those using Dr. S or Cambio Manuale kits, enhance desirability and value. The market increasingly favors manual-equipped cars, making the conversion a wise investment. Owners can expect higher returns compared to F1-equipped models, as the manual option aligns with the growing demand for traditional driving purism.
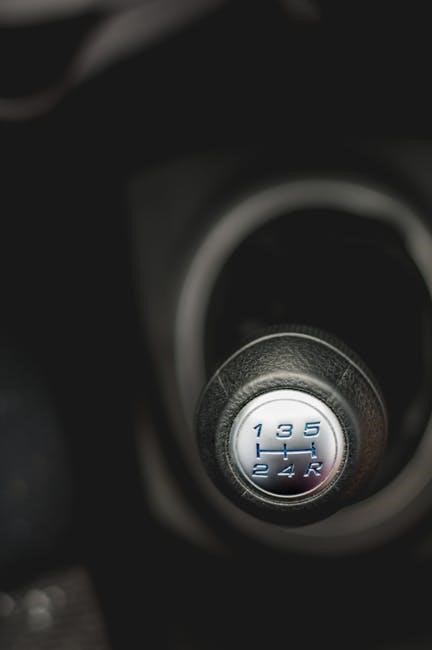
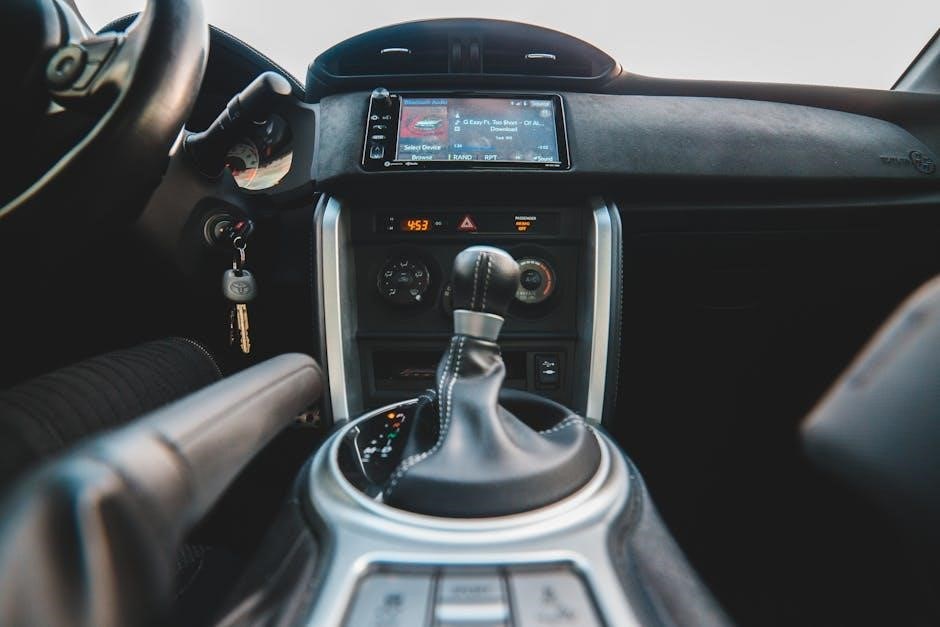
2.3. The Appeal of a Gated Manual Transmission
The gated manual transmission in the F430 offers a unique, satisfying mechanical feel, with its distinctive metal gate guiding gear selections. This design enhances driver engagement, providing tactile feedback and precision. Enthusiasts cherish the nostalgic connection to Ferrari’s heritage, as gated manuals embody classic supercar character. The visual appeal of the gated shifter and its operation add exclusivity, making it a standout feature for purists. This timeless design ensures the F430 remains a desirable choice, blending tradition with performance in a way modern transmissions often lack.
The Conversion Process
The F430 manual conversion involves installing a clutch master cylinder, pedals, Bowden cables, shift tower, and actuator, followed by ECU firmware modifications for seamless operation.
3.1. Overview of the Conversion Steps
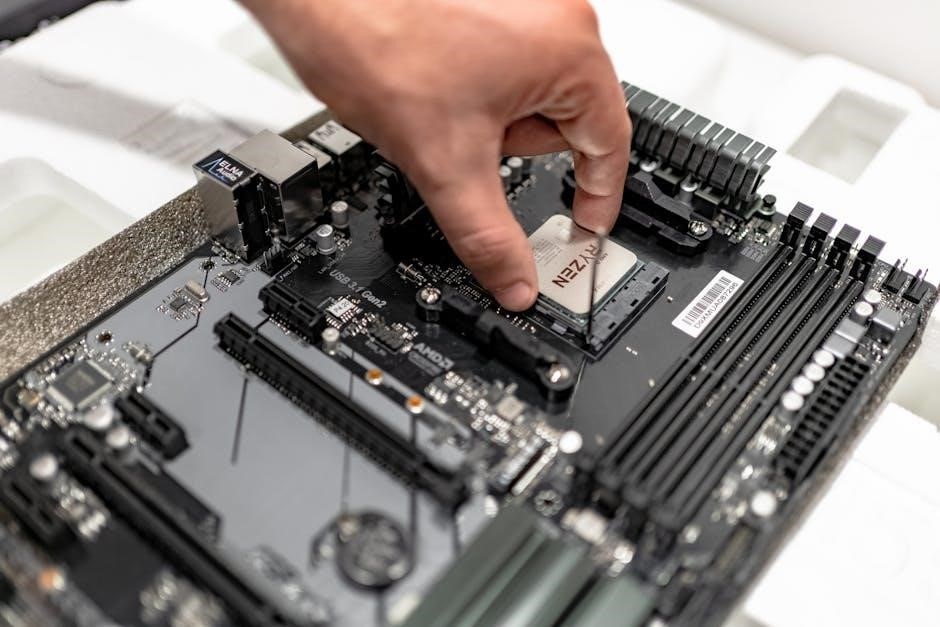
The F430 manual conversion begins with removing the F1 transmission and installing a gated manual gearbox. This involves fitting the clutch master cylinder, pedals, and hydraulic components. Next, the shift tower and actuator are mounted, followed by connecting Bowden cables. The ECU is reprogrammed with custom firmware to ensure compatibility. Finally, the system is tested for proper operation, ensuring smooth gear shifts and clutch engagement. This comprehensive process transforms the car into a driver-focused manual machine.
3.2. Necessary Tools and Expertise Required
Performing an F430 manual conversion demands specialized tools and mechanical expertise. Essential tools include a hydraulic pressure tester, ECU programming equipment, and precision wrenches. Knowledge of transmission systems, hydraulic components, and ECU firmware is critical. Experience with Ferrari-specific parts and troubleshooting skills are also vital. A clean, well-equipped workspace and diagnostic tools are recommended to ensure accuracy and safety during the process. Custom firmware and detailed technical guides are often provided with conversion kits to aid technicians.
3.3. Installation of Clutch Master Cylinder and Pedals
Installing the clutch master cylinder and pedals is a critical step in the F430 manual conversion. The process begins with removing the existing F1 transmission components and preparing the pedal box. The new clutch master cylinder is mounted, ensuring proper alignment with the clutch slave cylinder. The pedals are then fitted, requiring precise adjustments for optimal driver feel. Hydraulic lines are connected, and the system is bled to eliminate air bubbles. Final calibration involves ECU settings to synchronize the clutch and gearbox operation, ensuring smooth shifting and reliable performance.
3.4. Bowden Cables, Shift Tower, and Actuator Setup
The next step involves installing the Bowden cables, which connect the gearshift to the gearbox. The shift tower is mounted, and the actuator is aligned with the transmission. Proper routing of the Bowden cables ensures smooth shifting. The actuator is calibrated to match the gearbox’s mechanical linkage. Hydraulic connections are secured, and the system is bled to remove air. Final adjustments are made to ensure precise gear engagement. This setup restores the direct, mechanical feel of a traditional manual transmission, completing the conversion’s core mechanical components.
Conversion Kits Available
Dr; S Gated Conversion Kits and Cambio Manuale Kits are popular choices, offering hardware, custom ECU firmware, and hydraulic components for a seamless F430 manual conversion experience.
4.1. Dr. S Gated Conversion Kits
Dr. S Gated Conversion Kits are highly sought after for their comprehensive approach to transforming the F430’s transmission. These kits include everything needed for a seamless conversion, such as a clutch master cylinder, pedals, Bowden cables, and a shift actuator. Designed for both the F430 and 430 Scuderia, they offer a gated manual experience that enhances driving engagement. The kits also feature custom ECU firmware to ensure compatibility and optimal performance. With Dr. S, enthusiasts can achieve a factory-like manual setup without compromising on quality or functionality.
4.2. Cambio Manuale Kits and Their Features
Cambio Manuale Kits offer a premium solution for F430 manual conversions, providing a complete transformation from the F1 automatic to a gated six-speed manual. These kits are known for their precision engineering and include components like hydraulic clutch systems, shift towers, and custom linkages. They also feature tailored ECU firmware to ensure smooth operation and maintain the car’s performance integrity. Cambio Manuale Kits are favored for their reliability and attention to detail, making them a top choice among enthusiasts seeking an authentic manual driving experience in their F430.
4.3. What to Expect in a Complete Conversion Kit
A complete F430 manual conversion kit typically includes all necessary components for a seamless transition from F1 automatic to a gated six-speed manual. These kits feature a clutch master cylinder, pedals, Bowden cables, shift tower, and actuator setup. Additionally, they provide custom ECU firmware to ensure proper integration with the car’s systems. Hydraulic components and linkages are also included to maintain optimal performance. These comprehensive kits are designed to deliver a factory-like manual driving experience, combining reliability, precision, and authenticity for enthusiasts.
Costs and Considerations
Ferrari F430 manual conversion involves significant investment, including parts, labor, and potential additional modifications. Budgeting carefully ensures optimal performance and long-term satisfaction for driving enthusiasts.
5.1. Price Comparison: Factory Manual vs. Conversion
A factory manual Ferrari F430 is significantly more expensive than a converted model. Factory manuals can range from $200,000 to $300,000, while conversions typically cost between $20,000 and $30,000 for parts and labor. Conversion kits, such as Dr. S Gated or Cambio Manuale, are priced around $20,000 to $23,000, depending on the kit’s complexity. Overall, converting an F1-equipped F430 to a manual transmission is more cost-effective for enthusiasts seeking a gated manual experience without the premium of a factory manual car.
5.2. Labor Costs and Parts Expenses
Labor costs for a manual conversion typically range from $20,000 to $23,000, depending on the kit and complexity. Parts expenses include hydraulic components, custom ECU firmware, and hardware. DIY conversions can reduce labor costs but require mechanical expertise. Professional installations ensure precision but increase overall expenses. The total cost varies based on the approach and kit chosen, making careful planning essential for a successful conversion.
5.3. Budgeting for Additional Modifications
Budgeting for additional modifications is crucial to ensure a seamless manual conversion. Enthusiasts often opt for complementary upgrades, such as lightweight components or performance enhancements, which can add significant costs. It’s advisable to allocate extra funds for potential unforeseen expenses during the process. Proper financial planning ensures that the conversion meets both performance and aesthetic goals without compromising quality or safety standards. Balancing the budget between essential and optional upgrades is key to achieving the desired outcome.

DIY vs. Professional Installation
DIY manual conversions offer cost savings but demand advanced mechanical skills and time. Professional installations ensure reliability and warranty, though at a higher expense.
6.1. Pros and Cons of DIY Conversion
DIY manual conversions save costs but require advanced mechanical expertise. Enthusiasts gain satisfaction from hands-on involvement, but risks include potential errors and time-consuming troubleshooting. Proper tools and knowledge are essential.
6.2. When to Choose a Professional Service
Opting for a professional service is recommended when the conversion’s complexity exceeds personal expertise. Specialized tools and deep mechanical knowledge are required, and professionals ensure a flawless execution. Companies like SB Race Engineering offer expertise, reducing the risk of errors. DIY enthusiasts without experience should consider professional assistance to avoid costly mistakes and ensure reliability. Professional services also provide warranties and support, making them a safer choice for critical systems like ECU firmware and hydraulic components.
6.3. Tips for a Successful DIY Project
For a successful F430 manual conversion, thoroughly research and follow detailed guides. Invest in high-quality conversion kits like Dr. S Gated or Cambio Manuale, ensuring all components are included. Use proper tools and workspace to avoid damage. Seek advice from online forums or experts if unsure. Patience is key; meticulous planning prevents costly errors. Consider watching video guides, such as “Normal Guy Supercar,” for practical insights. Lastly, ensure ECU firmware is correctly updated to avoid glitches, and test all systems post-installation for smooth operation.
ECU and Firmware Modifications
ECU firmware plays a crucial role in manual conversions, enabling smooth operation of the gated transmission. Custom firmware solutions ensure compatibility and prevent glitches during shifting.
7.1. The Role of ECU in Manual Conversion
The ECU is central to a successful manual conversion, ensuring seamless communication between the new manual transmission and the car’s systems. It manages clutch engagement, gear shifts, and hydraulic control, preventing errors. Custom ECU firmware adapts the system for manual operation, eliminating F1-specific codes and optimizing performance. This customization ensures the car runs smoothly with the gated manual, maintaining Ferrari’s driving DNA while enhancing the manual experience for enthusiasts.
7.2. Custom Firmware Solutions
Custom firmware solutions are essential for integrating manual conversions seamlessly with the F430’s systems. These solutions reprogram the ECU to recognize and adapt to the manual transmission, ensuring proper clutch engagement and gearshift functionality. The firmware eliminates F1-specific codes, allowing the car to operate smoothly without manual mode errors. This customization enables optimal performance, maintaining the car’s DNA while enhancing drivability. It’s a critical step in achieving a flawless manual conversion experience, ensuring reliability and responsiveness behind the wheel.
7.3. Avoiding Common ECU-Related Issues
Common ECU-related issues during manual conversions include error codes, clutch engagement problems, and communication faults. To avoid these, ensure proper installation of custom firmware and test the system thoroughly post-conversion. Use reputable kits designed for the F430 to maintain ECU compatibility. Addressing these issues early prevents drivability problems and ensures seamless integration of the manual transmission. Proper setup guarantees reliability and performance, making the conversion worthwhile for enthusiasts seeking an enhanced driving experience.

Maintenance and Aftercare
Regular maintenance is crucial after a manual conversion to ensure optimal performance. Check hydraulic systems, clutch engagement, and gearbox functionality. Schedule expert inspections to prevent issues.
8.1. Post-Conversion Maintenance Tips
After completing the manual conversion, regular maintenance is essential to ensure optimal performance. Check the hydraulic system for leaks and inspect the clutch engagement. Monitor gearbox functionality and schedule periodic professional inspections. Keep the ECU firmware updated to avoid compatibility issues. Regularly clean and lubricate the shift components to maintain smooth operation. Ensure all connections and fasteners are secure to prevent loose parts. Address any unusual noises or vibrations promptly to avoid major repairs. Proper aftercare will extend the life of your manual conversion and preserve your F430’s performance.
8.2. Hydraulic System Care
Proper maintenance of the hydraulic system is crucial for smooth operation after a manual conversion. Regularly inspect hydraulic lines and connections for leaks or damage. Use high-quality hydraulic fluid and ensure the reservoir is always filled to the recommended level. Avoid contamination and clean the system thoroughly during servicing. Bleed the hydraulic system annually to remove air bubbles that can disrupt clutch and gear engagement. Neglecting hydraulic care can lead to inconsistent shifting and potential system failure. Always consult a specialist for complex repairs to maintain reliability and performance.
8.3. Regular Checks for Optimal Performance
Regular checks are essential to maintain the F430’s performance after a manual conversion. Inspect the clutch master cylinder for fluid leaks and ensure proper pedal feel. Check Bowden cables and the shift tower for alignment and wear. Monitor the gearbox oil level and top it off as needed. Review the ECU for firmware updates to ensure smooth operation. Lastly, verify all fluid levels and connections to prevent issues. Regular maintenance ensures the car runs at its best, delivering the driving experience enthusiasts desire. Stay proactive to avoid costly repairs and keep the vehicle in prime condition.

Community and Support
The F430 manual conversion community thrives online, with forums and YouTube channels like “Ferrari F430 DIY Manual Conversion” offering valuable insights and tips. Enthusiasts share experiences, solutions, and resources, fostering collaboration and support. Specialist workshops like SB Race Engineering provide expert guidance, ensuring owners can overcome challenges and achieve successful conversions. This vibrant network is invaluable for both novices and seasoned enthusiasts seeking advice or inspiration.
9.1. Online Forums and Resources
Online forums and communities are vital for F430 manual conversion enthusiasts, offering a wealth of knowledge and support. Platforms like Ferrari enthusiast forums and YouTube channels such as “Ferrari F430 DIY Manual Conversion” provide detailed guides, tutorials, and real-world experiences. These resources cover topics from installation steps to troubleshooting common issues. Additionally, websites like gatedconversion.com and specialist workshops share insights on conversion kits and best practices. Such forums foster a sense of community, allowing owners to exchange tips and gain confidence in their projects.
9.2. Specialist Workshops and Experts
Specialist workshops and experts play a crucial role in F430 manual conversions, offering tailored solutions and professional guidance. Companies like SB Race Engineering and Macchina Motorwerx specialize in converting F1-equipped F430s to gated manuals, providing high-quality kits and expertise. These workshops often have extensive experience with Ferrari transmissions, ensuring precise installations and reliability. Experts like those at Cambio Manuale and Dr. S Gated Conversion also offer custom solutions, including ECU modifications and hydraulic system upgrades. Their reputation for excellence makes them trusted partners for enthusiasts seeking professional results.
9.3. Events for F430 Manual Conversion Enthusiasts
Events for F430 manual conversion enthusiasts foster a passionate community, offering opportunities to showcase modifications and share knowledge. Car shows, racing events, and meetups provide platforms for owners to display their converted vehicles. Workshops and gatherings hosted by specialists like Dr. S Gated Conversion and SB Race Engineering allow hands-on learning and networking. These events celebrate the joy of driving and the uniqueness of manual transmissions, making them a must-attend for F430 enthusiasts seeking inspiration and expertise.
The Future of Manual Conversions
Manual conversions remain popular, driven by enthusiasts seeking tactile driving experiences. Emerging technologies and custom firmware advancements ensure compatibility, keeping manuals relevant in modern Ferrari ownership.
10.1. Trends in Manual Transmissions for Modern Cars
Modern cars are increasingly adopting dual-clutch automatics, but manual transmissions retain a loyal following. Enthusiasts drive demand for manual conversions, especially in classic models like the F430, blending heritage with improved drivability. Advances in custom firmware and hydraulic systems enable seamless integration of manual transmissions into modern vehicles, preserving the tactile driving experience while maintaining performance. This trend underscores the enduring appeal of manual driving, supported by innovations in conversion kits and community expertise.
10.2. The Role of Enthusiasts in Keeping Manuals Alive
Enthusiasts play a pivotal role in preserving manual transmissions, particularly for cars like the F430. Their passion drives the demand for manual conversions, fostering innovation in kits and custom solutions. Online communities and forums serve as hubs for knowledge sharing, enabling DIY projects and professional services. By embracing manual driving, enthusiasts ensure its survival, celebrating the tactile connection to the vehicle. Their dedication not only sustains the tradition but also inspires new generations to appreciate the art of manual shifting in an increasingly automatic world.
10.3. Emerging Technologies and Manual Conversions
Emerging technologies are revolutionizing F430 manual conversions, blending modern advancements with classic driving appeal. Custom ECU firmware and hydraulic system innovations enhance performance and reliability. Lightweight materials and 3D-printed components improve durability while maintaining authenticity. These technological strides ensure that manual transmissions remain viable and desirable, even as automatics dominate. The integration of cutting-edge solutions keeps the manual driving experience alive, appealing to purists and tech enthusiasts alike.
Troubleshooting Common Issues
Troubleshooting F430 manual conversions often involves addressing clutch and gearbox problems, hydraulic system leaks, and ECU firmware glitches. Early detection ensures optimal performance and longevity.
11.1. Addressing Clutch and Gearbox Problems
Clutch and gearbox issues are common post-conversion, often due to misalignment or worn components. Symptoms include clutch slippage, noisy operation, or difficulty shifting gears. Inspect the clutch for wear and ensure proper alignment during installation. Check gearbox mounts and bearings for damage. Hydraulic fluid leaks can also affect clutch engagement, requiring immediate attention. Regular maintenance, such as replacing worn synchros or adjusting the clutch pedal, prevents major repairs. Early detection of these issues ensures smooth operation and avoids costly overhauls.
11.2. Solving Hydraulic System Leaks
Hydraulic system leaks are common in F430 manual conversions, often caused by improper installation or worn components. Inspect clutch master cylinders, slave cylinders, and hydraulic lines for signs of damage or corrosion. Replace any faulty seals or hoses and ensure all connections are secure. Use high-quality hydraulic fluid compatible with Ferrari systems and bleed the system thoroughly to remove air bubbles. Regular inspections and prompt repairs can prevent fluid loss and maintain optimal clutch and gearbox performance. Addressing leaks early prevents further damage and ensures reliable operation.
11.3. Fixing ECU and Firmware Glitches
ECU and firmware issues can arise during F430 manual conversions, especially when custom firmware is installed. Symptoms include erratic clutch engagement or shift actuator malfunctions. To resolve these, reflashing the ECU with updated firmware or resetting it to factory settings may be necessary. Ensure the firmware is compatible with the manual conversion kit. Consulting online forums or experts can provide tailored solutions. Regular updates and thorough testing are crucial to prevent recurring glitches and ensure smooth operation of the manual transmission system.