Half Baked vape pens are gaining traction, offering diverse flavors and designs. Brands like Hangsen and HQD compete, while users seek guidance on safe disposal and troubleshooting.
What is a Half Baked Vape Pen?
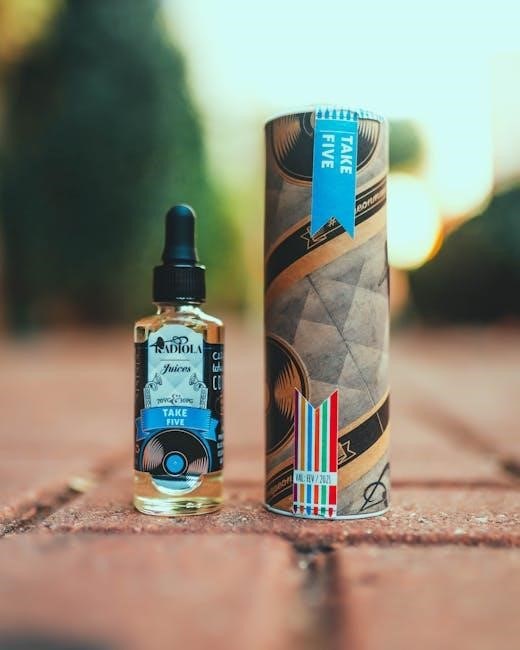
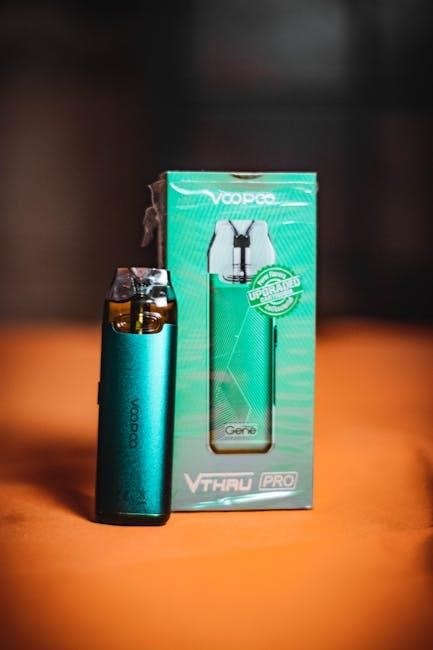
Half Baked vape pens represent a category within the broader disposable vape market, quickly becoming recognized for their variety and accessibility. These devices are pre-filled, pre-charged, and designed for single-use convenience, eliminating the need for refilling or battery replacements. The brand, alongside others like Hotcig and Havana, focuses on delivering a flavorful vaping experience without complex setups.
They often feature a sleek, compact design and a wide range of e-liquid flavors. Understanding their basic function – inhaling to activate – is key for new users. Proper disposal, as highlighted in online resources, is crucial due to battery components.
Popularity and Market Presence
Half Baked vape pens have experienced a surge in popularity, driven by their ease of use and diverse flavor profiles. They compete within a crowded market alongside brands like Hangsen, HQD, and HotSpot, appealing to both new and experienced vapers. Online searches demonstrate growing consumer interest in disposal methods and troubleshooting common issues, such as blinking lights or lack of vapor production.
Their accessibility through authorized retailers and online platforms contributes to their widespread presence. The brand’s marketing and product innovation play a key role in maintaining market share.

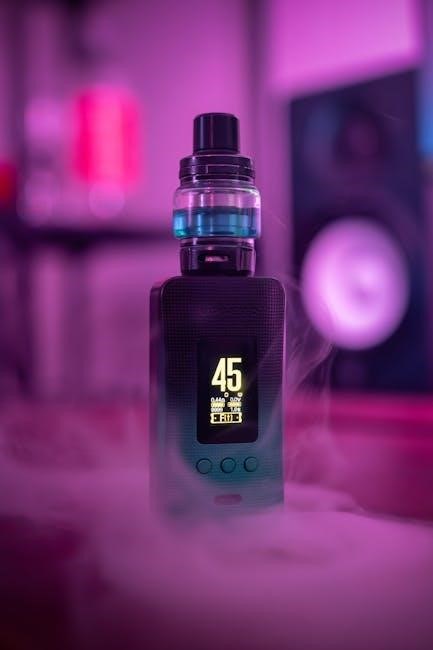
Understanding the Components
Half Baked vape pens consist of a battery, e-liquid chamber, and coil. Proper function relies on coil resistance, battery specifications, and e-liquid capacity.
Battery Specifications
Half Baked vape pens, being disposable, typically feature integrated batteries. These are generally lithium-ion based, providing power for the duration of the device’s e-liquid capacity. Specific milliampere-hour (mAh) ratings vary between models, influencing overall longevity. Users shouldn’t attempt to recharge these batteries, as they are not designed for it and pose a safety risk. Battery issues, like failure to fire, can stem from internal connection problems or depletion. Always handle and dispose of batteries responsibly, following local regulations to prevent environmental harm and potential hazards.
E-Liquid Capacity
Half Baked disposable vape pens come pre-filled with e-liquid, eliminating the need for manual refilling. Capacity typically ranges from 2ml to 5ml, dictating the approximate number of puffs per device. The e-liquid composition usually includes propylene glycol (PG), vegetable glycerin (VG), nicotine, and flavorings. Lower capacity devices offer fewer puffs, while larger ones provide extended use. Once the e-liquid is depleted, the entire device is intended for disposal. Understanding the capacity helps users estimate device lifespan and plan for replacements, ensuring continuous vaping enjoyment.
Coil Resistance and Type
Half Baked disposable vape pens utilize integrated coils, typically ranging from 0.8Ω to 1.2Ω resistance. These coils are generally constructed from Kanthal or similar alloys. Lower resistance coils (closer to 0.8Ω) produce warmer vapor and more intense flavor, while higher resistance coils (around 1.2Ω) offer a cooler, more subtle vaping experience. As disposables, coil replacement isn’t possible; the entire device is discarded when the coil burns out. The coil’s resistance impacts battery life and e-liquid consumption, influencing overall device performance and longevity.
Initial Setup & First Use
Half Baked disposable vape pens require minimal setup. Simply unbox, inspect for damage, and ensure the device is adequately charged before initial use for optimal performance.
Unboxing and Inspection
Upon receiving your Half Baked vape pen, carefully examine the packaging for any signs of damage during transit. Gently open the box and verify that all components are present – typically, this is just the disposable vape pen itself, as they are pre-filled and pre-charged.
Thoroughly inspect the device for any visible cracks, leaks, or manufacturing defects. Pay close attention to the mouthpiece and the body of the pen. If you notice any damage, do not use the device and contact the retailer or manufacturer immediately. A pre-use inspection ensures a safe and enjoyable vaping experience, preventing potential issues later on.
Charging the Device
Most Half Baked vape pens are disposable and come pre-charged, eliminating the need for manual charging. However, if your device features a charging port (typically USB-C), ensure you use a compatible cable and power source. Avoid fast chargers, as they can potentially damage the battery.
When charging, a small indicator light will usually illuminate, signifying the charging process. Once fully charged, the light may change color or turn off. Do not overcharge the device, as this can reduce battery lifespan. Disconnect immediately upon completion to preserve optimal performance and safety.
Filling the Vape Pen with E-Liquid
This step primarily applies to refillable Half Baked vape pens, as most models are pre-filled disposables. Locate the filling port, usually on the side or top of the device. Carefully remove the mouthpiece or plug to access the tank. Use a suitable e-liquid bottle with a thin nozzle to prevent spills.
Slowly fill the tank, leaving a small gap near the top to avoid overflow. Avoid getting e-liquid into the central airflow tube. After filling, securely replace the mouthpiece or plug. Allow a few minutes for the e-liquid to saturate the coil before first use, preventing a dry hit.

Operating Instructions
Half Baked vape pens typically activate upon inhalation. Some models may feature power buttons or adjustable voltage settings for a customized vaping experience.
Powering On/Off
Disposable Half Baked vape pens generally don’t have a traditional power button. Activation occurs automatically when you begin to inhale; the device senses airflow and heats the e-liquid. If your pen isn’t firing, ensure it’s adequately charged and not depleted. For models with a button – typically rechargeable versions – quickly press the button five times in rapid succession to power the device on or off. A light indicator will usually confirm the action. If blinking persists after five presses, there might be an internal electronic issue requiring attention or disposal.
Adjusting Voltage/Wattage (if applicable)
Many Half Baked vape pens, particularly disposable models, do not offer adjustable voltage or wattage settings. They are designed for simplicity and ease of use with pre-set power levels. However, if you possess a rechargeable Half Baked device, it might feature adjustment capabilities. Typically, this involves pressing the power button three times quickly to cycle through available settings. A light indicator will display the current level. Experiment cautiously to find your preferred vapor production and flavor intensity, but always stay within the device’s specified limits.
Inhalation Technique
Using a Half Baked vape pen is generally straightforward. Most utilize a draw-activated firing mechanism – simply inhale to activate the device. Ensure a consistent, gentle draw; avoid harsh or rapid puffs. A slow, steady inhalation allows the coil to heat properly, maximizing flavor and vapor production. If you experience a burnt taste, reduce your inhalation strength. For optimal results, maintain a comfortable mouth-to-lung or direct-to-lung technique, depending on your preference and the device’s intended use. Remember to avoid prolonged inhales to prevent overheating.
Troubleshooting Common Issues
Half Baked vape pens may experience firing, leaking, or burnt taste issues. Coil connectivity and proper disposal are key concerns for users seeking solutions.
Vape Pen Not Firing
If your Half Baked vape pen isn’t firing, several issues could be at play. First, ensure the coil is securely screwed in and making proper contact with the device. A loose connection prevents power delivery. Secondly, check if the coil itself is shorting – this requires coil replacement.
A blinking light often indicates an electronic malfunction preventing operation. If charging doesn’t resolve the issue, the device may require professional assessment or replacement. Remember, disposable vape pens have limited lifespans, and consistent non-firing suggests end-of-life.
Leaking Issues
Experiencing leaks with your Half Baked vape pen is frustrating, but often addressable. Overfilling the e-liquid reservoir is a primary cause; avoid exceeding the device’s capacity. Ensure the device is stored upright to prevent liquid from seeping into the airflow pathways. Inspect the o-rings and seals for damage – replacements are crucial for a tight seal.
Condensation buildup can also mimic leaks, especially in humid environments. Gently wipe away any condensation. If leaks persist despite these measures, discontinue use and consider contacting the manufacturer for support or a potential replacement.
Burnt Taste
A burnt taste from your Half Baked vape pen usually indicates the coil is nearing the end of its lifespan or the e-liquid is too low. Immediately stop vaping to prevent further damage. If the tank isn’t empty, ensure sufficient e-liquid is present to saturate the coil; a dry hit causes the burning sensation.
Lowering the wattage or voltage can also help if the device allows adjustment. Regularly replacing the coil, as recommended by the manufacturer, is essential; If the burnt taste persists with a new coil, the device itself might have an issue requiring professional attention.
Weak Vapor Production
Experiencing weak vapor production with your Half Baked vape pen can stem from several causes. A low battery is a common culprit; ensure the device is fully charged. Also, check for airflow obstructions – debris can block air intake, reducing vapor. The coil might be saturated or degraded, requiring replacement for optimal performance.
If adjustable, increasing the wattage or voltage can boost vapor output. Confirm the e-liquid isn’t too viscous, as thicker liquids may not vaporize efficiently. Inspect for leaks, as they diminish vapor and potentially damage the device.

Safety Precautions
Prioritize battery safety, handle e-liquids carefully, and avoid overheating your Half Baked vape pen. Proper disposal is crucial for environmental responsibility and user well-being.
Battery Safety Guidelines
Half Baked vape pen batteries require careful handling to ensure safe operation. Avoid exposing the device to extreme temperatures, as heat or cold can compromise battery performance and potentially lead to malfunctions. Never attempt to disassemble or modify the battery pack, as this could create hazardous conditions.
Always charge the battery using a compatible charger and avoid overcharging, which can damage the battery and reduce its lifespan. Inspect the battery for any signs of damage, such as dents, swelling, or leakage, and discontinue use if any issues are detected. Store batteries in a safe, dry place away from flammable materials and metal objects.
E-Liquid Handling
Half Baked vape pens utilize e-liquid, demanding responsible handling practices. Always store e-liquid in a secure location, out of reach of children and pets, to prevent accidental ingestion. Ensure the e-liquid bottle is tightly sealed when not in use to avoid leakage and oxidation. Avoid direct sunlight and extreme temperatures, as these can degrade the liquid’s quality and flavor.
When filling the vape pen, exercise caution to prevent spills and contact with skin or eyes. If contact occurs, rinse thoroughly with water. Dispose of empty e-liquid bottles responsibly, following local regulations for hazardous waste.
Avoiding Overheating
Half Baked vape pens, like all vaping devices, can experience overheating. To prevent this, avoid prolonged, continuous use; allow the device to rest between puffs. Never leave your vape pen exposed to direct sunlight or in hot environments, such as a car dashboard. Ensure adequate ventilation during use, avoiding enclosed spaces.
If the device feels excessively warm, immediately discontinue use and allow it to cool down. Do not attempt to charge an overheated battery. Regularly inspect the battery for any signs of damage, and discontinue use if damage is detected. Proper care extends the lifespan and safety.

Disposal and Recycling
Dispose of Half Baked disposable vape pens responsibly, following local e-waste regulations. Do not discard with regular trash; seek designated recycling or disposal locations.
Proper Disposal Methods
Half Baked disposable vape pens contain electronic components and lithium batteries, requiring careful disposal. Never simply throw them in the trash or recycling bin, as this poses environmental and safety hazards. Locate designated e-waste recycling centers in your area; many retailers also offer take-back programs.
Check with your local waste management authorities for specific guidelines regarding vape pen disposal. Some municipalities have specific drop-off locations or collection events. Properly disposing prevents harmful chemicals from leaching into the soil and water, and ensures valuable materials are recovered for reuse, contributing to a more sustainable practice.
Environmental Considerations
The increasing popularity of disposable vape pens, like Half Baked, raises significant environmental concerns. These devices contribute to electronic waste, containing plastics, metals, and lithium-ion batteries. Improper disposal leads to soil and water contamination, releasing harmful chemicals.
Choosing rechargeable vape systems over disposables reduces waste. Supporting manufacturers committed to sustainable practices and responsible sourcing is crucial. Recycling programs, though improving, still face challenges. Consumers should prioritize reducing consumption and advocating for better regulations to minimize the environmental impact of vaping products.
Maintenance and Cleaning
Regular cleaning extends the lifespan of your Half Baked vape. Focus on the mouthpiece and promptly replace coils to maintain optimal flavor and performance.
Cleaning the Mouthpiece
Maintaining a clean mouthpiece is crucial for a hygienic and enjoyable vaping experience with your Half Baked vape pen. Over time, residue can build up, affecting the flavor and potentially harboring bacteria. To clean, gently detach the mouthpiece if possible – consult your device’s specific instructions.
Use a cotton swab dipped in isopropyl alcohol to carefully wipe the interior of the mouthpiece, ensuring you reach all crevices. Allow the alcohol to evaporate completely before reattaching. For stubborn residue, a warm water and mild soap solution can be used, followed by thorough rinsing and drying. Regular cleaning, ideally after each use or at least weekly, will keep your vape pen fresh and functioning optimally.
Coil Replacement Instructions
Replacing the coil in your Half Baked vape pen is essential for maintaining optimal performance and flavor; First, ensure the device is powered off and, if disposable, that it’s reached the end of its lifespan. For devices with replaceable coils, carefully unscrew or detach the old coil from the tank or pod.
Take the new coil, ensuring it’s compatible with your device, and gently screw or attach it into place. Prime the new coil by saturating it with e-liquid – add a few drops directly onto the coil wicking material. Allow the e-liquid to soak in for a few minutes before filling the tank and vaping.
Battery Care
Proper battery care is crucial for the longevity and safety of your Half Baked vape pen. Avoid exposing the device to extreme temperatures, whether hot or cold, as this can damage the battery. When charging, use only the provided USB cable and a reliable power source.
Never leave a charging device unattended. Do not overcharge the battery; disconnect it once fully charged. If you notice any signs of battery damage, such as swelling or leakage, discontinue use immediately and dispose of the device responsibly. Store your vape pen in a cool, dry place when not in use.

Frequently Asked Questions (FAQ)
Half Baked vape pen lifespan varies with usage. Use compatible e-liquids for optimal performance. Vaping safety is debated; research potential health risks thoroughly.
How long does a Half Baked vape pen last?
The lifespan of a Half Baked disposable vape pen is directly related to individual usage patterns and the specific model’s e-liquid capacity. Generally, these devices are designed to deliver approximately 500 to 600 puffs. For average users, this translates to roughly one to two weeks of consistent vaping.
However, heavy users may find that a pen lasts only a few days, while lighter users could extend its life to three weeks or more. Factors like the frequency of puffs, the length of each inhale, and storage conditions also play a role in determining overall longevity. Proper storage, avoiding extreme temperatures, can help maximize the pen’s lifespan.
What e-liquid should I use?
Half Baked vape pens, particularly the disposable varieties, typically come pre-filled with e-liquid, eliminating the need for users to purchase it separately. However, for refillable models or if you’re transitioning from another device, selecting the right e-liquid is crucial. Most Half Baked pens are designed for nicotine salt e-liquids, offering a smoother and more satisfying experience.
Consider the nicotine strength based on your preferences; options range from 20mg to 50mg. Flavor choices are extensive, mirroring the brand’s diverse offerings. Always ensure the e-liquid is compatible with your device and sourced from reputable vendors to guarantee quality and safety.
Is vaping safe?
Determining the safety of vaping, including with Half Baked vape pens, is complex. While often presented as less harmful than traditional smoking, vaping isn’t risk-free. Long-term effects are still under investigation, and potential health concerns exist, particularly regarding nicotine addiction and lung health.
Disposable vapes, like many Half Baked models, pose environmental challenges due to battery disposal. Responsible usage, including avoiding overheating and proper disposal, is vital. If you experience any adverse effects, such as coughing or shortness of breath, discontinue use and consult a healthcare professional immediately.
Warranty Information
Half Baked vape pens may have limited warranties covering manufacturing defects. Check with authorized retailers for specific coverage details and the claim process.
Coverage Details
Half Baked vape pen warranties typically cover defects in materials and workmanship under normal use. This doesn’t include damage from misuse, accidents, or unauthorized modifications. Warranty periods vary, often ranging from 30 to 90 days from the purchase date, but confirm specifics with the retailer.
Coverage usually extends to device malfunctions, like firing issues or leaking, but excludes coil lifespan or e-liquid compatibility problems. Proof of purchase is essential for any claim. The warranty is void if the device has been disassembled or tampered with. Always register your device if possible, to streamline the claim process.
Claim Process
To initiate a Half Baked vape pen warranty claim, first contact the authorized retailer where you purchased the device. Provide your proof of purchase and a detailed description of the defect. If the retailer cannot resolve the issue, contact Half Baked directly through their website’s “Help Center” or designated customer support channels.
You may be required to submit photos or videos demonstrating the defect. Half Baked will assess the claim and, if approved, offer a replacement device or a refund, at their discretion. Shipping costs for returns may be the responsibility of the customer, depending on the specific warranty terms.
Where to Purchase
Half Baked vape pens are available through authorized retailers and various online platforms. Explore wholesale options and business resources directly from Half Baked.
Authorized Retailers
Finding Half Baked vape pens at authorized retailers ensures product authenticity and quality. These stores are partnered directly with the brand, guaranteeing genuine products and often offering expert advice. Look for established vape shops in your local area that carry a wide selection of disposable vape devices.
Authorized retailers frequently provide information on current promotions, new flavor releases, and proper usage guidelines. They can also assist with any initial questions you may have regarding the device’s features or operation. Supporting authorized retailers helps maintain brand standards and consumer safety within the vaping community.
Online Availability
Half Baked vape pens are increasingly available through various online platforms, offering convenience and a broader selection. However, exercising caution is crucial when purchasing online to avoid counterfeit products. Stick to reputable online vape retailers with established track records and positive customer reviews.
Always verify the retailer’s authentication and ensure they comply with age verification requirements. Direct links to authorized online stores may be found on the official Half Baked website or social media channels. Be mindful of shipping restrictions and local regulations regarding vape product deliveries.