Heka Hoods Installation Guide: A Comprehensive Overview
Heka Hoods provides detailed PDF installation guides upon order confirmation, offering a streamlined setup with specific fixing patterns and fastener details for DIY projects.
Heka Hoods represent a minimalist approach to awning hood systems, distinguished by their prefabricated, one-piece design that eliminates the need for cumbersome brackets during installation. Arriving on-site with a durable powder-coated finish, they promise a swift and straightforward setup process. Accessing the comprehensive installation guide PDF, provided post-order confirmation, is crucial.
This guide details specific fixing patterns and fastener requirements, ensuring a secure and aesthetically pleasing result. Heka Hoods prioritize ease of installation without compromising on quality or structural integrity, making them a popular choice for modern home renovations.
Understanding the Heka Hood System
The Heka Hood system is engineered for simplicity and efficiency, offering a prefabricated, one-piece solution that drastically reduces on-site installation time. The detailed installation guide PDF, accessible after purchase, is central to understanding the system’s components and proper procedures;
This document outlines essential fixing patterns and fastener specifications, guaranteeing a robust and visually appealing outcome. The system’s bracketless design and pre-finished surface contribute to a clean, modern aesthetic, simplifying the entire process from start to finish.

Safety Precautions Before Installation
Before starting, disconnect the power supply – a crucial safety step detailed in the Heka Hoods installation guide PDF, ensuring a secure process.
Disconnecting Power Supply
Prior to commencing any Heka Hoods installation, the installation guide PDF emphatically stresses the absolute necessity of disconnecting the power supply. This critical safety precaution minimizes the risk of electrical shock or damage during the process. The manual clearly states this as a non-negotiable step, ensuring installer safety and preventing potential hazards. Always verify power is off before handling any wiring or components near electrical sources. Following this instruction, found within the comprehensive PDF, guarantees a secure and trouble-free installation experience, protecting both personnel and property.
Importance of Following Instructions
The Heka Hoods installation guide PDF underscores the paramount importance of adhering strictly to provided instructions. Deviating from these guidelines can compromise structural integrity and void any warranties. The PDF details specific fixing patterns, fastener requirements, and leveling procedures crucial for optimal performance. Duayne Pearce emphasizes installing the product in a standard quality way, achievable only through diligent instruction-following. Proper installation, as outlined in the PDF, ensures the hood functions as designed, offering lasting protection and aesthetic appeal.

Downloading the Heka Hoods Installation PDF
Heka Hoods offers a seamless PDF download upon order confirmation, providing expert tips and step-by-step instructions for a successful DIY installation.
Accessing the PDF Upon Order Confirmation
Upon confirming your Heka Hoods order, you’ll receive immediate access to the comprehensive installation guide in PDF format. This digital resource is designed to ensure a smooth and efficient installation process. The PDF contains detailed instructions, diagrams, and crucial information regarding fixing patterns and necessary fasteners.
This readily available guide empowers you to confidently tackle the installation yourself, eliminating guesswork and potential errors. It’s a key component of the Heka Hoods commitment to a user-friendly experience, providing all the necessary support right at your fingertips, immediately after purchase.
Locating the Latest Versions of Manuals
Heka Hoods prioritizes providing customers with up-to-date resources. The latest versions of installation manuals, including the crucial PDF guide, are conveniently available in the dedicated download section on the official website. This ensures you’re always working with the most accurate and current installation procedures.
Regularly checking this section guarantees access to any revisions or improvements made to the installation process. Heka Hoods is committed to continuous improvement, and the download section reflects this dedication to providing the best possible support for a successful installation.
Finding Older Software Versions (If Needed)
While Heka Hoods recommends utilizing the latest PDF installation guide for optimal results, recognizing that specific projects might require compatibility with older systems is crucial. The website’s download section thoughtfully provides a link to access archived software versions and manuals.
This resource is particularly useful if working with pre-existing designs or addressing unique site conditions. Accessing these older versions ensures a smooth installation process, even when dealing with legacy systems or specific project requirements, maintaining flexibility and support.

Tools and Materials Required
Heka Hoods installation necessitates specific tools and fasteners, detailed within the PDF guide, ensuring a secure and efficient installation process for your awning hood.
Fixing Patterns and Fastener Requirements
Heka Hoods’ PDF installation guide meticulously outlines precise fixing patterns crucial for a robust installation. These patterns are designed to distribute load effectively, ensuring long-term stability and performance. The guide details specific fastener requirements – types, sizes, and materials – tailored to various wall substrates.
Selecting the correct fasteners is paramount; the PDF emphasizes this, preventing issues like pull-out or corrosion. It clarifies the number of fasteners needed per hood length, alongside recommended spacing. Adhering to these guidelines guarantees a secure, weather-resistant installation, maximizing the hood’s lifespan and functionality.
Essential Tools for Installation
The Heka Hoods installation PDF clearly lists essential tools for a smooth process. A high-quality spirit level is paramount for accurate alignment, preventing water pooling and ensuring aesthetic appeal. A power drill with appropriate drill bits – sized for the specified fasteners – is crucial for pre-drilling holes.
Additionally, a measuring tape, pencil, and potentially a rubber mallet are recommended. Safety glasses are vital for eye protection during drilling; The PDF doesn’t necessitate specialized tools, focusing on accessibility for DIY installers, promoting a quick and easy setup.

Step-by-Step Installation Process
The Heka Hoods PDF guides users through marking hole locations with a level, then pre-drilling those holes directly into the hood for secure mounting.
Marking Hole Locations with a Level
Heka Hoods installation PDF guides emphasize accuracy, advising installers to hold the hood firmly against the wall. Utilizing a level is crucial for establishing a perfectly horizontal line. This line then serves as a precise guide for marking the locations where the mounting holes will be drilled.
Carefully marking these points ensures proper alignment and a secure, aesthetically pleasing final installation. The PDF stresses the importance of double-checking these marks before proceeding to the pre-drilling stage, minimizing potential errors and ensuring a professional finish.
Pre-Drilling Holes in the Hood
The Heka Hoods installation PDF clearly instructs installers to pre-drill all holes directly into the hood itself. This preparatory step is vital for several reasons, facilitating easier screw insertion during the mounting process and preventing potential cracking or damage to the powder-coated finish;
The PDF doesn’t specify drill bit sizes, implying installers should use appropriately sized bits for the chosen fasteners. Accurate pre-drilling ensures a flush, secure fit, contributing to the overall structural integrity and long-term durability of the installed hood.
Structural Considerations & Wind Classification
The Heka Hoods PDF emphasizes that suitability depends on the application, site-specific wind classification, and sufficient structural support availability.
Site-Specific Wind Classification
Heka Hoods installation, as detailed in the PDF guide, necessitates a thorough understanding of site-specific wind classifications. This crucial step ensures the hood’s structural integrity and long-term performance. The PDF stresses that determining the appropriate wind rating for your location is paramount before commencing installation;
Factors like terrain, building height, and local wind codes must be considered. Incorrect wind classification could compromise the hood’s ability to withstand extreme weather events, potentially leading to damage or failure. Always consult local building regulations and engineering professionals to accurately assess your site’s wind conditions, referencing the PDF for guidance;
Ensuring Structural Suitability
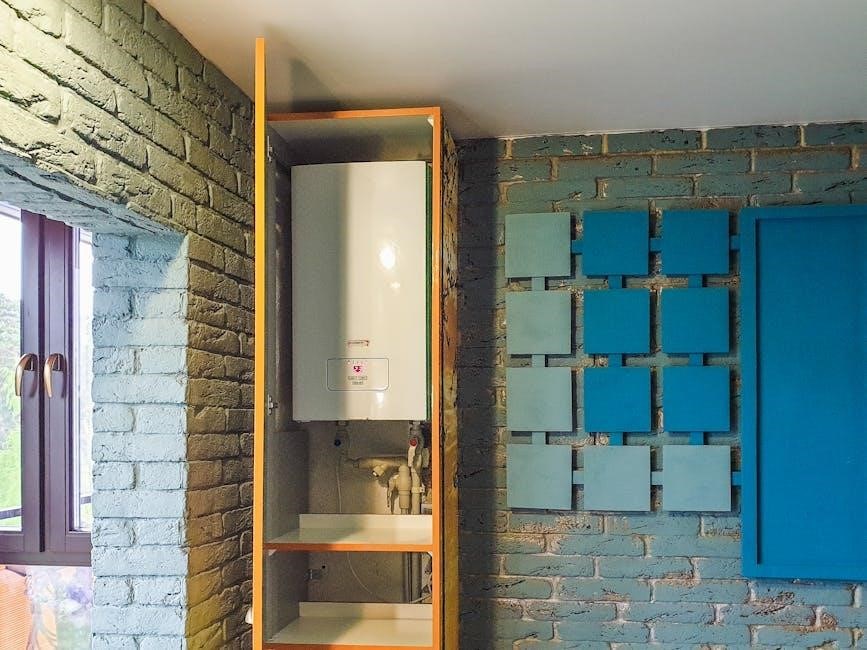
The Heka Hoods installation PDF emphasizes verifying the structural capacity of the wall to which the hood will be affixed. This involves assessing the wall’s material – brick, timber, or concrete – and its ability to bear the hood’s weight, plus any anticipated wind loads.
The PDF guide details that insufficient structural support can lead to instability and potential failure. It’s vital to confirm adequate fixing points and use appropriate fasteners, as outlined in the document, to distribute the load effectively. Consulting a structural engineer is recommended for complex installations or uncertain wall conditions.

Leveling and Alignment During Installation
The Heka Hoods PDF guide stresses using a level for accurate installation; holding the hood against the wall and marking hole locations is key.
Using a Level for Accurate Installation
Heka Hoods’ installation PDF consistently emphasizes the critical importance of utilizing a level throughout the entire process. Achieving precise leveling is paramount for both aesthetic appeal and functional performance of the awning hood. The guide recommends, whenever feasible, securely holding the hood directly against the wall surface.
Subsequently, carefully mark the locations for the mounting holes, ensuring the level is properly positioned to guarantee a perfectly horizontal line. This meticulous approach minimizes potential alignment issues later in the installation, contributing to a professional and lasting result.
Maintaining Consistent Alignment
The Heka Hoods installation PDF stresses that consistent alignment is crucial for a visually appealing and structurally sound installation. After marking hole locations with a level, double-check alignment before pre-drilling. Any discrepancies at this stage can compound during fastening, leading to noticeable imperfections.
Regularly verify alignment as you proceed with securing the hood, ensuring it remains level and true to the initial markings. This proactive approach minimizes the risk of adjustments and ensures a seamless integration with the building facade, enhancing the overall aesthetic.

Troubleshooting Common Installation Issues
The Heka Hoods PDF guide addresses alignment problems and fastener difficulties, offering solutions for a smooth installation process and optimal hood performance.
Addressing Alignment Problems
Heka Hoods’ installation PDF emphasizes the critical importance of using a level throughout the process. If misalignment occurs, the guide recommends re-checking marked hole locations against the wall.
Holding the hood firmly in place while marking ensures accuracy. Pre-drilling holes correctly, as detailed in the PDF, minimizes shifting during fastening. Consistent alignment is maintained by frequently verifying levelness during each step.
Small adjustments can be made before fully tightening fasteners, guaranteeing a secure and visually appealing installation, as outlined in the comprehensive guide.
Dealing with Fastener Difficulties
The Heka Hoods installation PDF details specific fixing patterns and fastener requirements for various wall types. If encountering resistance during fastening, the guide advises verifying the correct fastener type is being used.
Ensure pre-drilled holes are appropriately sized, preventing stripping or damage. Applying even pressure while tightening is crucial, avoiding over-tightening which can compromise the hood’s integrity.
Consult the PDF for alternative fastening solutions if the initial method proves unsuitable, ensuring a secure and lasting installation, as per Duayne Pearce’s quality standards.
Heka Hoods and James Hardie Compatibility
Heka Hoods integrates seamlessly with James Hardie products; the installation PDF ensures proper attachment, maintaining both systems’ warranties and aesthetic appeal.
Integration with James Hardie Products
Heka Hoods are designed for harmonious integration with James Hardie siding, ensuring a clean and professional finish; The comprehensive installation PDF details specific considerations when mounting to James Hardie, including recommended fastener types and pre-drilling techniques to prevent damage.
Proper installation, guided by the PDF, maintains the integrity of both the Heka Hood system and the James Hardie cladding’s warranty. Careful adherence to the outlined procedures guarantees a secure and aesthetically pleasing result, maximizing the lifespan and performance of both building components.

Resources and Support
Heka Hoods offers assistance; access the installation PDF, or contact them directly. GreenCoast Design and D Pearce Constructions are also valuable resources.
Contacting Heka Hoods for Assistance
For direct support regarding your Heka Hoods installation, particularly concerning the installation guide PDF, reaching out to Heka Hoods themselves is recommended. They provide expert guidance to ensure a smooth and successful installation process.
You can connect with them through their official channels for specific queries related to fixing patterns, fastener requirements, or any troubleshooting encountered while referencing the PDF.
Additionally, GreenCoast Design and D Pearce Constructions, associated with Heka Hoods, can offer valuable insights and support during your project. Their expertise complements the detailed instructions within the PDF guide.
GreenCoast Design and D Pearce Constructions
GreenCoast Design and D Pearce Constructions are key collaborators with Heka Hoods, contributing to the quality and ease of installation detailed within the installation guide PDF. Duayne Pearce of D Pearce Constructions emphasizes installing the product with standard quality.
Their involvement ensures the PDF reflects practical, on-site experience, offering valuable context alongside the step-by-step instructions. They can provide additional support and clarification if needed, complementing the information found in the downloadable guide.
Consider their expertise for complex installations or specific site considerations.