
The new customer credit application form is a crucial tool for businesses to assess creditworthiness, streamlining the process while ensuring compliance and data protection.
Overview of the Importance of Credit Application Forms
Credit application forms are essential tools for businesses to assess a customer’s creditworthiness, ensuring informed decision-making and mitigating financial risks. These forms provide a standardized process for gathering critical information, such as financial history, income verification, and credit scores, which are vital for evaluating eligibility. By requiring detailed disclosures, businesses can balance customer access to credit with risk management. Additionally, these forms help maintain transparency, fostering trust between the business and the applicant. Compliance with legal requirements, such as data protection and credit reporting laws, is also ensured through proper documentation. Ultimately, credit application forms streamline operations, reduce errors, and facilitate a fair evaluation process for all parties involved.
Why Businesses Require a Credit Application Form
Businesses require a credit application form to systematically evaluate customers’ creditworthiness, ensuring informed lending decisions. This document collects essential financial details, such as income, employment history, and credit history, helping businesses assess repayment capabilities. By verifying this information, companies can mitigate financial risks and avoid potential defaults. Additionally, the form ensures compliance with legal and regulatory requirements, protecting both the business and the customer. It also streamlines the application process, reducing administrative burdens and improving efficiency. Overall, a credit application form is a critical tool for maintaining financial stability and fostering trust in business relationships. It supports sustainable growth by enabling businesses to extend credit confidently while safeguarding their interests.
Benefits of Using a Standardized Credit Application Template
A standardized credit application template offers numerous advantages for businesses. It ensures consistency across all applications, making it easier to compare and evaluate candidates. By including predefined fields, it reduces the time spent on manual data entry and minimizes errors. This template also promotes compliance with legal requirements, as it includes all necessary sections for fair lending practices. Additionally, it enhances clarity for applicants, reducing confusion and ensuring all required information is provided. A standardized template also improves brand image by presenting a professional and organized document. Businesses can further customize it to align with their specific needs, ensuring a seamless and efficient credit evaluation process. This approach fosters transparency, builds trust, and streamlines operations, ultimately benefiting both the business and its customers.

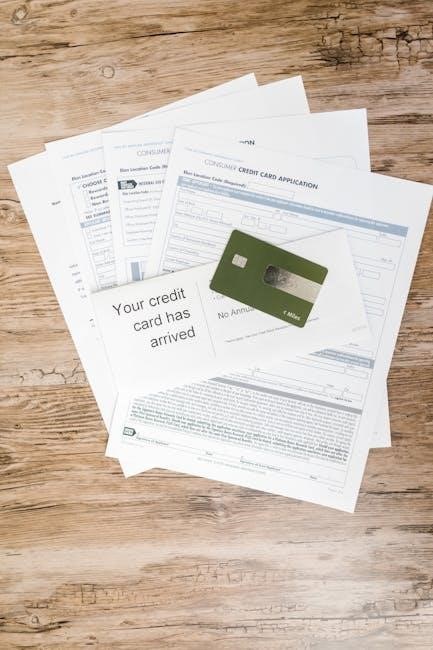
Key Components of a New Customer Credit Application Form
A new customer credit application form typically includes personal and business information, financial details, credit history, references, and terms and conditions to ensure thorough evaluation and compliance.
Personal Information Section
The personal information section of a new customer credit application form requires details such as full name, date of birth, contact information, and identification documents. This section ensures the applicant’s identity is verified and aids in assessing creditworthiness. It typically includes fields for home address, email, and phone number, ensuring clear communication channels. Additionally, some forms may request a Social Security or tax identification number for credit history checks. Accurate completion of this section is crucial for processing the application efficiently. Businesses use this data to evaluate risk and ensure compliance with legal requirements, safeguarding both parties involved in the credit agreement. Proper validation of personal details helps prevent fraud and ensures secure transactions.
Business Information Requirements
The business information section is essential for verifying the legitimacy and stability of a company. It typically includes the business name, registration number, and structure (e.g., sole proprietorship, LLC, or corporation). Applicants may need to provide details about their industry, years in operation, and physical location. Some forms require a Federal Tax ID or Employer Identification Number (EIN) to conduct credit checks. This section helps assess the company’s financial health and credibility, ensuring alignment with credit policies. Additionally, businesses may be asked to disclose ownership details or provide a Dun & Bradstreet (D-U-N-S) number for a comprehensive credit evaluation. Accurate and complete business information is critical for a smooth credit application process.
Financial Details and Income Verification
Financial details and income verification are critical components of the credit application process. Applicants are typically required to provide recent bank statements, income statements, and tax returns to validate their financial stability. This section may also include details about annual revenue, net profit, and cash flow to assess creditworthiness. Businesses might need to disclose existing debts or liabilities to provide a comprehensive financial overview. In some cases, credit checks or references from financial institutions may be requested to verify the accuracy of the information provided. Ensuring the accuracy of these details is essential for a fair and prompt credit decision. This section helps lenders evaluate the applicant’s ability to manage credit responsibly and meet repayment obligations effectively.
Credit History and Score Section
The credit history and score section is a vital part of the application, providing insight into an applicant’s financial reliability. This section typically includes details about past loans, repayment history, and any unresolved debts. The credit score, calculated by credit bureaus, reflects the applicant’s ability to manage credit responsibly. A higher score generally indicates lower risk, while a lower score may require further scrutiny. Businesses use this information to assess the likelihood of timely repayments and may request additional documentation if the credit history is complex. Ensuring the accuracy of this data is crucial, as it directly impacts the approval decision. Compliance with credit reporting laws ensures the process remains fair and transparent for all parties involved.
References and Guarantor Information
The references and guarantor information section allows businesses to verify the credibility of the applicant through trusted third parties. Applicants are typically required to provide contact details of personal or business references who can vouch for their financial reliability. In cases where the applicant’s credit history is limited or uncertain, a guarantor may be necessary to co-sign the agreement. The guarantor’s financial stability and creditworthiness are then considered alongside the applicant’s. This section ensures that businesses can assess the overall risk more comprehensively. Clear guidelines for providing references and selecting a suitable guarantor are often included to simplify the process for applicants. This step is crucial for maintaining accountability and security in credit agreements.
Terms and Conditions Agreement
The Terms and Conditions Agreement is a critical section of the new customer credit application form, outlining the rules and obligations for both the applicant and the creditor. It ensures transparency and legal compliance, providing a clear understanding of the credit agreement’s framework. This section typically includes details on payment terms, interest rates, late fees, and the consequences of defaulting on payments. Applicants are required to read and agree to these terms before submitting the form, confirming their acceptance of the outlined conditions. The agreement also protects both parties by establishing a legally binding contract, ensuring that all responsibilities and expectations are clearly defined. This step is essential for maintaining accountability and trust in the credit relationship. Businesses must ensure the terms are fair and compliant with relevant laws.
Step-by-Step Guide to Completing the Form
The step-by-step guide helps users efficiently complete the form by following organized instructions, ensuring all required sections are accurately filled out and submitted without delays.
Downloading the Correct PDF Template
To begin the process, access the official website or platform where the new customer credit application form is hosted. Use specific search terms like “new customer credit application form PDF” to locate the correct template. Ensure the form is up-to-date by checking the version number or date listed on the document. Once found, click the download button to save the PDF to your device. Verify that the template is designed for your region or business type, as formats may vary. After downloading, review the form to familiarize yourself with its structure and requirements before proceeding to fill it out. This step ensures you have the most accurate and applicable version of the application form.
Filling Out Personal and Business Details
Begin by carefully entering your personal information, such as your full name, date of birth, and contact details, ensuring accuracy to avoid delays. Provide a valid government-issued ID number if required. Next, complete the business section by including your company name, registration number, and business address. Specify the type of business structure, such as sole proprietorship, partnership, or corporation. Include details about your business operations, annual revenue, and years in operation. Be thorough in listing all relevant information to demonstrate financial stability and credibility. Double-check all entries for consistency and correctness before proceeding to the next step. This ensures a smooth evaluation process and increases the likelihood of approval.
Attaching Required Documentation
Ensure all necessary documents are attached to your credit application form to facilitate a smooth review process. Typically, required documents include government-issued ID, proof of income, and bank statements. For businesses, attach financial statements, tax returns, and business registration certificates. Make sure all documents are current, valid, and clearly legible. Use a scanner to produce high-quality digital copies, and save them in acceptable formats like PDF or JPEG. Verify the file sizes do not exceed submission limits. Organize the documents in the order specified by the application form to avoid delays. Double-check that all required fields are completed before attaching the files. Securely submit the application to protect sensitive information and maintain customer trust throughout the process.
Reviewing and Signing the Application
Before finalizing, carefully review the credit application form to ensure all information is accurate and complete. Check for any typographical errors or missing details, as inaccuracies may delay processing. Verify that all sections, including personal and business information, financial data, and references, are fully filled out. Ensure all attached documents are correct and meet the specified requirements. Read through the terms and conditions thoroughly to understand your obligations. Sign and date the application legibly, confirming that the provided information is true and accurate. If submitting electronically, use a digital signature if available. Once satisfied, proceed to submit the application securely to maintain confidentiality and integrity of the data. Keep a copy for your records.
Submitting the Application Securely
Ensure the new customer credit application form is submitted through secure channels to protect sensitive information. For online submissions, verify the website uses HTTPS encryption and look for a padlock icon in the browser. When submitting via email, consider using encrypted attachments or secure file-sharing platforms. If mailing, use certified or registered post to track delivery. For in-person submissions, hand-deliver the application to an authorized representative. Always confirm receipt with the provider to ensure your application is processed safely. Protecting data during submission is crucial to prevent identity theft and maintain customer trust. Secure submission methods are essential for compliance with privacy laws and data protection regulations. Choose the most reliable option available to safeguard your personal and financial information. This ensures confidentiality and integrity throughout the process. For further assistance, contact customer support if needed. Follow these steps to guarantee secure submission every time. Always prioritize security to avoid potential risks associated with data breaches. By taking these precautions, you ensure your application is handled securely and efficiently. Keep a record of submission confirmation for your records. Stay informed about best practices for secure document submission to enhance your safety online. Regularly update your security measures to align with evolving technological advancements and threats. This proactive approach helps maintain the highest level of protection for your sensitive information. For additional guidance, consult the provider’s instructions or seek advice from a trusted source. Security is a shared responsibility, and your diligence contributes to a safer application process. Remember, your privacy and financial security are paramount, so never compromise on secure submission methods. Stay vigilant and informed to protect yourself from potential threats. By following these guidelines, you can confidently submit your application with peace of mind. The security of your information is a top priority, and taking the right steps ensures it remains protected. Always choose secure methods to safeguard your data and maintain trust with your service provider. Your attention to detail in this process is crucial for a seamless and secure experience. Stay proactive in protecting your information and utilize available resources to enhance your security measures. The effort you invest in secure submission pays off in maintaining your privacy and financial integrity. Keep yourself updated on the latest security practices to stay ahead of potential risks. This ensures your application process is not only efficient but also secure. Prioritizing security is essential in today’s digital age, and your diligence makes a significant difference. Always opt for secure submission channels to protect your sensitive information from unauthorized access. Remember, your data’s security is in your hands, so handle it with care. By choosing secure methods, you contribute to a safer online environment for everyone. Stay safe, stay secure, and ensure your application is submitted with the highest level of protection available. This not only protects you but also builds trust with your provider. Security is everyone’s responsibility, and your actions make a difference. Always verify the security of the submission method before proceeding. Your vigilance is key to maintaining the confidentiality of your information. For any concerns, reach out to the provider’s support team to ensure your application is handled securely. Your proactive approach to security ensures a smooth and protected process. Stay informed, stay secure, and submit your application with confidence. The security measures you take today protect your information tomorrow. Always choose the most reliable and secure method available to safeguard your data. Your attention to security details is crucial for a successful and protected application process. Stay safe online and ensure your information remains confidential throughout the submission process. Protecting your data is a priority, and secure submission methods are your best defense. Make informed choices to maintain the highest level of security for your credit application. Your diligence ensures a safe and efficient experience. Always prioritize security when submitting your application to avoid any potential risks. By taking the right precautions, you protect your information and maintain trust with your provider. Remember, security is paramount, so never overlook the importance of secure submission. Your efforts contribute to a safer digital environment for everyone. Stay secure, stay informed, and submit your application with confidence. The security of your information is in your hands, so handle it with care and attention. Choose secure methods, verify encryption, and ensure your data is protected throughout the process. This ensures your application is not only complete but also secure. Prioritize security today for a safer tomorrow. Always verify the security of your submission method to protect your sensitive information. Your proactive approach to security makes a significant difference in safeguarding your data. For any questions, consult the provider’s guidelines or seek professional advice. Security is a shared responsibility, and your actions play a crucial role in protecting your information. Stay vigilant, stay secure, and ensure your application is submitted safely. The effort you put into secure submission is an investment in your privacy and financial security. Always choose the most secure option available to protect your data. Your attention to security details ensures a safe and efficient application process. Stay informed about the latest security practices and update your methods accordingly. This keeps your information protected from evolving threats. By staying proactive, you maintain the highest level of security for your credit application. Your diligence ensures that your sensitive information remains confidential and secure. Always prioritize security when submitting your application to avoid potential risks. Remember, your data’s safety is a top priority, and secure submission methods are essential. Stay safe, stay secure, and submit your application with confidence. The security measures you implement today protect your information tomorrow. Always opt for secure channels and verify their reliability before proceeding. Your commitment to security ensures a smooth and protected application process. For any concerns, reach out to the provider’s support team to ensure your application is handled securely. Your proactive approach to security is key to maintaining the integrity of your information. Stay informed, stay secure, and submit your application with peace of mind. The security of your data is in your hands, so choose secure methods to protect it. Always verify the submission method’s security features to ensure your information is safe. Your attention to detail in this process is crucial for a secure and efficient experience. Stay safe online and ensure your application is submitted with the highest level of protection available. Security is everyone’s responsibility, and your actions make a difference. Always choose secure submission methods to safeguard your sensitive information. Your diligence ensures that your data remains confidential and protected throughout the process. Stay proactive in protecting your information and utilize available resources to enhance your security measures. The effort you invest in secure submission pays off in maintaining your privacy and financial integrity. Keep yourself updated on the latest security practices to stay ahead of potential risks. This ensures your application process is not only efficient but also secure. Prioritizing security is essential in today’s digital age, and your diligence makes a significant difference. Always opt for secure submission channels to protect your sensitive information from unauthorized access. Remember, your data’s security is in your hands, so handle it with care. By choosing secure methods, you contribute to a safer online environment for everyone. Stay safe, stay secure, and ensure your application is submitted with the highest level of protection available. This not only protects you but also builds trust with your provider. Security is everyone’s responsibility, and your actions make a difference. Always verify the security of the submission method before proceeding. Your vigilance is key to maintaining the confidentiality of your information. For any concerns, reach out to the provider’s support team to ensure your application is handled securely. Your proactive approach to security ensures a smooth and protected process. Stay informed, stay secure, and submit your application with confidence. The security measures you take today protect your information tomorrow. Always choose the most reliable and secure method available to safeguard your data. Your attention to security details is crucial for a successful and protected application process. Stay safe online and ensure your information remains confidential throughout the submission process. Protecting your data is a priority, and secure submission methods are your best defense. Make informed choices to maintain the highest level of security for your credit application. Your diligence ensures a safe and efficient experience. Always prioritize security when submitting your application to avoid any potential risks. By taking the right precautions, you protect your information and maintain trust with your provider. Remember, security is paramount, so never overlook the importance of secure submission. Your efforts contribute to a safer digital environment for everyone. Stay secure, stay informed, and submit your application with confidence. The security of your information is in your hands, so handle it with care and attention. Choose secure methods, verify encryption, and ensure your data is protected throughout the process. This ensures your application is not only complete but also secure. Prioritize security today for a safer tomorrow. Always verify the security of your submission method to protect your sensitive information. Your proactive approach to security makes a significant difference in safeguarding your data. For any questions, consult the provider’s guidelines or seek professional advice. Security is a shared responsibility, and your actions play a crucial role in protecting your information. Stay vigilant, stay secure, and ensure your application is submitted safely. The effort you put into secure submission is an investment in your privacy and financial security. Always choose the most secure option available to protect your data. Your attention to security details ensures a safe and efficient application process. Stay informed about the latest security practices and update your methods accordingly. This keeps your information protected from evolving threats. By staying proactive, you maintain the highest level of security for your credit application. Your diligence ensures that your sensitive information remains confidential and secure. Always prioritize security when submitting your application to avoid potential risks. Remember, your data’s safety is a top priority, and secure submission methods are essential. Stay safe, stay secure, and submit your application with confidence. The security measures you implement today protect your information tomorrow. Always opt for secure channels and verify their reliability before proceeding. Your commitment to security ensures a smooth and protected application process. For any concerns, reach out to the provider’s support team to ensure your application is handled securely. Your proactive approach to security is key to maintaining the integrity of your information. Stay informed, stay secure, and submit your application with peace of mind. The security of your data is in your hands, so choose secure methods to protect it. Always verify the submission method’s security features to ensure your information is

Understanding the Credit Application Process
The credit application process involves submitting required documents, verifying information, and assessing creditworthiness to determine eligibility for credit, ensuring compliance and protecting sensitive data throughout.
What Happens After Submitting the Form
After submitting the credit application form, the business reviews the provided information to verify identity, assess creditworthiness, and evaluate financial stability. A credit check is typically conducted to analyze the applicant’s history and score. The submitted documents, such as income statements and references, are validated to ensure accuracy. If additional information is required, the applicant may be contacted. Once the review is complete, the business determines whether to approve, reject, or request further details. The decision is communicated to the applicant, usually within a specified timeframe. Approved applications proceed to the next steps, while rejections may include explanations based on compliance policies. This process ensures a fair and secure evaluation of credit eligibility.
How Creditworthiness is Assessed
Creditworthiness is assessed by evaluating the applicant’s financial stability, credit history, and repayment capacity. Businesses analyze the provided financial details, such as income statements and bank records, to gauge affordability. Credit scores and reports are reviewed to identify past payment behaviors and potential risks. References and guarantor information are also verified to ensure credibility. The debt-to-income ratio is calculated to determine if the applicant can manage additional credit obligations. Employment stability and business longevity are considered to assess income consistency. This comprehensive evaluation helps businesses make informed decisions about credit approval and terms, ensuring a balanced approach to risk management and customer access to credit.
Timeline for Credit Approval or Rejection
The timeline for credit approval or rejection typically varies depending on the complexity of the application and the organization’s processes. Once the completed form and required documents are submitted, the initial review usually takes 1-3 business days. This involves verifying the provided information and conducting a credit check. If additional documentation is needed, the process may be delayed by several more days. In most cases, a decision is reached within 5-10 business days, with some institutions offering expedited options for quicker turnaround. Applicants are then notified via email or mail regarding the approval or rejection, along with the terms if approved. Communication throughout the process ensures transparency and sets clear expectations for applicants.
Next Steps Post-Approval
After credit approval, the institution will outline the next steps, typically involving the disbursement of funds or the setup of a credit line. Applicants will receive detailed information regarding the approved credit terms, including the amount, interest rate, and repayment schedule; It’s essential to review and understand these terms before accepting the offer. Once accepted, the funds are usually transferred within a specified timeframe, often within 24-48 hours for direct transfers. Setting up a repayment plan and ensuring timely payments is crucial to maintaining a positive credit history. Clear communication from the institution ensures a smooth transition, and applicants are encouraged to reach out with any questions or concerns.
Legal and Compliance Considerations
Ensuring data security, privacy, and adherence to credit laws is essential for compliance, maintaining transparency, and fulfilling legal obligations in the credit application process.
Privacy Policies and Data Protection
Protecting customer data is critical when handling credit applications. Businesses must ensure compliance with privacy laws, such as GDPR or CCPA, to safeguard personal and financial information. Encryption and secure systems should be used to prevent unauthorized access. Transparency is key; customers should be informed about how their data will be stored, used, and shared. Access to sensitive information should be restricted to authorized personnel only. Regular audits and employee training can help maintain data security standards. By prioritizing privacy and data protection, businesses build trust and minimize the risk of breaches, ensuring a secure experience for applicants throughout the credit application process.
Compliance with Credit Reporting Laws
Compliance with credit reporting laws is essential to ensure ethical and legal handling of customer data. Businesses must adhere to regulations like FCRA in the U.S., which governs how credit information is collected, used, and shared. Proper disclosure to customers about credit checks and data usage is mandatory. Consent must be obtained before accessing credit histories, and records must be maintained securely. Non-compliance can lead to legal consequences and reputational damage. Staying updated on evolving laws ensures businesses remain in compliance, protecting both the organization and its customers. Regular training for staff and thorough audits are recommended to uphold these standards effectively.
Disclosure Requirements for Credit Terms
Disclosure requirements for credit terms ensure transparency and fairness in lending practices. Businesses must clearly outline interest rates, payment terms, and any associated fees in the credit application form. This includes specifying whether interest rates are fixed or variable and detailing any penalties for late payments. Additionally, the total cost of credit and the repayment schedule should be provided to help customers make informed decisions. Compliance with these requirements not only builds trust but also protects both parties from potential disputes. Clear and concise language is essential to avoid misunderstandings, ensuring that all terms are easily comprehensible to the applicant. This transparency fosters a positive relationship and adheres to legal standards.

Best Practices for Businesses Using Credit Forms
Adopt user-friendly designs, ensure clarity in instructions, and provide secure submission methods to enhance customer experience and streamline the credit application process efficiently for businesses.
Designing a User-Friendly Form
Designing a user-friendly credit application form is essential for improving customer experience. Ensure the form is visually appealing, with a clear structure and logical flow. Use simple, concise language and avoid jargon to make the process intuitive. Label fields clearly and provide examples where necessary to reduce confusion. Group related information together, such as personal and business details, to make navigation easier. Incorporate interactive elements like tooltips and validation to guide users in real-time. Test the form across different devices and browsers to ensure compatibility. A well-designed form not only enhances user satisfaction but also increases completion rates and reduces errors, making the process efficient for both businesses and their customers.
and Final Thoughts
Ensuring Clarity in Instructions
Clear instructions are vital for a seamless credit application process. Provide step-by-step guidance to help users understand each section. Use bold headings and bullet points to highlight key information. Avoid ambiguity by defining technical terms and specifying required documents. Include examples of acceptable formats for dates and numerical entries. Offer a help section or FAQs to address common queries. Ensure instructions are consistent across all sections to avoid confusion. Regularly update the form to reflect any changes in requirements or policies. By making instructions clear and accessible, businesses can reduce errors and ensure applicants complete the form accurately, improving overall efficiency and customer satisfaction.