Welcome to the Viper Car Starter Manual, your comprehensive guide to understanding and utilizing your remote start system effectively. This manual is designed for both new and experienced users, providing detailed insights into installation, operation, and troubleshooting.
Discover how to harness the full potential of your Viper remote starter, ensuring a seamless and safe experience. Whether you’re upgrading your vehicle’s convenience features or enhancing security, this guide offers essential information to get you started.
Learn about the system’s features, benefits, and proper usage to maximize your remote starter’s performance. This manual is your key to unlocking a hassle-free and secure driving experience with your Viper car starter.
1.1 Overview of the Viper Remote Starter System
The Viper Remote Starter System offers a convenient and secure way to start your vehicle remotely. Designed for compatibility with both manual and automatic transmissions, the system ensures safe operation by requiring manual vehicles to be in neutral. It integrates seamlessly with Viper car alarms, enhancing security features. The system also supports advanced functionalities like SmartStart app integration, allowing smartphone control. With its user-friendly design and robust technology, the Viper Remote Starter System provides a reliable solution for drivers seeking comfort and peace of mind.
1.2 Key Features of the Viper Car Starter
The Viper Car Starter boasts an array of innovative features designed to enhance your driving experience. It offers remote start functionality, allowing you to activate your vehicle from a distance of up to a half-mile. The system supports both manual and automatic transmissions, with specific safety protocols for manual vehicles. Additionally, it integrates with Viper’s SmartStart app, enabling smartphone control and compatibility with Android Wear devices. Advanced security features, such as the Failsafe Starter Kill, ensure unauthorized use prevention, while the virtual tach function simplifies installation across various vehicles.
1.3 Benefits of Using a Viper Remote Starter
The Viper Remote Starter offers unparalleled convenience, allowing you to start your car from a distance, ensuring it’s ready to drive in any weather. It enhances security with features like the Failsafe Starter Kill, preventing unauthorized use. The system also boosts your vehicle’s resale value and provides peace of mind with advanced safety protocols. Additionally, it integrates seamlessly with modern smartphones via the SmartStart app, offering a futuristic driving experience. These benefits make the Viper Remote Starter a practical and desirable upgrade for any vehicle owner.
Understanding the Viper Car Starter System
The Viper Car Starter System includes a remote controller, control module, and sensors, designed to provide advanced security and convenience. It integrates seamlessly with your vehicle’s electrical system, offering reliable performance and ease of use.
2.1 Components of the Viper Remote Starter Kit
The Viper Remote Starter Kit includes a control module, remote controller, wiring harness, and installation accessories. The control module acts as the system’s brain, processing signals and controlling vehicle functions. The remote controller offers one-way or two-way communication, providing feedback through LEDs or an LCD screen. The wiring harness connects components to your car’s electrical system, ensuring proper integration. Additional accessories like antennas and bypass modules may be included for enhanced functionality and compatibility.
2.2 How the Viper Remote Starter Works
The Viper Remote Starter operates by utilizing a control module that receives signals from a remote controller or smartphone app, sending commands to the vehicle’s ignition, starter motor, and fuel injection system. It ensures security through rolling codes or encryption. Compatibility with both automatic and manual transmissions requires specific conditions, such as neutral gear and handbrake engagement for manuals. A failsafe starter kill function enhances safety by preventing unauthorized starts. Wiring connects the module to the car’s systems, and features like virtual tach monitor engine RPM without direct connection. The system integrates with smartphones via the SmartStart app, offering feedback through two-way communication. Installation requires technical knowledge, with detailed instructions available for setup.
2.3 Compatibility with Different Vehicle Types
The Viper Remote Starter is compatible with a wide range of vehicles, including cars, trucks, SUVs, and vans. For manual transmission vehicles, the system requires specific conditions, such as leaving the car in neutral and engaging the handbrake to ensure safe remote starting. Automatic transmission vehicles operate seamlessly with the remote starter. Compatibility varies by make and model, so consulting the vehicle’s specifications or a professional installer is recommended for proper setup. The system integrates with most modern vehicles, ensuring reliable performance across different types.
Installation of the Viper Car Starter
The Viper Car Starter installation requires careful wiring and bypass module configuration. Follow detailed instructions to ensure proper setup. Professional installation is recommended for optimal performance and safety.
3.1 Pre-Installation Checklist
Before installing your Viper car starter, ensure you have all necessary components. Verify vehicle compatibility and consult the manual for specific requirements. Check the wiring harness, relays, and bypass modules. Ensure the vehicle is in neutral (manual transmission) or park (automatic) with the handbrake engaged. Disconnect the battery to prevent electrical shocks. Gather tools like screwdrivers, wire cutters, and connectors. Review local regulations regarding remote starters; Ensure the system is compatible with your vehicle’s make and model; Plan the wiring route to avoid interference and damage. Follow safety guidelines to ensure a secure installation process.
3.2 Step-by-Step Installation Guide
Begin by disconnecting the vehicle’s battery to ensure safety. Locate the ignition, starter, and accessory wires, and connect them to the Viper module. Install the brain unit in an accessible location, away from heat sources. Connect the remote start, alarm, and bypass module wires according to the wiring diagram. Mount the antenna for optimal signal strength. Reconnect the battery and test the system by pressing the remote start button. Ensure all functions work correctly before finalizing the installation. Follow the manual for specific wiring instructions tailored to your vehicle.
3.3 Wiring Diagram and Connections
Refer to the wiring diagram provided in the manual for precise connections. Connect the ignition, starter, and accessory wires to the corresponding ports on the Viper module. Ensure the bypass module is correctly wired to bypass the vehicle’s security system. Connect the antenna to the remote start system for optimal signal reception. Always disconnect the battery before starting the wiring process to avoid electrical hazards. Consult the vehicle-specific wiring guide for accurate connections and test the system thoroughly after installation to ensure proper functionality.
3.4 Special Considerations for Manual Transmission Vehicles
For manual transmission vehicles, ensure the car is in neutral gear before remote starting. Engage the parking brake to prevent unintended movement. The system requires a specific routine: park in neutral, engage the handbrake, exit, and then activate the remote start. Failure to follow this sequence may result in safety risks or system malfunction. Always confirm the vehicle is secure before leaving it unattended. Consult the manual for detailed steps tailored to your manual transmission setup to ensure safe and effective remote starting.
Operating the Viper Car Starter
Learn how to start your engine remotely, lock/unlock doors, and activate advanced features. Understand the remote start activation process and differences for manual vs. automatic transmissions.
4.1 Basic Operation and Remote Functions
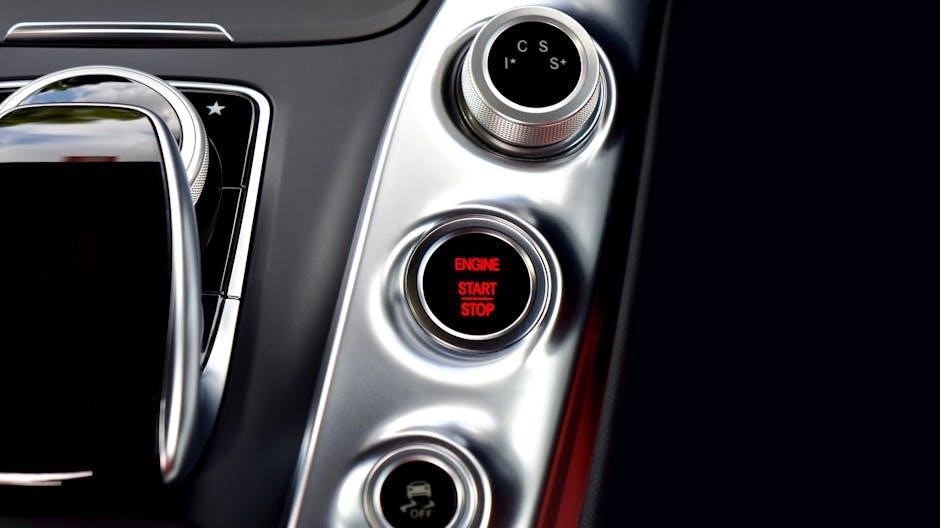
The Viper car starter offers intuitive remote functions, allowing users to start their engine, lock/unlock doors, and activate the car’s alarm system with the press of a button. The remote control typically features a sleek design with a LCD display for real-time feedback. Basic operations include remote start, which pre-heats or cools the vehicle, and trunk release for added convenience. Users can also customize settings to suit their preferences, ensuring a personalized experience. Proper use of these functions ensures optimal performance and safety, making the Viper starter a reliable and user-friendly accessory for any vehicle.
4.2 Remote Start Activation Process
To activate the remote start, press and hold the remote’s start button until the vehicle’s parking lights flash. For manual transmissions, ensure the car is in neutral and the parking brake is engaged. The system will confirm the start with a series of beeps. Once activated, the engine will run for a preset duration. To shut off, press the remote’s stop button or start the vehicle normally. Always follow the manual’s guidelines for safe and proper operation.
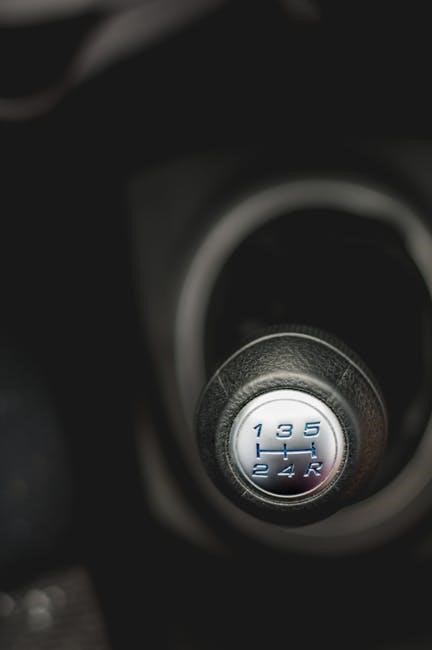
4.3 Differences in Operation for Manual vs. Automatic Transmissions
For manual transmissions, the vehicle must be in neutral and the parking brake engaged before remote starting. This ensures safety, as the car cannot move. Automatic transmissions do not require these steps, as they can remain in park. Both systems activate similarly, but manual transmissions demand extra precautions to prevent unintended movement. Always follow the manual’s guidelines for your specific transmission type to ensure safe and proper operation.
4.4 Advanced Features and Customization Options
The Viper car starter offers advanced features like smartphone integration via SmartStart, allowing remote start and lock/unlock functions from your phone. Customization options include setting run times, adjusting sensitivity, and personalizing alert notifications. Users can tailor their experience to suit their preferences, enhancing convenience and security. These features ensure a seamless and personalized remote start experience, making your Viper system adaptable to your lifestyle and vehicle needs.
Programming the Viper Remote Controller
Program your Viper remote controller by following step-by-step instructions to sync it with your vehicle’s system, ensuring proper functionality and seamless integration for remote start operations.
5.1 Step-by-Step Programming Instructions
Start by turning your vehicle’s ignition to the ON position. Press and hold the remote’s control button until the system’s LED flashes. Release the button and press it again to confirm synchronization. Follow the sequence provided in the manual to complete the programming process. Ensure all steps are executed within the specified timeframes to avoid errors. If issues arise, refer to the troubleshooting section for guidance. Proper synchronization ensures reliable remote start functionality and system performance. Always follow safety precautions during programming to prevent accidental starts.
5.2 Syncing the Remote with Your Vehicle
To sync your Viper remote controller with your vehicle, start by turning the ignition to the ON position. Press and release the remote’s control button, then wait for the system’s LED to flash. This indicates the remote is detecting the vehicle’s signals. Press the button again to complete the synchronization process. Once synced, the LED will flash twice, confirming the connection. Ensure the vehicle is in a safe location during this process. Proper synchronization ensures reliable communication between the remote and your car’s system. Follow the manual’s guidelines for optimal results. Always test the remote after syncing to confirm functionality. This step is crucial for ensuring your remote starter operates correctly and securely. Make sure no one is in or around the vehicle during the syncing process to avoid accidents. If issues persist, consult the troubleshooting section for further assistance. By following these steps, you can ensure a seamless connection between your Viper remote and your vehicle. This synchronization process is essential for maintaining the functionality and security of your remote starter system. Always refer to the manual for specific instructions tailored to your Viper model. Proper synchronization ensures that all features of your remote starter work as intended, providing you with convenience and peace of mind. If you encounter any problems during the syncing process, double-check the steps or contact a professional installer for assistance. Ensuring a proper connection is vital for the performance and reliability of your Viper remote starter system. After successful synchronization, test the remote start feature to confirm it works correctly. This step is crucial for ensuring your vehicle starts remotely without any issues. Always keep your remote in a safe place to prevent unauthorized use. By following the syncing process outlined in this manual, you can enjoy the full benefits of your Viper remote starter system. This process is designed to be user-friendly, but it requires attention to detail to ensure proper functionality. If you are unsure about any step, consult the manual or seek professional help to avoid complications. Synchronization is a one-time process, but it may need to be repeated if the remote is replaced or reprogrammed. Always use the original Viper remote controller for optimal performance. After syncing, familiarize yourself with the remote’s buttons and their functions to make the most of your remote starter system. Proper synchronization ensures that your Viper remote starter operates efficiently and securely, providing you with a convenient way to start your car remotely. This step is essential for enjoying the full range of features your Viper system has to offer. If you experience any difficulties during the syncing process, refer to the troubleshooting guide or contact Viper support for assistance. By completing this process, you can ensure that your remote starter system functions correctly and enhances your driving experience. Always follow the instructions carefully to avoid any potential issues with your vehicle’s remote starter system. Syncing your remote with your vehicle is a straightforward process when done correctly, but it requires careful attention to the steps outlined in this manual. After completing the synchronization, your Viper remote starter will be ready to use, providing you with the convenience of starting your car from a distance. This feature is especially useful during extreme weather conditions, allowing you to heat or cool your vehicle before getting in. Proper synchronization ensures that your remote starter system works seamlessly with your vehicle, offering you enhanced convenience and security. If you encounter any problems during the syncing process, do not hesitate to seek assistance from a qualified technician or Viper support. By following the steps in this manual, you can ensure that your Viper remote starter system is properly synced and functioning as intended. This process is designed to be user-friendly, but it requires precision to ensure that all components communicate effectively. After successfully syncing your remote, you can enjoy the benefits of remote starting your car with confidence. This step is crucial for the overall performance and reliability of your Viper remote starter system. Always remember to test the remote start feature after syncing to confirm that it works correctly. If you need further assistance, refer to the troubleshooting section or contact Viper customer support. By completing this process, you can ensure that your remote starter system operates smoothly and securely, providing you with a hassle-free experience. Proper synchronization is essential for maintaining the functionality and security of your Viper remote starter system. Always follow the instructions carefully to ensure a successful syncing process. After syncing, your remote will be fully integrated with your vehicle’s system, allowing you to start your car remotely with ease. This feature is designed to enhance your driving experience, offering you convenience and peace of mind. If you encounter any issues during the syncing process, do not hesitate to seek professional help to resolve the problem. By following the steps in this manual, you can ensure that your Viper remote starter system is properly synced and ready to use. This process is a critical step in enjoying the full benefits of your remote starter system. Always test the remote start feature after syncing to confirm that it works correctly. If you need further assistance, refer to the troubleshooting section or contact Viper customer support. By completing this process, you can ensure that your remote starter system operates smoothly and securely, providing you with a hassle-free experience. Proper synchronization is essential for maintaining the functionality and security of your Viper remote starter system. Always follow the instructions carefully to ensure a successful syncing process. After syncing, your remote will be fully integrated with your vehicle’s system, allowing you to start your car remotely with ease. This feature is designed to enhance your driving experience, offering you convenience and peace of mind. If you encounter any issues during the syncing process, do not hesitate to seek professional help to resolve the problem. By following the steps in this manual, you can ensure that your Viper remote starter system is properly synced and ready to use. This process is a critical step in enjoying the full benefits of your remote starter system. Always test the remote start feature after syncing to confirm that it works correctly. If you need further assistance, refer to the troubleshooting section or contact Viper customer support. By completing this process, you can ensure that your remote starter system operates smoothly and securely, providing you with a hassle-free experience. Proper synchronization is essential for maintaining the functionality and security of your Viper remote starter system. Always follow the instructions carefully to ensure a successful syncing process. After syncing, your remote will be fully integrated with your vehicle’s system, allowing you to start your car remotely with ease. This feature is designed to enhance your driving experience, offering you convenience and peace of mind. If you encounter any issues during the syncing process, do not hesitate to seek professional help to resolve the problem. By following the steps in this manual, you can ensure that your Viper remote starter system is properly synced and ready to use. This process is a critical step in enjoying the full benefits of your remote starter system. Always test the remote start feature after syncing to confirm that it works correctly. If you need further assistance, refer to the troubleshooting section or contact Viper customer support. By completing this process, you can ensure that your remote starter system operates smoothly and securely, providing you with a hassle-free experience. Proper synchronization is essential for maintaining the functionality and security of your Viper remote starter system. Always follow the instructions carefully to ensure a successful syncing process. After syncing, your remote will be fully integrated with your vehicle’s system, allowing you to start your car remotely with ease. This feature is designed to enhance your driving experience, offering you convenience and peace of mind. If you encounter any issues during the syncing process, do not hesitate to seek professional help to resolve the problem. By following the steps in this manual, you can ensure that your Viper remote starter system is properly synced and ready to use. This process is a critical step in enjoying the full benefits of your remote starter system. Always test the remote start feature after syncing to confirm that it works correctly. If you need further assistance, refer to the troubleshooting section or contact Viper customer support. By completing this process, you can ensure that your remote starter system operates smoothly and securely, providing you with a hassle-free experience. Proper synchronization is essential for maintaining the functionality and security of your Viper remote starter system. Always follow the instructions carefully to ensure a successful syncing process. After syncing, your remote will be fully integrated with your vehicle’s system, allowing you to start your car remotely with ease. This feature is designed to enhance your driving experience, offering you convenience and peace of mind. If you encounter any issues during the syncing process, do not hesitate to seek professional help to resolve the problem. By following the steps in this manual, you can ensure that your Viper remote starter system is properly synced and ready to use. This process is a critical step in enjoying the full
5.3 Troubleshooting Programming Issues
If you encounter issues while programming your Viper remote controller, ensure the ignition is in the ON position and the vehicle is in park. Check that the remote’s battery is strong and properly installed. If the LED does not flash during programming, repeat the process. Verify that no one is standing near the vehicle, as this could interfere with the signal. Consult the manual for specific error codes and solutions. If issues persist, contact a professional installer or Viper support for assistance. Ensure all steps are followed precisely for successful programming.
Safety and Security Features
Viper systems include advanced safety mechanisms like failsafe starter kill and unauthorized use prevention, ensuring your vehicle remains secure and protected from potential threats or malfunctions.
6.1 Built-In Safety Mechanisms
Viper remote starters feature multiple built-in safety mechanisms to prevent unauthorized access and ensure safe operation. These include failsafe starter kill, which disables the engine if the system detects unauthorized use, and automatic shutdown if the vehicle’s safety parameters are breached. Additionally, manual transmission vehicles require specific protocols, such as leaving the car in neutral and engaging the handbrake, to activate the remote start. These features work together to protect your vehicle and ensure a secure remote starting experience.
6.2 Failsafe Starter Kill Function
The Failsafe Starter Kill Function is a critical security feature of the Viper car starter system. It automatically disables the engine if unauthorized access or tampering is detected, ensuring your vehicle remains secure. This function integrates with the system’s safety protocols, shutting down the starter if the vehicle’s security parameters are breached. By preventing unauthorized engine activation, the Failsafe Starter Kill Function adds an extra layer of protection, giving you peace of mind while using your remote start system.
6.3 Preventing Unauthorized Use
The Viper car starter system incorporates advanced security measures to prevent unauthorized use. Through unique encryption and rolling code technology, the remote starter ensures that only authorized remotes can activate your vehicle. Additional features include automatic engine disengagement if suspicious activity is detected, providing an extra layer of protection. Always keep your remote secure and avoid sharing access codes to maintain the highest level of security for your vehicle.
Popular Viper Car Starter Models
Explore top Viper models like the 4816V, 7116V, and 9656V, each offering unique features such as extended range, advanced security, and seamless integration with modern vehicles.
- Viper 4816V: Reliable and user-friendly with up to 1,500 feet range.
- Viper 7116V: Enhanced security and compatibility with various vehicle types.
- Viper 9656V: Premium features including smartphone app control.
7.1 Viper 4816V Remote Controller
The Viper 4816V Remote Controller is a sleek and functional accessory designed for compatibility with various Viper car alarm and remote start systems. It offers a reliable connection with a range of up to 1,500 feet, ensuring convenient control over your vehicle’s security and remote start features. The controller features a simple, intuitive design with a LED indicator for status notifications. It also supports advanced functions like trunk release and panic mode. This remote is a perfect addition to any Viper system, enhancing your car’s security and accessibility. It’s also noted for its durability and user-friendly interface, making it a popular choice among car owners seeking reliable performance and ease of use. For detailed setup and usage instructions, refer to the Viper 4816V user manual, which provides step-by-step guidance tailored to your vehicle. The manual emphasizes proper installation and synchronization to ensure optimal functionality. With the Viper 4816V, you can enjoy enhanced control over your car’s security and remote start capabilities, all from the palm of your hand.
7.2 Viper 7116V Remote Controller
The Viper 7116V Remote Controller is a high-performance accessory designed for seamless integration with Viper car alarm and remote start systems. It features a sleek 2-way LED remote with a USB charger, ensuring convenient control over your vehicle’s security and remote start functions. The 7116V is backward compatible with older Viper systems, such as the 7856V, making it a versatile choice for car owners. Its intuitive design and advanced features, like trunk release and panic mode, enhance your car’s security and accessibility. The remote is also noted for its long-range connectivity and user-friendly interface. For optimal performance, refer to the Viper 7116V manual, which provides detailed programming and installation instructions tailored to your vehicle. This remote controller is a popular choice among car enthusiasts seeking reliable and modern solutions for their vehicle’s security needs.
7.3 Viper 9656V Remote Start System
The Viper 9656V Remote Start System offers exceptional convenience and performance, allowing users to start their vehicle from up to a half-mile away. This system is compatible with Directed 4X10 or 5X10 remote start setups, ensuring a seamless integration with your car’s existing features. The 9656V kit includes a 1-way remote control, providing straightforward operation with essential functions like remote start and trunk release. It supports advanced features such as virtual tach and manual transmission mode, ensuring compatibility with a wide range of vehicles. The system prioritizes safety with built-in failsafe mechanisms, preventing unauthorized use and accidental starts. For installation, refer to the Viper 9656V manual, which outlines step-by-step instructions and wiring diagrams to ensure a smooth setup process. This remote start system is ideal for drivers seeking a reliable and feature-rich solution to enhance their driving experience. Its durability and compatibility make it a top choice among car owners looking to upgrade their vehicle’s functionality.

Maintenance and Troubleshooting
Regularly check the remote batteries and system functionality. Replace batteries when needed and update firmware for optimal performance. Consult the manual for specific troubleshooting guidance to ensure safety and effectiveness.
8.1 Common Issues and Solutions
One common issue is weak or lost remote signal, often resolved by replacing the remote batteries or re-syncing the system. Another problem is vehicle not starting remotely, which can be due to incorrect transmission mode or ignition issues. Additionally, system malfunction after updates may occur, requiring a reset or reinstallation of software. Always refer to the manual for detailed troubleshooting steps and ensure proper installation to avoid such issues. Regular maintenance and updates help maintain optimal performance and functionality.
8.2 Updating Firmware and Software
Regularly updating your Viper car starter’s firmware and software is crucial for optimal performance and security. Use the SmartStart app to check for updates and download the latest versions. Ensure your system is connected to the internet and follow the app’s step-by-step instructions. Updates may improve functionality, add features, and fix bugs. Always back up settings before updating and restart the system post-update. This ensures your remote starter remains compatible with your vehicle and operates seamlessly. Keep your system up-to-date to enjoy the latest enhancements and security patches.
8.3 Replacing Batteries and Repairing Remotes
To maintain your Viper car starter’s performance, regular battery replacement is essential. Use a CR2032 or CR2450 battery, depending on your remote model. Open the remote’s battery compartment, remove the old battery, and insert the new one, ensuring proper polarity alignment. For repairs, inspect the remote for physical damage or worn buttons. Clean the buttons with a soft cloth and check for loose connections. If issues persist, replace the remote or consult a professional. Always refer to your user manual or contact Viper support for guidance. Proper maintenance ensures reliable operation and extends the life of your remote starter system.

Viper SmartStart Integration
Viper SmartStart seamlessly integrates with your car starter, offering advanced control via smartphone apps. This innovative system enhances convenience, allowing remote start, lock/unlock, and status checks from your device.
9.1 Overview of the SmartStart App
The Viper SmartStart app revolutionizes car control, enabling remote start, lock/unlock, and vehicle status checks via smartphone. Compatible with Android and iOS, it offers real-time updates and customizable alerts. The app integrates seamlessly with Viper systems, providing a user-friendly interface for enhanced convenience. With features like GPS tracking and geofencing, it ensures greater security and peace of mind. The SmartStart app is consistently updated, such as the Android Wear integration, to stay ahead in smart vehicle control technology.