msa altair 4x manual

MSA Altair 4x Manual: Comprehensive Article Plan (02/27/2026)

Today’s date is 02/27/2026 11:05:26․ This manual details the MSA ALTAIR 4x, a 65-page document (35-3010A-09) covering operation and service․

The ALTAIR 4X is a multigas detector utilized in marine, offshore, waste management, sewer, and firefighting environments; it supports LEL, CO, H2S, and O2 sensors․

What is the MSA Altair 4x?

The MSA Altair 4x is a robust, multi-gas detector designed for personal monitoring of hazardous atmospheric conditions․ This device, detailed in a 65-page manual (part number 35-3010A-09), is engineered for reliable performance across diverse industrial hygiene and safety applications․ It’s a crucial tool for personnel working in confined spaces or potentially dangerous environments․

Capable of simultaneously detecting up to four gases – including combustible gases (LEL), carbon monoxide (CO), hydrogen sulfide (H2S), and oxygen (O2) – the Altair 4x provides comprehensive protection․ Its durable construction ensures it can withstand harsh conditions, making it ideal for use in sectors like marine, offshore, waste management, and firefighting, as well as sewer operations․ The detector’s core function is to alert users to the presence of harmful gases, safeguarding their health and well-being․

Key Features and Benefits

The MSA Altair 4x boasts several key features enhancing safety and usability․ A standout benefit is its “Faster Bump Test” capability, completing checks in just 10 seconds (SRA-600585)․ This rapid testing minimizes downtime and ensures continuous protection․ The detector supports multiple sensor types (LEL, CO, H2S, O2) offering versatile gas detection․

Its robust design provides durability in challenging environments, crucial for industries like marine and firefighting․ The Altair 4x’s multi-gas detection capability simplifies monitoring, reducing the need for multiple devices․ Furthermore, compatibility with other MSA equipment and available accessories, like charging stations and adapters, streamline integration into existing safety programs․ These features collectively contribute to improved worker safety and operational efficiency․

Typical Applications & Industries

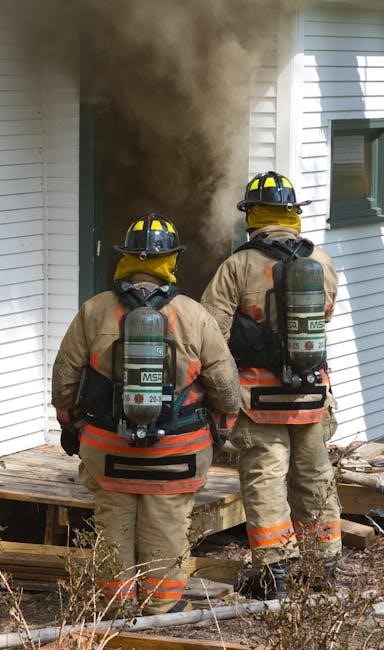
The MSA Altair 4x finds widespread application across diverse and demanding industries․ It’s frequently utilized in the marine sector, providing critical gas detection in confined spaces and harsh conditions․ Offshore environments also benefit from its reliable performance, safeguarding personnel from hazardous atmospheres․

Waste management facilities employ the Altair 4x to monitor for combustible and toxic gases․ Firefighters rely on its accuracy for safe entry and operation in emergency situations․ Furthermore, sewer operations utilize the detector to identify dangerous gas build-ups․ Its versatility extends to general industrial safety programs, ensuring compliance and protecting workers from potential exposure to harmful substances․ The Altair 4x is a vital tool for maintaining safe working environments․

Understanding the Altair 4x Components

The ALTAIR 4X is a multigas detector, capable of supporting LEL, CO, H2S, and O2 sensors within a robust detector housing for reliable performance․

Detector Housing and Construction

The Altair 4x’s detector housing is engineered for durability, designed to withstand harsh environments commonly encountered in industries like marine, offshore, waste management, sewer operations, and firefighting․ Constructed with robust materials, the housing protects sensitive internal components from impacts, dust, and water․

Its design prioritizes both ruggedness and user comfort, ensuring reliable performance even under demanding conditions․ The housing’s construction contributes significantly to the instrument’s overall reliability and longevity, minimizing downtime and maintenance requirements․ The materials used are selected for chemical resistance, preventing degradation from exposure to various gases and contaminants․ This careful construction ensures the Altair 4x remains a dependable safety tool․

Sensor Types Supported (LEL, CO, H2S, O2)

The MSA Altair 4x Multigas Detector is a versatile instrument, capable of supporting a range of electrochemical and catalytic bead sensors․ Specifically, it monitors for Lower Explosive Limit (LEL) gases, Carbon Monoxide (CO), Hydrogen Sulfide (H2S), and Oxygen (O2) levels․ This broad detection capability makes it suitable for diverse applications and hazardous environments․

Each sensor type provides critical safety information, alerting users to potentially dangerous atmospheric conditions․ The Altair 4x’s compatibility with these sensors ensures comprehensive gas detection, protecting personnel from exposure to flammable, toxic, and oxygen-deficient atmospheres․ Sensor selection depends on the specific hazards present in the work environment, offering customizable protection․

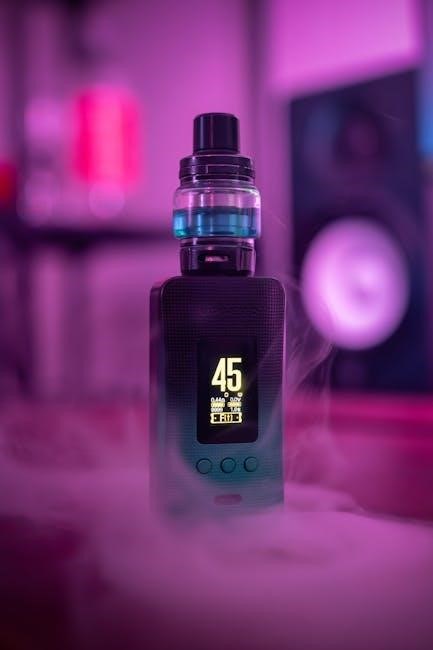
Display and User Interface Overview

The MSA Altair 4x features a clear, backlit display providing real-time gas readings and instrument status․ The user interface is designed for intuitive operation, even while wearing appropriate personal protective equipment․ Key information, including gas concentrations, alarm status, and battery life, is readily visible․ Navigation is typically achieved through a combination of buttons, allowing users to quickly access menus and settings;

The display utilizes visual cues, such as color-coded indicators, to immediately communicate alarm conditions․ Audible alarms complement the visual alerts, ensuring comprehensive notification of hazardous situations; The interface allows for easy configuration of alarm thresholds and other operational parameters, tailoring the device to specific needs․

Getting Started: Initial Setup & Operation

Powering on the ALTAIR 4x is straightforward, with basic navigation managed via buttons․ Sensor activation requires a warm-up period for accurate readings and reliable performance․

Powering On/Off and Basic Navigation

To initiate operation, press and hold the power button until the display illuminates, signifying the ALTAIR 4x is active․ A short press toggles the backlight for enhanced visibility in low-light conditions․ Conversely, a prolonged press initiates the shutdown sequence, ensuring energy conservation․

Basic navigation relies on a combination of buttons – typically a directional pad or joystick – allowing users to scroll through menus, select options, and access various functions․ The interface is designed for intuitive operation, even with gloved hands․ Familiarize yourself with the button layout to efficiently navigate settings and readings․ The display provides clear visual cues, indicating selected options and current status․

Sensor Activation and Warm-up Procedures

Upon powering on, the ALTAIR 4x automatically initiates a self-diagnostic check, activating each sensor sequentially․ Allow a sufficient warm-up period – typically a few minutes – for optimal accuracy and stability․ During this phase, the display will indicate sensor status, potentially showing “warming up” or similar messages․

Avoid exposing the device to target gases during the warm-up phase, as this can compromise calibration and readings․ Ensure proper airflow around the sensor inlets to facilitate rapid stabilization․ The instrument is capable of detecting LEL, CO, H2S, and O2, each requiring a specific warm-up duration for reliable performance․ Refer to the display for confirmation of sensor readiness․

Understanding Alarm Indicators (Visual & Audible)

The ALTAIR 4x utilizes both visual and audible alarms to alert users to hazardous conditions․ Visual alarms manifest as flashing LEDs, color-coded to indicate the severity and type of gas detected․ Audible alarms employ distinct tones and patterns, differentiating between low, medium, and high-level alerts․

Immediate action is crucial upon alarm activation․ The instrument’s display provides detailed information regarding the specific gas exceeding the threshold and its concentration․ Familiarize yourself with the alarm escalation sequence and corresponding response protocols․ Proper interpretation of these indicators ensures prompt evacuation and mitigation of potential risks in marine, offshore, or waste management environments․

Calibration Procedures for the Altair 4x

Regular calibration is essential for accurate readings․ This involves acknowledging required calibrations and utilizing appropriate calibration gas and equipment for optimal performance․

Importance of Regular Calibration

Maintaining the accuracy of the MSA Altair 4x gas detector hinges on consistent and thorough calibration․ Calibration ensures the sensors reliably detect hazardous gases, protecting personnel and preventing potentially dangerous situations․ Drift in sensor readings is inevitable over time due to sensor aging and environmental factors; regular calibration compensates for this drift․

Failing to calibrate can lead to false negatives – a failure to detect a hazardous gas – or false positives, causing unnecessary alarm activation and workflow disruption․ Adhering to a strict calibration schedule, as outlined in the manual, is not merely a best practice, but a critical safety requirement․ Proper calibration guarantees compliance with safety regulations and provides confidence in the detector’s performance․ Acknowledging and performing required calibrations promptly is paramount․

Manual Calibration Steps – Detailed Guide

Initiate calibration by connecting the Altair 4x to a compatible power supply and computer․ Carefully remove the radiation shield and install the designated calibration shroud, ensuring a secure fit․ Subsequently, connect the zero gas (0 ppm CH4) to the instrument’s inlet, following the manufacturer’s instructions for flow rate and connection type․

Navigate to the calibration menu on the device’s user interface and select the appropriate gas type․ Allow the instrument to stabilize with the zero gas before confirming the zero calibration point; Repeat this process for each target gas, utilizing calibration gas with known concentrations․ Document all calibration data for traceability and future reference, adhering to established safety protocols․

Using Calibration Gas & Equipment

Employ only certified calibration gases with traceable NIST standards for accurate results․ Ensure the gas cylinders are properly regulated to the flow rate specified in the Altair 4x manual – typically a low flow rate is preferred․ Utilize appropriate adapters and fittings to prevent leaks and maintain gas purity during calibration procedures․

Inspect all gas lines and connections for damage before each use․ Always handle gas cylinders with care, securing them in an upright position․ Document the gas cylinder’s expiration date and lot number for quality control․ Proper ventilation is crucial when working with calibration gases, and always follow established safety guidelines․

Bump Testing and Functionality Checks

Regular bump tests, including the faster 10-second option, verify sensor response to known gas concentrations (LEL, CO, H2S, O2) for safety․

What is a Bump Test and Why Perform It?

A bump test is a crucial safety procedure that challenges the gas detector’s sensors with a known concentration of calibration gas․ This confirms the instrument is responding appropriately and accurately to hazardous gases․ It’s not a full calibration, but a quick functionality check․ Performing bump tests regularly—frequency dictated by safety protocols and regulations—ensures the ALTAIR 4x is reliable and provides dependable warnings․

Without regular bump testing, you risk false negatives, where the detector fails to alarm in the presence of a dangerous gas, or false alarms, disrupting operations․ The ALTAIR 4x offers a faster, 10-second bump test option for increased efficiency, but the core principle remains the same: verifying sensor performance before each day’s use or after any event that could compromise the detector’s integrity․

Performing a Bump Test – Step-by-Step

Initiate the bump test via the ALTAIR 4x’s menu, navigating to the ‘Bump Test’ function․ Ensure the correct gas type is selected, corresponding to the calibration gas being used (LEL, CO, H2S, or O2)․ Connect the regulator of the calibration gas cylinder to the detector’s gas inlet, verifying a secure connection to prevent leaks․

Activate the gas flow and observe the detector’s display․ The instrument should register an alarm condition for each active sensor, confirming its response․ The 10-second faster bump test feature expedites this process․ Upon completion, the detector will indicate ‘Pass’ or ‘Fail’․ Document all bump test results for record-keeping and compliance purposes․

Faster Bump Test Feature (10 Second)

The ALTAIR 4x incorporates a ‘Faster Bump Test’ function, significantly reducing testing time to approximately 10 seconds․ This feature streamlines routine safety checks, minimizing downtime and enhancing operational efficiency․ To utilize this capability, ensure the detector is in bump test mode and the option is enabled within the instrument’s settings․

This accelerated process delivers a rapid assessment of sensor functionality․ While quicker, it maintains the reliability of a standard bump test, verifying alarm response to calibration gas․ Documenting the use of the faster bump test alongside results is recommended for comprehensive safety records․

Troubleshooting Common Issues

Common problems include low batteries, sensor failures, and alarm malfunctions․ Diagnostics and resolutions are crucial for maintaining reliable gas detection with the ALTAIR 4x․

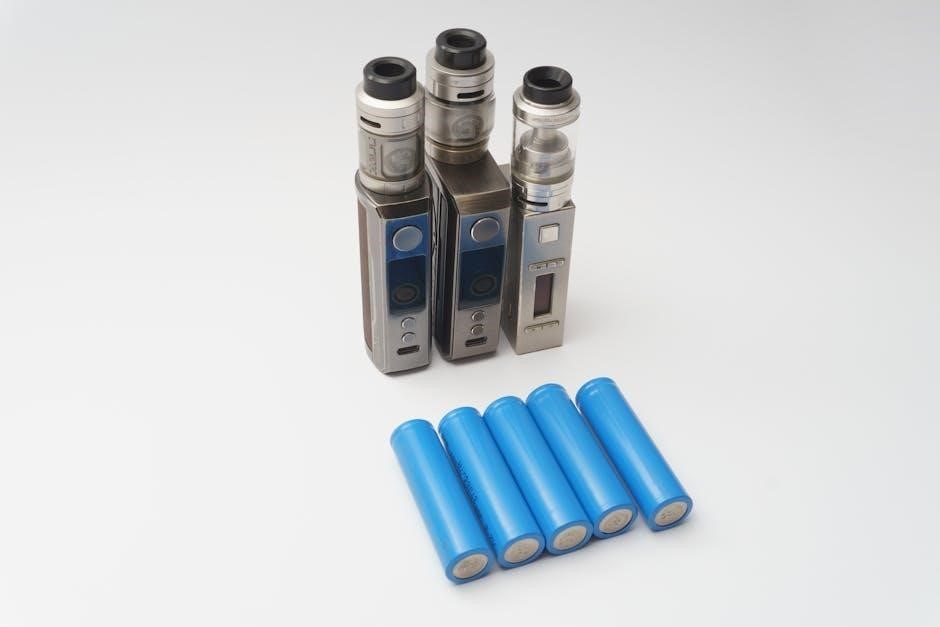
Low Battery Issues and Solutions

Addressing low battery concerns is vital for continuous operation of the MSA Altair 4x․ Several factors can contribute to reduced battery life, including frequent alarm activations, extended periods of operation, and the use of optional accessories that draw additional power․ Regularly check the battery level displayed on the unit’s interface․

If a low battery is indicated, immediately connect the detector to a compatible charging station or adapter․ Ensure the charging connection is secure․ Allow sufficient time for a full recharge cycle․ Consider utilizing a spare, fully charged battery for uninterrupted monitoring during critical tasks․ If battery issues persist despite proper charging, the battery may require replacement․ Refer to the accessories section for compatible replacement options and ordering information․

Sensor Failure Diagnostics

Promptly identifying sensor failures is crucial for maintaining accurate gas detection with the MSA Altair 4x․ The device may display error messages or exhibit unusual readings if a sensor malfunctions․ Common indicators include consistently zero or maximum readings, erratic fluctuations, or a complete lack of response to known gas concentrations․

If a sensor failure is suspected, perform a bump test to verify functionality․ If the issue persists, consult the user interface for specific error codes, which can pinpoint the affected sensor․ Sensor replacement may be necessary; follow the outlined procedures in the maintenance section․ Ensure the replacement sensor is compatible with the Altair 4x and properly calibrated for optimal performance and safety․

Alarm Malfunctions and Resolution

Addressing alarm malfunctions promptly is vital for ensuring worker safety when using the MSA Altair 4x․ Issues can range from false alarms to a complete failure to alert users to hazardous conditions․ First, verify the gas concentrations are indeed within alarm thresholds․ Check sensor functionality via a bump test to rule out sensor failures as the cause․

If the alarm persists without justification, review alarm setpoints within the device’s configuration․ Incorrectly configured setpoints can trigger unwanted alarms․ Consult the manual for proper settings․ If problems continue, a device reset or software update might resolve the issue․ Document all troubleshooting steps and contact MSA support if the malfunction remains unresolved․

Maintenance and Care

Regular cleaning of the Altair 4x housing is essential․ Sensor replacement should follow established procedures, and proper storage maximizes performance and longevity․

Cleaning the Altair 4x Housing

Maintaining a clean Altair 4x housing is crucial for optimal performance and longevity of the device․ Regularly wipe down the exterior with a damp cloth, utilizing mild soap and water if necessary to remove dirt or debris․ Avoid using harsh chemicals, solvents, or abrasive cleaners, as these can damage the housing material and potentially compromise the instrument’s integrity․

Pay particular attention to the areas around the sensors and display, ensuring they are free from obstructions․ After cleaning, thoroughly dry the housing with a clean, lint-free cloth․ Inspect the housing for any cracks or damage during the cleaning process; if any are found, contact MSA for repair or replacement options․ Consistent cleaning contributes significantly to the reliable operation of your Altair 4x gas detector․

Sensor Replacement Procedures

Proper sensor replacement is vital for maintaining the accuracy and reliability of the MSA Altair 4x․ Always consult the official MSA documentation for specific sensor types and procedures․ Begin by powering off the device and accessing the sensor compartment, typically located on the detector’s face․ Carefully remove the old sensor, noting its orientation for correct installation of the new one․

Ensure the replacement sensor is compatible with the Altair 4x and has not exceeded its expiration date․ Gently insert the new sensor, aligning it properly within the compartment․ Securely fasten the compartment cover, and then power on the device to initiate sensor recognition․ Calibration is required after any sensor replacement to guarantee accurate readings․

Storage Guidelines for Optimal Performance

To ensure longevity and accurate function, proper storage of the MSA Altair 4x is crucial․ When not in use, store the detector in a clean, dry, and dust-free environment, away from extreme temperatures and direct sunlight․ Avoid storing near corrosive chemicals or strong magnetic fields, as these can damage the sensors․

Remove batteries for extended storage periods to prevent potential leakage and corrosion․ Periodically check the detector and battery condition, even during storage․ Regularly perform bump tests after prolonged storage to verify functionality before use․ Following these guidelines will help maintain the Altair 4x’s performance and reliability․

Accessories and Compatibility

The ALTAIR 4x works with charging stations and adapters․ It’s compatible with other MSA equipment, and ordering information for parts is available․

Available Accessories (Charging Stations, Adapters)

MSA offers a range of accessories designed to enhance the functionality and convenience of the ALTAIR 4x Multigas Detector․ These include specialized charging stations, facilitating efficient and reliable battery charging for continuous operation in demanding environments; Various adapter options are also available, ensuring compatibility with diverse power sources and charging infrastructures commonly found across different industries and locations․

These accessories are engineered to meet stringent safety standards and seamlessly integrate with the ALTAIR 4x’s robust design․ They contribute to streamlined workflows, reduced downtime, and improved overall user experience․ Detailed specifications and compatibility information for each accessory can be found in the official MSA product catalog and ordering guides, ensuring users select the optimal components for their specific needs and applications․

Compatibility with Other MSA Equipment

The MSA ALTAIR 4x Multigas Detector is designed to integrate effectively within a broader ecosystem of MSA safety solutions․ It exhibits compatibility with various MSA communication systems, allowing for seamless data transmission and real-time monitoring capabilities when paired with MSA’s gas monitoring networks․ This interoperability enhances situational awareness and facilitates coordinated safety responses in complex operational environments․

Furthermore, the ALTAIR 4x can be utilized alongside other MSA personal protective equipment (PPE), contributing to a comprehensive safety program․ Detailed compatibility matrices and integration guidelines are available from MSA, ensuring optimal performance and data synchronization across all connected devices․ This holistic approach to safety management maximizes protection and minimizes potential risks for personnel․

Ordering Information for Parts and Accessories

MSA provides a comprehensive catalog of parts and accessories for the ALTAIR 4x Multigas Detector, ensuring sustained operational readiness and performance․ Available accessories include charging stations, AC adapters, and various calibration gas cylinders essential for routine maintenance and compliance․ Specific sensor options – LEL, CO, H2S, and O2 – can be ordered individually to meet diverse monitoring requirements․

To facilitate efficient procurement, MSA offers detailed pricing and ordering documentation․ This documentation lists component part numbers, descriptions, and current pricing structures․ Customers can access this information through authorized MSA distributors or directly via MSA’s customer support channels․ Proper part selection is crucial for maintaining the detector’s accuracy and reliability․

whmis 2015 quiz answers pdf

WHMIS 2015 Quiz Answers PDF: A Comprehensive Guide

Finding reliable WHMIS 2015 quiz answers in PDF format requires careful sourcing. Many online resources offer practice questions and‚ occasionally‚ answer keys for self-assessment.

Understanding WHMIS 2015

WHMIS 2015‚ the Workplace Hazardous Materials Information System‚ represents a significant update to Canada’s hazard communication standards. It aligns with the Globally Harmonized System (GHS) of Classification and Labelling of Chemicals‚ aiming for a more comprehensive and consistent approach to workplace safety. Understanding the core principles of WHMIS 2015 is crucial before attempting any related quizzes or seeking answers.

The system revolves around three key elements: hazard classification‚ hazard communication‚ and worker training. Proper classification ensures chemicals are categorized based on their physical‚ health‚ and environmental hazards. Hazard communication‚ through labels and Safety Data Sheets (SDS)‚ effectively conveys this information to workers.

Successfully navigating WHMIS 2015 quizzes necessitates a firm grasp of these fundamentals. While finding PDF answers can be tempting‚ focusing on comprehension is far more valuable for long-term safety and compliance. Resources offering practice questions should be used as learning tools‚ not simply as a means to obtain correct answers without understanding the underlying concepts.

The Importance of WHMIS 2015 Training

Comprehensive WHMIS 2015 training is paramount for all workers handling hazardous products. Simply finding a PDF of quiz answers bypasses the critical learning process and doesn’t ensure genuine understanding of workplace safety protocols. Effective training equips individuals to identify hazards‚ interpret labels and Safety Data Sheets (SDS)‚ and implement appropriate control measures.

Reliance on readily available quiz answers fosters a false sense of competence and can lead to dangerous practices. WHMIS 2015 isn’t about memorizing facts for a test; it’s about developing a safety-conscious mindset. Proper training emphasizes practical application‚ enabling workers to proactively mitigate risks.

Investing in quality training programs‚ rather than seeking shortcut answers‚ protects employees and ensures regulatory compliance. While practice quizzes are helpful‚ they should supplement‚ not replace‚ thorough instruction. Prioritize understanding the ‘why’ behind the rules‚ not just the ‘what’.

Accessing WHMIS 2015 Quiz Answers (PDF Format)

Locating WHMIS 2015 quiz answers in PDF format can be challenging‚ as many legitimate training providers don’t publicly distribute them to maintain assessment integrity. A general internet search yields numerous results‚ but caution is advised; many sources may contain inaccurate or outdated information. Some websites offer sample quizzes with answer keys‚ often as promotional material for their paid courses.

Beware of sites promising complete answer sets for free‚ as these may be unreliable or even malicious. Reputable safety training organizations typically provide answer keys only to enrolled students or as part of a comprehensive training package.

Consider exploring official WHMIS resources or contacting certified trainers directly for access to validated practice materials. Remember‚ the goal isn’t simply to pass a quiz‚ but to genuinely understand and apply WHMIS principles for workplace safety.

Key Components of WHMIS 2015

Understanding the core elements – hazard classification‚ communication‚ labels‚ and Safety Data Sheets – is crucial for successfully answering WHMIS 2015 quiz questions.

Hazard Classification

Accurate hazard classification forms the bedrock of WHMIS 2015‚ and quiz questions frequently assess your understanding of this process. The system categorizes hazards into physical‚ health‚ and environmental categories‚ each with specific criteria. Physical hazards encompass flammable liquids‚ compressed gases‚ and explosives‚ demanding knowledge of their properties. Health hazards include carcinogens‚ mutagens‚ and respiratory sensitizers‚ requiring familiarity with potential health effects.

Environmental hazards cover substances toxic to aquatic life. Quiz questions often present scenarios requiring you to correctly classify a substance based on its characteristics. Mastering the classification criteria is vital for selecting appropriate control measures and interpreting Safety Data Sheets (SDS). Incorrect classification leads to inadequate safety protocols. Therefore‚ a strong grasp of these categories and their associated criteria is essential for achieving success on WHMIS 2015 quizzes and ensuring workplace safety.

Hazard Communication

Effective hazard communication is central to WHMIS 2015‚ and quizzes heavily emphasize your understanding of how information is conveyed. This encompasses labels‚ Safety Data Sheets (SDS)‚ and worker training. Questions often focus on interpreting label elements – pictograms‚ signal words‚ and hazard statements – to quickly identify risks. A key aspect is understanding the SDS format and locating specific information‚ like first-aid measures or handling precautions.

Quizzes frequently present scenarios requiring you to determine the appropriate communication method for a given hazard. Knowing how to access and utilize SDS information is crucial. Furthermore‚ understanding employer responsibilities regarding worker training is often tested. Successful completion relies on recognizing that clear‚ concise communication is paramount for protecting workers from chemical hazards. Therefore‚ mastering these communication channels is vital for both quiz performance and workplace safety.

Labels: A First Line of Defense

WHMIS 2015 quiz questions frequently assess your ability to decipher information presented on product labels. These labels are the initial point of hazard recognition‚ utilizing standardized pictograms‚ signal words (“Danger” or “Warning”)‚ and hazard statements to convey risks. Expect questions testing your understanding of what each pictogram represents – for example‚ flame for flammability or skull and crossbones for acute toxicity.

Quiz scenarios often involve identifying the correct label elements for specific chemicals or interpreting the meaning of existing labels. Understanding the purpose of precautionary statements‚ outlining safe handling practices‚ is also critical. Many questions focus on the supplier’s responsibility to provide compliant labels. Successfully answering these questions requires recognizing that labels provide immediate‚ vital safety information‚ acting as the first line of defense against chemical hazards in the workplace.

Safety Data Sheets (SDS): Detailed Information

WHMIS 2015 quizzes heavily emphasize Safety Data Sheets (SDS)‚ testing your ability to locate and interpret specific information within their 16 sections. Expect questions asking about the meaning of exposure limits‚ first-aid measures‚ or safe handling procedures detailed in the SDS. A common quiz format presents a scenario and asks you to identify which SDS section contains the relevant answer.

Understanding the SDS format is crucial; questions frequently target sections like hazard identification‚ composition/information on ingredients‚ and control measures. You’ll need to know where to find information on physical and chemical properties‚ stability and reactivity‚ and toxicological information. Many quizzes assess your knowledge of the SDS’s role in risk assessment and emergency response planning. Mastering SDS navigation is key to achieving a high score‚ as they provide comprehensive hazard details.

Common Hazards Covered by WHMIS 2015

WHMIS 2015 quizzes assess knowledge of physical‚ health‚ and environmental hazards. Understanding hazard classifications—flammable liquids‚ corrosives‚ acute toxicity—is vital for correct answers.

Physical Hazards

WHMIS 2015 training emphasizes recognizing physical hazards‚ frequently tested on quizzes. These include flammable gases‚ aerosols‚ liquids‚ and solids – understanding flashpoints and auto-ignition temperatures is crucial for answering related questions correctly. Explosives‚ categorized by their explosive power‚ also feature prominently.

Compressed gases‚ whether flammable or inert‚ require specific handling procedures‚ often assessed in quiz scenarios. Oxidizing materials‚ which can intensify fires‚ are another key area. Corrosive materials‚ capable of damaging skin or metal‚ demand careful attention;

Quiz questions often present scenarios involving these hazards‚ requiring application of knowledge regarding proper storage‚ handling‚ and emergency procedures. Successfully navigating these questions relies on a firm grasp of the hazard classifications and associated control measures. PDF study guides often detail these classifications with examples‚ aiding in quiz preparation.

Health Hazards

WHMIS 2015 quizzes heavily feature health hazards‚ demanding a thorough understanding of their classifications. Acute toxicity‚ covering immediate effects from single or short-term exposure‚ is a common focus. Skin corrosion/irritation and serious eye damage/irritation are frequently tested‚ requiring knowledge of preventative measures and first aid.

Respiratory or skin sensitization‚ leading to allergic reactions‚ also appears in quiz questions. Germ cell mutagenicity‚ carcinogenicity‚ and reproductive toxicity represent serious long-term health risks‚ often presented in complex scenarios. Specific target organ toxicity (single or repeated exposure) requires identifying affected organs and exposure routes.

Aspiration hazard‚ posing a risk during ingestion‚ completes the health hazard categories. PDF resources often provide detailed descriptions of each hazard‚ alongside examples and corresponding hazard statements. Mastering these classifications is vital for accurately answering quiz questions and ensuring workplace safety.

Environmental Hazards

WHMIS 2015 quizzes increasingly emphasize environmental hazards‚ reflecting growing regulatory focus. Aquatic toxicity is a primary concern‚ testing knowledge of harmful effects on aquatic life – both acute and chronic. Quiz questions often present scenarios involving spills and releases‚ requiring assessment of potential environmental damage.

Hazardous to the ozone layer substances are frequently assessed‚ demanding understanding of their impact on atmospheric protection. PDF study guides detail the specific criteria for classifying a substance as ozone-depleting. Similarly‚ quizzes cover substances with potential for bioaccumulation‚ posing risks through the food chain.

Persistence in the environment is another key area‚ evaluating how long a substance remains harmful. Understanding these classifications is crucial for selecting appropriate containment and disposal methods. Reliable WHMIS 2015 resources provide clear explanations and examples to aid in quiz preparation and promote environmental responsibility.

Navigating WHMIS 2015 Quizzes

Success on WHMIS 2015 quizzes relies on understanding question formats – multiple choice‚ true/false‚ and scenario-based. PDF resources offer practice‚ boosting confidence and knowledge.

Quiz Formats and Question Types

WHMIS 2015 quizzes commonly employ a variety of formats designed to assess comprehension of hazard communication principles. Multiple-choice questions are prevalent‚ testing recall of definitions‚ classifications‚ and proper procedures. True/false questions evaluate understanding of core concepts‚ demanding precise knowledge to avoid misinterpretations. Scenario-based questions present realistic workplace situations‚ requiring application of WHMIS principles to determine appropriate responses.

PDF study guides often mirror these formats‚ providing valuable practice opportunities. Some quizzes focus on interpreting Safety Data Sheets (SDS)‚ identifying hazard symbols‚ or selecting appropriate personal protective equipment (PPE). Others assess knowledge of hazard classes – physical‚ health‚ and environmental – and their corresponding labeling requirements.

Understanding the nuances of each question type is crucial. Multiple-choice questions often include distractors – incorrect answers designed to mislead. Scenario-based questions require careful reading and analysis to identify the relevant hazards and appropriate control measures. Accessing practice quizzes in PDF format allows for self-assessment and identification of knowledge gaps before formal evaluation.

Strategies for Answering WHMIS Questions

Successfully navigating WHMIS 2015 quizzes requires a strategic approach. Thoroughly review the Safety Data Sheet (SDS) format and understand the significance of each section. Prioritize understanding hazard classifications – physical‚ health‚ and environmental – as questions frequently assess this knowledge. When encountering scenario-based questions‚ carefully identify the hazard presented and the appropriate control measures.

For multiple-choice questions‚ eliminate obviously incorrect answers first‚ narrowing down the options. Pay close attention to keywords like “must‚” “should‚” and “may‚” as they indicate varying levels of obligation. When dealing with SDS interpretation‚ practice identifying hazard symbols and understanding their corresponding meanings.

Utilize available PDF practice quizzes to familiarize yourself with question styles and identify areas needing improvement. Don’t simply memorize answers; focus on understanding the underlying principles. A strong grasp of WHMIS 2015 concepts will enable you to confidently tackle any quiz question.

Commonly Missed Questions & Explanations

Many individuals struggle with questions differentiating between hazard classes and categories within WHMIS 2015. A common error is confusing “danger” with “warning” – remember “danger” signifies a more severe hazard. Questions regarding SDS Section 7 (Handling and Storage) often pose challenges; understanding proper ventilation and incompatibility is crucial.

Another frequently missed area involves control measures. Participants often select less effective options‚ failing to prioritize elimination or substitution over personal protective equipment (PPE). Questions about label elements‚ specifically signal words and pictograms‚ also present difficulties.

Understanding the hierarchy of controls is vital. Reviewing practice quizzes and analyzing incorrect answers‚ focusing on the rationale behind the correct response‚ is key. Don’t underestimate the importance of understanding specific hazard properties detailed within the SDS.

Resources for WHMIS 2015 Information

Numerous websites and training providers offer WHMIS 2015 resources. Explore official government sites and reputable third-party platforms for quizzes and detailed guidance.

Official WHMIS Websites

Accessing official WHMIS websites is paramount for accurate information and reliable resources‚ though direct quiz answers in PDF format are rarely published. Health Canada serves as the primary governing body for WHMIS in Canada‚ offering comprehensive details on regulations‚ hazard classifications‚ and safety data sheets (SDS). Their website provides access to the official WHMIS 2015 legislation and guidance documents.

Provincial and territorial occupational health and safety agencies also maintain websites with WHMIS-related information tailored to their specific jurisdictions. These sites often include links to approved training providers and resources for employers and workers. While these official sources don’t typically provide direct answers to quizzes‚ they offer the foundational knowledge necessary to successfully complete WHMIS 2015 training and assessments.

Remember to prioritize understanding the principles of WHMIS rather than simply memorizing answers. Utilizing official resources ensures you’re learning from the most current and accurate information available‚ preparing you for safe handling of hazardous materials in the workplace.

Third-Party Training Providers

Numerous third-party training providers offer WHMIS 2015 courses‚ often including practice quizzes and assessments. While these providers don’t generally distribute complete quiz answer keys in PDF format‚ their training materials frequently incorporate sample questions mirroring those found in official certifications. These courses can be beneficial for reinforcing learning and identifying areas needing improvement.

When selecting a provider‚ verify their accreditation and ensure the course content aligns with the official WHMIS 2015 standards established by Health Canada. Reputable providers will focus on comprehension of hazard communication principles‚ SDS interpretation‚ and proper labeling procedures‚ rather than simply providing answers.

Be cautious of websites offering readily available “quiz answers” as these may contain inaccurate information or promote unsafe practices. Investing in a quality training program from a trusted provider is the most effective way to gain a thorough understanding of WHMIS 2015 and prepare for certification.

Free Online WHMIS Resources

Several websites offer free WHMIS 2015 resources‚ including introductory materials and practice questions. However‚ finding complete WHMIS 2015 quiz answers in PDF format freely available online is rare and often unreliable. Many sites provide sample questions to test your knowledge‚ but comprehensive answer keys are typically reserved for paid courses.

Government websites and safety organizations often host informational documents and guides that can aid in understanding WHMIS principles. These resources are valuable for self-study and can help you prepare for formal assessments. Remember to always cross-reference information with official WHMIS 2015 documentation from Health Canada.

While free resources can be a good starting point‚ they shouldn’t be solely relied upon for certification preparation. A structured training program‚ even a low-cost one‚ will provide a more thorough and accurate understanding of WHMIS 2015 requirements.

Understanding SDS Sections

SDS documents are crucial for WHMIS comprehension. Quiz answers often relate to information found within these sections‚ demanding careful review and understanding of each part.

Section 1: Identification

The initial section of a Safety Data Sheet (SDS)‚ ‘Identification‚’ is frequently tested on WHMIS 2015 quizzes. Understanding its components is vital for accurate answer selection. This section details the product identifier – the trade name commonly used. Crucially‚ it includes the chemical name‚ providing a precise scientific designation.

Furthermore‚ Section 1 lists the recommended use of the chemical and restrictions on its use‚ often presented as specific applications or warnings against certain exposures. A vital element is the supplier’s contact information‚ including name‚ address‚ and emergency phone number. Quiz questions may ask for this information‚ emphasizing its importance for immediate response in case of incidents.

Correctly identifying these elements within the SDS is key to answering related quiz questions. Many quizzes assess your ability to locate specific details within this section‚ testing practical application of WHMIS knowledge. Therefore‚ familiarity with the layout and content of Section 1 is paramount for success.

Section 2: Hazard Identification

Section 2 of the Safety Data Sheet (SDS)‚ ‘Hazard Identification‚’ is a cornerstone of WHMIS 2015 training and a frequent focus of quiz questions. This section clearly outlines the hazards associated with the chemical‚ utilizing standardized classifications and pictograms. Expect quiz questions to test your ability to interpret these visual cues and understand their corresponding dangers.

The section details hazard classes‚ such as flammability‚ toxicity‚ or corrosivity‚ and categories within those classes‚ indicating the severity of the hazard. Signal words – ‘Danger’ or ‘Warning’ – are prominently displayed‚ conveying the level of risk. Hazard statements provide concise descriptions of the nature of the hazard‚ while precautionary statements offer advice on minimizing exposure.

WHMIS 2015 quizzes often present scenarios requiring you to match hazards to appropriate pictograms or identify the correct hazard statement based on a given situation. Mastering the information in Section 2 is therefore crucial for achieving a high score and demonstrating a solid understanding of chemical safety.

Section 16: Other Information

Section 16 of the Safety Data Sheet (SDS)‚ titled ‘Other Information‚’ often appears as a less emphasized area‚ yet it frequently contains details tested on WHMIS 2015 quizzes. This section provides crucial context regarding the SDS itself‚ including the date of preparation or last revision – a common quiz question element.

It details information about key literature references used in compiling the SDS‚ and importantly‚ clarifies the disclaimer regarding the information’s accuracy and completeness. Understanding this disclaimer is vital; the SDS provides guidance‚ but users are responsible for safe handling practices.

Quiz questions may focus on interpreting the revision date to determine the SDS’s currency‚ or understanding the limitations outlined in the disclaimer. This section also sometimes lists abbreviations and acronyms used throughout the document‚ which could be tested. Don’t overlook Section 16 when preparing for a WHMIS 2015 assessment; it’s a source of surprisingly frequent quiz content.

half baked vape pen instructions

Half Baked vape pens are gaining traction, offering diverse flavors and designs. Brands like Hangsen and HQD compete, while users seek guidance on safe disposal and troubleshooting.

What is a Half Baked Vape Pen?

Half Baked vape pens represent a category within the broader disposable vape market, quickly becoming recognized for their variety and accessibility. These devices are pre-filled, pre-charged, and designed for single-use convenience, eliminating the need for refilling or battery replacements. The brand, alongside others like Hotcig and Havana, focuses on delivering a flavorful vaping experience without complex setups.

They often feature a sleek, compact design and a wide range of e-liquid flavors. Understanding their basic function – inhaling to activate – is key for new users. Proper disposal, as highlighted in online resources, is crucial due to battery components.

Popularity and Market Presence

Half Baked vape pens have experienced a surge in popularity, driven by their ease of use and diverse flavor profiles. They compete within a crowded market alongside brands like Hangsen, HQD, and HotSpot, appealing to both new and experienced vapers. Online searches demonstrate growing consumer interest in disposal methods and troubleshooting common issues, such as blinking lights or lack of vapor production.

Their accessibility through authorized retailers and online platforms contributes to their widespread presence. The brand’s marketing and product innovation play a key role in maintaining market share.

Understanding the Components

Half Baked vape pens consist of a battery, e-liquid chamber, and coil. Proper function relies on coil resistance, battery specifications, and e-liquid capacity.

Battery Specifications

Half Baked vape pens, being disposable, typically feature integrated batteries. These are generally lithium-ion based, providing power for the duration of the device’s e-liquid capacity. Specific milliampere-hour (mAh) ratings vary between models, influencing overall longevity. Users shouldn’t attempt to recharge these batteries, as they are not designed for it and pose a safety risk. Battery issues, like failure to fire, can stem from internal connection problems or depletion. Always handle and dispose of batteries responsibly, following local regulations to prevent environmental harm and potential hazards.

E-Liquid Capacity

Half Baked disposable vape pens come pre-filled with e-liquid, eliminating the need for manual refilling. Capacity typically ranges from 2ml to 5ml, dictating the approximate number of puffs per device. The e-liquid composition usually includes propylene glycol (PG), vegetable glycerin (VG), nicotine, and flavorings. Lower capacity devices offer fewer puffs, while larger ones provide extended use. Once the e-liquid is depleted, the entire device is intended for disposal. Understanding the capacity helps users estimate device lifespan and plan for replacements, ensuring continuous vaping enjoyment.

Coil Resistance and Type

Half Baked disposable vape pens utilize integrated coils, typically ranging from 0.8Ω to 1.2Ω resistance. These coils are generally constructed from Kanthal or similar alloys. Lower resistance coils (closer to 0.8Ω) produce warmer vapor and more intense flavor, while higher resistance coils (around 1.2Ω) offer a cooler, more subtle vaping experience. As disposables, coil replacement isn’t possible; the entire device is discarded when the coil burns out. The coil’s resistance impacts battery life and e-liquid consumption, influencing overall device performance and longevity.

Initial Setup & First Use

Half Baked disposable vape pens require minimal setup. Simply unbox, inspect for damage, and ensure the device is adequately charged before initial use for optimal performance.

Unboxing and Inspection

Upon receiving your Half Baked vape pen, carefully examine the packaging for any signs of damage during transit. Gently open the box and verify that all components are present – typically, this is just the disposable vape pen itself, as they are pre-filled and pre-charged.

Thoroughly inspect the device for any visible cracks, leaks, or manufacturing defects. Pay close attention to the mouthpiece and the body of the pen. If you notice any damage, do not use the device and contact the retailer or manufacturer immediately. A pre-use inspection ensures a safe and enjoyable vaping experience, preventing potential issues later on.

Charging the Device

Most Half Baked vape pens are disposable and come pre-charged, eliminating the need for manual charging. However, if your device features a charging port (typically USB-C), ensure you use a compatible cable and power source. Avoid fast chargers, as they can potentially damage the battery.

When charging, a small indicator light will usually illuminate, signifying the charging process. Once fully charged, the light may change color or turn off. Do not overcharge the device, as this can reduce battery lifespan. Disconnect immediately upon completion to preserve optimal performance and safety.

Filling the Vape Pen with E-Liquid

This step primarily applies to refillable Half Baked vape pens, as most models are pre-filled disposables. Locate the filling port, usually on the side or top of the device. Carefully remove the mouthpiece or plug to access the tank. Use a suitable e-liquid bottle with a thin nozzle to prevent spills.

Slowly fill the tank, leaving a small gap near the top to avoid overflow. Avoid getting e-liquid into the central airflow tube. After filling, securely replace the mouthpiece or plug. Allow a few minutes for the e-liquid to saturate the coil before first use, preventing a dry hit.

Operating Instructions

Half Baked vape pens typically activate upon inhalation. Some models may feature power buttons or adjustable voltage settings for a customized vaping experience.

Powering On/Off

Disposable Half Baked vape pens generally don’t have a traditional power button. Activation occurs automatically when you begin to inhale; the device senses airflow and heats the e-liquid. If your pen isn’t firing, ensure it’s adequately charged and not depleted. For models with a button – typically rechargeable versions – quickly press the button five times in rapid succession to power the device on or off. A light indicator will usually confirm the action. If blinking persists after five presses, there might be an internal electronic issue requiring attention or disposal.

Adjusting Voltage/Wattage (if applicable)

Many Half Baked vape pens, particularly disposable models, do not offer adjustable voltage or wattage settings. They are designed for simplicity and ease of use with pre-set power levels. However, if you possess a rechargeable Half Baked device, it might feature adjustment capabilities. Typically, this involves pressing the power button three times quickly to cycle through available settings. A light indicator will display the current level. Experiment cautiously to find your preferred vapor production and flavor intensity, but always stay within the device’s specified limits.

Inhalation Technique

Using a Half Baked vape pen is generally straightforward. Most utilize a draw-activated firing mechanism – simply inhale to activate the device. Ensure a consistent, gentle draw; avoid harsh or rapid puffs. A slow, steady inhalation allows the coil to heat properly, maximizing flavor and vapor production. If you experience a burnt taste, reduce your inhalation strength. For optimal results, maintain a comfortable mouth-to-lung or direct-to-lung technique, depending on your preference and the device’s intended use. Remember to avoid prolonged inhales to prevent overheating.

Troubleshooting Common Issues

Half Baked vape pens may experience firing, leaking, or burnt taste issues. Coil connectivity and proper disposal are key concerns for users seeking solutions.

Vape Pen Not Firing

If your Half Baked vape pen isn’t firing, several issues could be at play. First, ensure the coil is securely screwed in and making proper contact with the device. A loose connection prevents power delivery. Secondly, check if the coil itself is shorting – this requires coil replacement.

A blinking light often indicates an electronic malfunction preventing operation. If charging doesn’t resolve the issue, the device may require professional assessment or replacement. Remember, disposable vape pens have limited lifespans, and consistent non-firing suggests end-of-life.

Leaking Issues

Experiencing leaks with your Half Baked vape pen is frustrating, but often addressable. Overfilling the e-liquid reservoir is a primary cause; avoid exceeding the device’s capacity. Ensure the device is stored upright to prevent liquid from seeping into the airflow pathways. Inspect the o-rings and seals for damage – replacements are crucial for a tight seal.

Condensation buildup can also mimic leaks, especially in humid environments. Gently wipe away any condensation. If leaks persist despite these measures, discontinue use and consider contacting the manufacturer for support or a potential replacement.

Burnt Taste

A burnt taste from your Half Baked vape pen usually indicates the coil is nearing the end of its lifespan or the e-liquid is too low. Immediately stop vaping to prevent further damage. If the tank isn’t empty, ensure sufficient e-liquid is present to saturate the coil; a dry hit causes the burning sensation.

Lowering the wattage or voltage can also help if the device allows adjustment. Regularly replacing the coil, as recommended by the manufacturer, is essential; If the burnt taste persists with a new coil, the device itself might have an issue requiring professional attention.

Weak Vapor Production

Experiencing weak vapor production with your Half Baked vape pen can stem from several causes. A low battery is a common culprit; ensure the device is fully charged. Also, check for airflow obstructions – debris can block air intake, reducing vapor. The coil might be saturated or degraded, requiring replacement for optimal performance.

If adjustable, increasing the wattage or voltage can boost vapor output. Confirm the e-liquid isn’t too viscous, as thicker liquids may not vaporize efficiently. Inspect for leaks, as they diminish vapor and potentially damage the device.

Safety Precautions

Prioritize battery safety, handle e-liquids carefully, and avoid overheating your Half Baked vape pen. Proper disposal is crucial for environmental responsibility and user well-being.

Battery Safety Guidelines

Half Baked vape pen batteries require careful handling to ensure safe operation. Avoid exposing the device to extreme temperatures, as heat or cold can compromise battery performance and potentially lead to malfunctions. Never attempt to disassemble or modify the battery pack, as this could create hazardous conditions.

Always charge the battery using a compatible charger and avoid overcharging, which can damage the battery and reduce its lifespan. Inspect the battery for any signs of damage, such as dents, swelling, or leakage, and discontinue use if any issues are detected. Store batteries in a safe, dry place away from flammable materials and metal objects.

E-Liquid Handling

Half Baked vape pens utilize e-liquid, demanding responsible handling practices. Always store e-liquid in a secure location, out of reach of children and pets, to prevent accidental ingestion. Ensure the e-liquid bottle is tightly sealed when not in use to avoid leakage and oxidation. Avoid direct sunlight and extreme temperatures, as these can degrade the liquid’s quality and flavor.

When filling the vape pen, exercise caution to prevent spills and contact with skin or eyes. If contact occurs, rinse thoroughly with water. Dispose of empty e-liquid bottles responsibly, following local regulations for hazardous waste.

Avoiding Overheating

Half Baked vape pens, like all vaping devices, can experience overheating. To prevent this, avoid prolonged, continuous use; allow the device to rest between puffs. Never leave your vape pen exposed to direct sunlight or in hot environments, such as a car dashboard. Ensure adequate ventilation during use, avoiding enclosed spaces.

If the device feels excessively warm, immediately discontinue use and allow it to cool down. Do not attempt to charge an overheated battery. Regularly inspect the battery for any signs of damage, and discontinue use if damage is detected. Proper care extends the lifespan and safety.

Disposal and Recycling

Dispose of Half Baked disposable vape pens responsibly, following local e-waste regulations. Do not discard with regular trash; seek designated recycling or disposal locations.

Proper Disposal Methods

Half Baked disposable vape pens contain electronic components and lithium batteries, requiring careful disposal. Never simply throw them in the trash or recycling bin, as this poses environmental and safety hazards. Locate designated e-waste recycling centers in your area; many retailers also offer take-back programs.

Check with your local waste management authorities for specific guidelines regarding vape pen disposal. Some municipalities have specific drop-off locations or collection events. Properly disposing prevents harmful chemicals from leaching into the soil and water, and ensures valuable materials are recovered for reuse, contributing to a more sustainable practice.

Environmental Considerations

The increasing popularity of disposable vape pens, like Half Baked, raises significant environmental concerns. These devices contribute to electronic waste, containing plastics, metals, and lithium-ion batteries. Improper disposal leads to soil and water contamination, releasing harmful chemicals.

Choosing rechargeable vape systems over disposables reduces waste. Supporting manufacturers committed to sustainable practices and responsible sourcing is crucial. Recycling programs, though improving, still face challenges. Consumers should prioritize reducing consumption and advocating for better regulations to minimize the environmental impact of vaping products.

Maintenance and Cleaning

Regular cleaning extends the lifespan of your Half Baked vape. Focus on the mouthpiece and promptly replace coils to maintain optimal flavor and performance.

Cleaning the Mouthpiece

Maintaining a clean mouthpiece is crucial for a hygienic and enjoyable vaping experience with your Half Baked vape pen. Over time, residue can build up, affecting the flavor and potentially harboring bacteria. To clean, gently detach the mouthpiece if possible – consult your device’s specific instructions.

Use a cotton swab dipped in isopropyl alcohol to carefully wipe the interior of the mouthpiece, ensuring you reach all crevices. Allow the alcohol to evaporate completely before reattaching. For stubborn residue, a warm water and mild soap solution can be used, followed by thorough rinsing and drying. Regular cleaning, ideally after each use or at least weekly, will keep your vape pen fresh and functioning optimally.

Coil Replacement Instructions

Replacing the coil in your Half Baked vape pen is essential for maintaining optimal performance and flavor; First, ensure the device is powered off and, if disposable, that it’s reached the end of its lifespan. For devices with replaceable coils, carefully unscrew or detach the old coil from the tank or pod.

Take the new coil, ensuring it’s compatible with your device, and gently screw or attach it into place. Prime the new coil by saturating it with e-liquid – add a few drops directly onto the coil wicking material. Allow the e-liquid to soak in for a few minutes before filling the tank and vaping.

Battery Care

Proper battery care is crucial for the longevity and safety of your Half Baked vape pen. Avoid exposing the device to extreme temperatures, whether hot or cold, as this can damage the battery. When charging, use only the provided USB cable and a reliable power source.

Never leave a charging device unattended. Do not overcharge the battery; disconnect it once fully charged. If you notice any signs of battery damage, such as swelling or leakage, discontinue use immediately and dispose of the device responsibly. Store your vape pen in a cool, dry place when not in use.

Frequently Asked Questions (FAQ)

Half Baked vape pen lifespan varies with usage. Use compatible e-liquids for optimal performance. Vaping safety is debated; research potential health risks thoroughly.

How long does a Half Baked vape pen last?

The lifespan of a Half Baked disposable vape pen is directly related to individual usage patterns and the specific model’s e-liquid capacity. Generally, these devices are designed to deliver approximately 500 to 600 puffs. For average users, this translates to roughly one to two weeks of consistent vaping.

However, heavy users may find that a pen lasts only a few days, while lighter users could extend its life to three weeks or more. Factors like the frequency of puffs, the length of each inhale, and storage conditions also play a role in determining overall longevity. Proper storage, avoiding extreme temperatures, can help maximize the pen’s lifespan.

What e-liquid should I use?

Half Baked vape pens, particularly the disposable varieties, typically come pre-filled with e-liquid, eliminating the need for users to purchase it separately. However, for refillable models or if you’re transitioning from another device, selecting the right e-liquid is crucial. Most Half Baked pens are designed for nicotine salt e-liquids, offering a smoother and more satisfying experience.

Consider the nicotine strength based on your preferences; options range from 20mg to 50mg. Flavor choices are extensive, mirroring the brand’s diverse offerings. Always ensure the e-liquid is compatible with your device and sourced from reputable vendors to guarantee quality and safety.

Is vaping safe?

Determining the safety of vaping, including with Half Baked vape pens, is complex. While often presented as less harmful than traditional smoking, vaping isn’t risk-free. Long-term effects are still under investigation, and potential health concerns exist, particularly regarding nicotine addiction and lung health.

Disposable vapes, like many Half Baked models, pose environmental challenges due to battery disposal. Responsible usage, including avoiding overheating and proper disposal, is vital. If you experience any adverse effects, such as coughing or shortness of breath, discontinue use and consult a healthcare professional immediately.

Warranty Information

Half Baked vape pens may have limited warranties covering manufacturing defects. Check with authorized retailers for specific coverage details and the claim process.

Coverage Details

Half Baked vape pen warranties typically cover defects in materials and workmanship under normal use. This doesn’t include damage from misuse, accidents, or unauthorized modifications. Warranty periods vary, often ranging from 30 to 90 days from the purchase date, but confirm specifics with the retailer.

Coverage usually extends to device malfunctions, like firing issues or leaking, but excludes coil lifespan or e-liquid compatibility problems. Proof of purchase is essential for any claim. The warranty is void if the device has been disassembled or tampered with. Always register your device if possible, to streamline the claim process.

Claim Process

To initiate a Half Baked vape pen warranty claim, first contact the authorized retailer where you purchased the device. Provide your proof of purchase and a detailed description of the defect. If the retailer cannot resolve the issue, contact Half Baked directly through their website’s “Help Center” or designated customer support channels.

You may be required to submit photos or videos demonstrating the defect. Half Baked will assess the claim and, if approved, offer a replacement device or a refund, at their discretion. Shipping costs for returns may be the responsibility of the customer, depending on the specific warranty terms.

Where to Purchase

Half Baked vape pens are available through authorized retailers and various online platforms. Explore wholesale options and business resources directly from Half Baked.

Authorized Retailers

Finding Half Baked vape pens at authorized retailers ensures product authenticity and quality. These stores are partnered directly with the brand, guaranteeing genuine products and often offering expert advice. Look for established vape shops in your local area that carry a wide selection of disposable vape devices.

Authorized retailers frequently provide information on current promotions, new flavor releases, and proper usage guidelines. They can also assist with any initial questions you may have regarding the device’s features or operation. Supporting authorized retailers helps maintain brand standards and consumer safety within the vaping community.

Online Availability

Half Baked vape pens are increasingly available through various online platforms, offering convenience and a broader selection. However, exercising caution is crucial when purchasing online to avoid counterfeit products. Stick to reputable online vape retailers with established track records and positive customer reviews.

Always verify the retailer’s authentication and ensure they comply with age verification requirements. Direct links to authorized online stores may be found on the official Half Baked website or social media channels. Be mindful of shipping restrictions and local regulations regarding vape product deliveries.

heka hoods installation guide pdf

Heka Hoods Installation Guide: A Comprehensive Overview

Heka Hoods provides detailed PDF installation guides upon order confirmation, offering a streamlined setup with specific fixing patterns and fastener details for DIY projects.

Heka Hoods represent a minimalist approach to awning hood systems, distinguished by their prefabricated, one-piece design that eliminates the need for cumbersome brackets during installation. Arriving on-site with a durable powder-coated finish, they promise a swift and straightforward setup process. Accessing the comprehensive installation guide PDF, provided post-order confirmation, is crucial.

This guide details specific fixing patterns and fastener requirements, ensuring a secure and aesthetically pleasing result. Heka Hoods prioritize ease of installation without compromising on quality or structural integrity, making them a popular choice for modern home renovations.

Understanding the Heka Hood System

The Heka Hood system is engineered for simplicity and efficiency, offering a prefabricated, one-piece solution that drastically reduces on-site installation time. The detailed installation guide PDF, accessible after purchase, is central to understanding the system’s components and proper procedures;

This document outlines essential fixing patterns and fastener specifications, guaranteeing a robust and visually appealing outcome. The system’s bracketless design and pre-finished surface contribute to a clean, modern aesthetic, simplifying the entire process from start to finish.

Safety Precautions Before Installation

Before starting, disconnect the power supply – a crucial safety step detailed in the Heka Hoods installation guide PDF, ensuring a secure process.

Disconnecting Power Supply

Prior to commencing any Heka Hoods installation, the installation guide PDF emphatically stresses the absolute necessity of disconnecting the power supply. This critical safety precaution minimizes the risk of electrical shock or damage during the process. The manual clearly states this as a non-negotiable step, ensuring installer safety and preventing potential hazards. Always verify power is off before handling any wiring or components near electrical sources. Following this instruction, found within the comprehensive PDF, guarantees a secure and trouble-free installation experience, protecting both personnel and property.

Importance of Following Instructions

The Heka Hoods installation guide PDF underscores the paramount importance of adhering strictly to provided instructions. Deviating from these guidelines can compromise structural integrity and void any warranties. The PDF details specific fixing patterns, fastener requirements, and leveling procedures crucial for optimal performance. Duayne Pearce emphasizes installing the product in a standard quality way, achievable only through diligent instruction-following. Proper installation, as outlined in the PDF, ensures the hood functions as designed, offering lasting protection and aesthetic appeal.

Downloading the Heka Hoods Installation PDF

Heka Hoods offers a seamless PDF download upon order confirmation, providing expert tips and step-by-step instructions for a successful DIY installation.

Accessing the PDF Upon Order Confirmation

Upon confirming your Heka Hoods order, you’ll receive immediate access to the comprehensive installation guide in PDF format. This digital resource is designed to ensure a smooth and efficient installation process. The PDF contains detailed instructions, diagrams, and crucial information regarding fixing patterns and necessary fasteners.

This readily available guide empowers you to confidently tackle the installation yourself, eliminating guesswork and potential errors. It’s a key component of the Heka Hoods commitment to a user-friendly experience, providing all the necessary support right at your fingertips, immediately after purchase.

Locating the Latest Versions of Manuals

Heka Hoods prioritizes providing customers with up-to-date resources. The latest versions of installation manuals, including the crucial PDF guide, are conveniently available in the dedicated download section on the official website. This ensures you’re always working with the most accurate and current installation procedures.

Regularly checking this section guarantees access to any revisions or improvements made to the installation process. Heka Hoods is committed to continuous improvement, and the download section reflects this dedication to providing the best possible support for a successful installation.

Finding Older Software Versions (If Needed)

While Heka Hoods recommends utilizing the latest PDF installation guide for optimal results, recognizing that specific projects might require compatibility with older systems is crucial. The website’s download section thoughtfully provides a link to access archived software versions and manuals.

This resource is particularly useful if working with pre-existing designs or addressing unique site conditions. Accessing these older versions ensures a smooth installation process, even when dealing with legacy systems or specific project requirements, maintaining flexibility and support.

Tools and Materials Required

Heka Hoods installation necessitates specific tools and fasteners, detailed within the PDF guide, ensuring a secure and efficient installation process for your awning hood.

Fixing Patterns and Fastener Requirements

Heka Hoods’ PDF installation guide meticulously outlines precise fixing patterns crucial for a robust installation. These patterns are designed to distribute load effectively, ensuring long-term stability and performance. The guide details specific fastener requirements – types, sizes, and materials – tailored to various wall substrates.

Selecting the correct fasteners is paramount; the PDF emphasizes this, preventing issues like pull-out or corrosion. It clarifies the number of fasteners needed per hood length, alongside recommended spacing. Adhering to these guidelines guarantees a secure, weather-resistant installation, maximizing the hood’s lifespan and functionality.

Essential Tools for Installation

The Heka Hoods installation PDF clearly lists essential tools for a smooth process. A high-quality spirit level is paramount for accurate alignment, preventing water pooling and ensuring aesthetic appeal. A power drill with appropriate drill bits – sized for the specified fasteners – is crucial for pre-drilling holes.

Additionally, a measuring tape, pencil, and potentially a rubber mallet are recommended. Safety glasses are vital for eye protection during drilling; The PDF doesn’t necessitate specialized tools, focusing on accessibility for DIY installers, promoting a quick and easy setup.

Step-by-Step Installation Process

The Heka Hoods PDF guides users through marking hole locations with a level, then pre-drilling those holes directly into the hood for secure mounting.

Marking Hole Locations with a Level

Heka Hoods installation PDF guides emphasize accuracy, advising installers to hold the hood firmly against the wall. Utilizing a level is crucial for establishing a perfectly horizontal line. This line then serves as a precise guide for marking the locations where the mounting holes will be drilled.

Carefully marking these points ensures proper alignment and a secure, aesthetically pleasing final installation. The PDF stresses the importance of double-checking these marks before proceeding to the pre-drilling stage, minimizing potential errors and ensuring a professional finish.

Pre-Drilling Holes in the Hood

The Heka Hoods installation PDF clearly instructs installers to pre-drill all holes directly into the hood itself. This preparatory step is vital for several reasons, facilitating easier screw insertion during the mounting process and preventing potential cracking or damage to the powder-coated finish;

The PDF doesn’t specify drill bit sizes, implying installers should use appropriately sized bits for the chosen fasteners. Accurate pre-drilling ensures a flush, secure fit, contributing to the overall structural integrity and long-term durability of the installed hood.

Structural Considerations & Wind Classification

The Heka Hoods PDF emphasizes that suitability depends on the application, site-specific wind classification, and sufficient structural support availability.

Site-Specific Wind Classification

Heka Hoods installation, as detailed in the PDF guide, necessitates a thorough understanding of site-specific wind classifications. This crucial step ensures the hood’s structural integrity and long-term performance. The PDF stresses that determining the appropriate wind rating for your location is paramount before commencing installation;

Factors like terrain, building height, and local wind codes must be considered. Incorrect wind classification could compromise the hood’s ability to withstand extreme weather events, potentially leading to damage or failure. Always consult local building regulations and engineering professionals to accurately assess your site’s wind conditions, referencing the PDF for guidance;

Ensuring Structural Suitability

The Heka Hoods installation PDF emphasizes verifying the structural capacity of the wall to which the hood will be affixed. This involves assessing the wall’s material – brick, timber, or concrete – and its ability to bear the hood’s weight, plus any anticipated wind loads.

The PDF guide details that insufficient structural support can lead to instability and potential failure. It’s vital to confirm adequate fixing points and use appropriate fasteners, as outlined in the document, to distribute the load effectively. Consulting a structural engineer is recommended for complex installations or uncertain wall conditions.

Leveling and Alignment During Installation

The Heka Hoods PDF guide stresses using a level for accurate installation; holding the hood against the wall and marking hole locations is key.

Using a Level for Accurate Installation

Heka Hoods’ installation PDF consistently emphasizes the critical importance of utilizing a level throughout the entire process. Achieving precise leveling is paramount for both aesthetic appeal and functional performance of the awning hood. The guide recommends, whenever feasible, securely holding the hood directly against the wall surface.

Subsequently, carefully mark the locations for the mounting holes, ensuring the level is properly positioned to guarantee a perfectly horizontal line. This meticulous approach minimizes potential alignment issues later in the installation, contributing to a professional and lasting result.

Maintaining Consistent Alignment

The Heka Hoods installation PDF stresses that consistent alignment is crucial for a visually appealing and structurally sound installation. After marking hole locations with a level, double-check alignment before pre-drilling. Any discrepancies at this stage can compound during fastening, leading to noticeable imperfections.

Regularly verify alignment as you proceed with securing the hood, ensuring it remains level and true to the initial markings. This proactive approach minimizes the risk of adjustments and ensures a seamless integration with the building facade, enhancing the overall aesthetic.

Troubleshooting Common Installation Issues

The Heka Hoods PDF guide addresses alignment problems and fastener difficulties, offering solutions for a smooth installation process and optimal hood performance.

Addressing Alignment Problems

Heka Hoods’ installation PDF emphasizes the critical importance of using a level throughout the process. If misalignment occurs, the guide recommends re-checking marked hole locations against the wall.

Holding the hood firmly in place while marking ensures accuracy. Pre-drilling holes correctly, as detailed in the PDF, minimizes shifting during fastening. Consistent alignment is maintained by frequently verifying levelness during each step.

Small adjustments can be made before fully tightening fasteners, guaranteeing a secure and visually appealing installation, as outlined in the comprehensive guide.

Dealing with Fastener Difficulties

The Heka Hoods installation PDF details specific fixing patterns and fastener requirements for various wall types. If encountering resistance during fastening, the guide advises verifying the correct fastener type is being used.

Ensure pre-drilled holes are appropriately sized, preventing stripping or damage. Applying even pressure while tightening is crucial, avoiding over-tightening which can compromise the hood’s integrity.

Consult the PDF for alternative fastening solutions if the initial method proves unsuitable, ensuring a secure and lasting installation, as per Duayne Pearce’s quality standards.

Heka Hoods and James Hardie Compatibility

Heka Hoods integrates seamlessly with James Hardie products; the installation PDF ensures proper attachment, maintaining both systems’ warranties and aesthetic appeal.

Integration with James Hardie Products

Heka Hoods are designed for harmonious integration with James Hardie siding, ensuring a clean and professional finish; The comprehensive installation PDF details specific considerations when mounting to James Hardie, including recommended fastener types and pre-drilling techniques to prevent damage.

Proper installation, guided by the PDF, maintains the integrity of both the Heka Hood system and the James Hardie cladding’s warranty. Careful adherence to the outlined procedures guarantees a secure and aesthetically pleasing result, maximizing the lifespan and performance of both building components.

Resources and Support

Heka Hoods offers assistance; access the installation PDF, or contact them directly. GreenCoast Design and D Pearce Constructions are also valuable resources.

Contacting Heka Hoods for Assistance

For direct support regarding your Heka Hoods installation, particularly concerning the installation guide PDF, reaching out to Heka Hoods themselves is recommended. They provide expert guidance to ensure a smooth and successful installation process.

You can connect with them through their official channels for specific queries related to fixing patterns, fastener requirements, or any troubleshooting encountered while referencing the PDF.

Additionally, GreenCoast Design and D Pearce Constructions, associated with Heka Hoods, can offer valuable insights and support during your project. Their expertise complements the detailed instructions within the PDF guide.

GreenCoast Design and D Pearce Constructions

GreenCoast Design and D Pearce Constructions are key collaborators with Heka Hoods, contributing to the quality and ease of installation detailed within the installation guide PDF. Duayne Pearce of D Pearce Constructions emphasizes installing the product with standard quality.

Their involvement ensures the PDF reflects practical, on-site experience, offering valuable context alongside the step-by-step instructions. They can provide additional support and clarification if needed, complementing the information found in the downloadable guide.

Consider their expertise for complex installations or specific site considerations.

samsung rf24r7201sr manual

Samsung RF24R7201SR Manual: Comprehensive Guide

This comprehensive guide details the Samsung RF24R7201SR refrigerator‚ offering user manuals‚ quick start guides‚ and troubleshooting resources in multiple languages—English‚ French‚ and Spanish.

Welcome to the Samsung RF24R7201SR refrigerator! This 24 cu. ft. French Door refrigerator is designed with both style and functionality in mind‚ offering advanced features for optimal food preservation and convenience. This manual serves as a complete resource‚ guiding you through setup‚ operation‚ maintenance‚ and troubleshooting.

Available documentation includes detailed user manuals in English‚ French‚ and Spanish‚ alongside a quick start guide for immediate use. Samsung provides resources for various regions‚ including Canada (CA) and the United States (US). Understanding your refrigerator’s capabilities will ensure years of reliable performance. Explore the SmartThings app connectivity and enjoy a modern refrigeration experience.

Safety Precautions and Warnings

Important safety information is crucial for operating your Samsung RF24R7201SR refrigerator safely. Always disconnect the power supply before cleaning or performing maintenance. Avoid storing flammable materials or liquids near the appliance. Do not attempt to repair the refrigerator yourself; contact qualified Samsung support for assistance.

Ensure proper grounding to prevent electrical shock. Keep ventilation openings clear of obstructions. Supervise children around the appliance‚ particularly regarding the water and ice dispenser. Improper use can lead to hazards; carefully review all warnings within the user manual before operation. Prioritize safety for a long-lasting and secure experience.

Unpacking and Installation

Carefully unpack your Samsung RF24R7201SR refrigerator‚ inspecting for any shipping damage. Remove all packing materials‚ including tape and protective films; Position the refrigerator on a level floor‚ ensuring adequate ventilation space around the sides and back – at least 2 inches.

Connect the water supply line according to local plumbing codes‚ checking for leaks. Ensure the power cord is properly grounded. Allow the refrigerator to stand upright for at least two hours before plugging it in to stabilize the refrigerant. Refer to the detailed installation instructions in the user manual for optimal setup;

Refrigerator Features Overview

The Samsung RF24R7201SR boasts a spacious interior with adjustable shelves and crisper drawers for optimal food storage. Enjoy convenient access to filtered water and ice via the external dispenser. This model features a modern design with a stainless steel finish‚ enhancing any kitchen aesthetic.

SmartThings app connectivity allows remote control and monitoring of the refrigerator’s functions. Benefit from advanced cooling technology‚ maintaining consistent temperatures throughout. Explore features like the Twin Cooling Plus™ system for preserving freshness and minimizing odor mixing. The user manual details each feature for maximum usability.

Ice and Water Dispenser Operation

The RF24R7201SR’s ice and water dispenser provides chilled refreshment on demand. To dispense water‚ firmly press a glass against the dispenser paddle. For ice‚ select either cubed or crushed ice using the designated button. Ensure the water supply is connected and the ice maker is turned on for proper operation.

The dispenser features automatic shut-off functionality. Regularly check the water filter for optimal water quality and replace as needed (refer to the manual). Avoid using excessive force when dispensing to prevent damage. The manual provides detailed instructions and troubleshooting tips for dispenser-related issues.

SmartThings App Connectivity

The Samsung RF24R7201SR refrigerator offers SmartThings app connectivity‚ enhancing your kitchen experience. Download the SmartThings app on your smartphone and follow the on-screen instructions to connect your refrigerator to your home Wi-Fi network. Once connected‚ you can remotely monitor and control various refrigerator functions.

Features include temperature adjustments‚ receiving alerts if the door is left open‚ and diagnosing potential issues. The app also allows for smart recipes and grocery list management. Refer to the manual for detailed pairing instructions and a comprehensive list of compatible features. Ensure a stable Wi-Fi connection for optimal performance.

Control Panel Functions

The RF24R7201SR’s control panel provides intuitive access to refrigerator settings. Located on the dispenser‚ it allows for precise temperature control for both the refrigerator and freezer compartments. Use the buttons to adjust settings‚ activate features like Power Freeze and Power Cool‚ and monitor current temperatures.

The display also indicates filter status and provides diagnostic alerts. Familiarize yourself with the icons and their corresponding functions as detailed in the user manual. Customization options‚ such as display brightness and sound volume‚ are also accessible through the control panel. Regular checks of the panel ensure optimal performance.

Temperature Settings and Adjustments

The RF24R7201SR allows precise temperature control for optimal food preservation. Use the control panel to set refrigerator temperatures between 37°F and 45°F‚ and freezer temperatures between -4°F and 6°F. Adjustments are made in incremental steps for fine-tuning;

The ‘Power Freeze’ and ‘Power Cool’ functions rapidly lower temperatures for quick freezing or chilling. Remember to return to normal settings after use. Consistent temperature is crucial; avoid frequent adjustments. Monitor temperatures regularly to ensure food safety and freshness. Refer to the manual for recommended settings based on food type.

Display Settings and Customization

The RF24R7201SR’s control panel offers display customization options for user convenience. Adjust brightness levels to suit ambient lighting‚ ensuring clear visibility. You can switch between Fahrenheit and Celsius temperature units. The display also allows for setting a screen saver‚ conserving energy when inactive.

Customize alert settings for door ajar warnings or filter replacement reminders. Explore options to disable or modify specific display features. Refer to the manual for detailed instructions on navigating the display menu and accessing all available customization settings. Personalize the display for a tailored user experience.

Food Storage Guidelines

Proper food storage maximizes freshness and minimizes waste within your RF24R7201SR refrigerator. Store meats and fish in the coldest sections‚ typically the lower shelves‚ to prevent spoilage. Dairy products benefit from consistent‚ moderate temperatures found in the mid-shelves. Fruits and vegetables thrive in humidity-controlled crisper drawers.

Avoid overcrowding shelves to ensure proper air circulation. Utilize airtight containers to prevent odor transfer and maintain moisture levels. Regularly check expiration dates and discard expired items. Following these guidelines preserves food quality and extends shelf life‚ optimizing your refrigerator’s efficiency.

Optimal Placement of Food Items

Strategic food placement within your RF24R7201SR ensures optimal preservation. The coldest zone‚ typically the bottom shelf‚ is ideal for raw meats and poultry‚ preventing cross-contamination. Mid-shelves suit dairy products like milk and cheese‚ maintaining consistent temperatures. Utilize the door bins for condiments and beverages‚ which experience temperature fluctuations.

Crisper drawers‚ designed for humidity control‚ are perfect for fruits and vegetables. Store delicate produce separately to prevent ethylene gas exposure. Avoid blocking air vents‚ ensuring even cooling throughout the refrigerator. Proper organization maximizes space and maintains food freshness.

Humidity Control and Crisper Drawers

The RF24R7201SR’s crisper drawers offer adjustable humidity control‚ extending the life of your produce. High humidity settings are best for leafy greens and vegetables prone to wilting‚ preserving their crispness. Lower humidity is ideal for fruits‚ minimizing spoilage from ethylene gas.

Properly utilizing these drawers prevents premature decay and maintains optimal flavor. Separate ethylene-producing fruits (apples‚ bananas) from ethylene-sensitive vegetables (broccoli‚ carrots). Regularly check and remove any spoiled items to maintain drawer hygiene and prevent contamination. This feature significantly reduces food waste.

Cleaning and Maintenance

Regular cleaning ensures optimal performance and hygiene for your RF24R7201SR refrigerator. Disconnect power before cleaning. Interior surfaces should be wiped down with a mild detergent and warm water solution‚ then rinsed and dried thoroughly. Avoid abrasive cleaners which can damage the finish.

The exterior‚ including stainless steel‚ benefits from regular cleaning with a stainless steel cleaner to prevent streaks and maintain its luster. Pay attention to door gaskets‚ ensuring they are clean for a proper seal. Consistent maintenance extends the refrigerator’s lifespan and preserves food quality.

Interior Cleaning Procedures

To effectively clean the RF24R7201SR’s interior‚ begin by removing all food items and shelving. Wash shelves and drawers with warm‚ soapy water‚ rinsing and drying completely before replacing. Wipe down interior walls and surfaces with a solution of mild detergent and water.

For stubborn stains‚ a baking soda paste can be gently applied. Ensure all detergent residue is removed with a clean‚ damp cloth. Pay close attention to door seals‚ cleaning them to maintain a tight seal. Regularly cleaning prevents odor buildup and maintains optimal hygiene within the refrigerator.

Exterior Cleaning and Stainless Steel Care

Maintaining the RF24R7201SR’s exterior‚ particularly the stainless steel finish‚ requires specific care. Use a stainless steel cleaner and a soft microfiber cloth‚ wiping with the grain to avoid scratches. Avoid abrasive cleaners‚ scouring pads‚ or harsh chemicals. For general cleaning‚ warm water and mild dish soap are sufficient.

Rinse thoroughly with a clean‚ damp cloth and dry immediately to prevent water spots. Regularly polishing the stainless steel will help preserve its luster. Clean the door handles frequently to remove fingerprints and smudges‚ ensuring a pristine appearance.

Troubleshooting Common Issues

This section addresses frequent problems with your RF24R7201SR refrigerator. If the ice maker isn’t producing ice‚ check the water supply line and ensure it’s not frozen or kinked; Verify the ice maker is turned on within the control panel settings. For water dispenser malfunctions‚ confirm the water filter isn’t clogged and the water supply is connected.

If the refrigerator isn’t cooling adequately‚ check the temperature settings and ensure the door seals are airtight. Unusual noises may indicate a leveling issue or a component needing service. Consult the full manual for detailed diagnostic steps and error codes.

Ice Maker Problems

Addressing ice maker issues in your RF24R7201SR begins with verifying the water supply. Ensure the water line isn’t frozen‚ kinked‚ or disconnected. Confirm the ice maker is switched ‘on’ via the refrigerator’s control panel; it may have been accidentally disabled. A clogged water filter significantly restricts water flow‚ hindering ice production – consider replacement.

If ice cubes are small or misshapen‚ the water pressure might be low. Check for proper freezer temperature settings; it needs to be cold enough for ice formation. If problems persist‚ consult the full manual for detailed troubleshooting steps and potential error codes related to the ice maker system.

Water Dispenser Malfunctions

If your RF24R7201SR’s water dispenser isn’t working‚ first check the water supply connection. Ensure the water line is securely connected and the shut-off valve is fully open. A frozen water line is a common culprit‚ especially in colder climates. Verify the water filter isn’t clogged; a restricted filter drastically reduces water flow.

Low water pressure can also cause issues. If the dispenser operates slowly‚ this is a likely cause. Consult the manual for instructions on resetting the dispenser. If problems continue‚ examine the dispenser’s internal components for ice blockages or leaks‚ and refer to the troubleshooting section.

Replacing the Water Filter

The Samsung RF24R7201SR refrigerator requires regular water filter replacement‚ typically every six months. Locate the filter within the refrigerator‚ usually in the upper-right corner. Gently twist the existing filter counterclockwise and pull it straight out. Before installing the new filter‚ ensure it’s properly aligned.

Push the new filter into the housing and twist clockwise until it locks into place. Flush the system by dispensing water for five minutes to remove any air or carbon particles. Reset the filter indicator on the control panel following the manual’s instructions. Proper filter replacement ensures clean‚ fresh-tasting water.

Replacing the Air Filter

Maintaining optimal air quality within your Samsung RF24R7201SR refrigerator is crucial‚ achieved through regular air filter replacement—recommended every six months. The air filter is typically located in the upper section of the refrigerator. Gently pull the filter cover forward and remove the old filter.

Insert the new air filter‚ ensuring it’s properly seated within the housing. Replace the filter cover‚ pushing it back into position until it clicks. This process eliminates odors and keeps the refrigerator environment fresh. Consult your user manual for specific location details and reset instructions‚ if applicable.

Technical Specifications

The Samsung RF24R7201SR is a 24 cubic foot French Door refrigerator. Key specifications include dimensions optimized for standard kitchen spaces and a focus on energy efficiency. While precise details vary‚ expect a voltage requirement of 120V and standard plug configuration.

The refrigerator features Twin Cooling Plus™ technology for optimal humidity levels. It also boasts an external ice and water dispenser. Further specifications‚ including weight‚ exact dimensions‚ and energy consumption‚ are detailed in the full user manual available for download from Samsung’s website‚ referencing file ID 7212423.

Warranty Information

Samsung provides a standard warranty for the RF24R7201SR refrigerator‚ covering defects in materials and workmanship. The specific duration and coverage details—typically one year for parts and labor‚ and potentially longer for the sealed refrigeration system—are outlined in the warranty documentation included with your purchase.

To initiate a warranty claim or for support‚ contact Samsung Support directly. Details for contacting them are available on the Samsung website. Retain your proof of purchase (receipt) as it’s required for all warranty service requests. Extended warranty options may also be available for purchase.

Coverage Details

The Samsung RF24R7201SR warranty generally covers parts and labor for one year from the date of original purchase. This includes defects in materials or workmanship under normal household use. The sealed system (compressor‚ condenser‚ evaporator‚ and connecting tubing) often receives extended coverage‚ potentially up to five or ten years‚ depending on the specific model and region.

Warranty exclusions typically include damage from misuse‚ accidents‚ improper installation‚ or unauthorized repairs. Cosmetic issues and normal wear and tear are also usually not covered; Review the full warranty statement for a comprehensive list of inclusions and limitations.

Contacting Samsung Support

For assistance with your Samsung RF24R7201SR refrigerator‚ several support options are available. You can visit the Samsung website (samsung;com) and utilize their online chat feature or submit a support request. Alternatively‚ you can call Samsung’s customer care center; the phone number varies by region‚ so check the official website for the correct contact information.

Samsung also offers support through the SmartThings app‚ providing access to troubleshooting guides and direct communication with support agents. When contacting support‚ have your model number (RF24R7201SR) and serial number readily available to expedite the process and ensure accurate assistance.