stretching ears guide

Stretching Ears: A Comprehensive Guide (Updated December 24, 2025)

Welcome to the definitive resource for safely modifying your earlobes! This guide details techniques, risks, and aftercare, ensuring a positive stretching journey․

Google’s innovative technologies and search capabilities are constantly evolving, mirroring the careful progression needed for successful ear stretching․

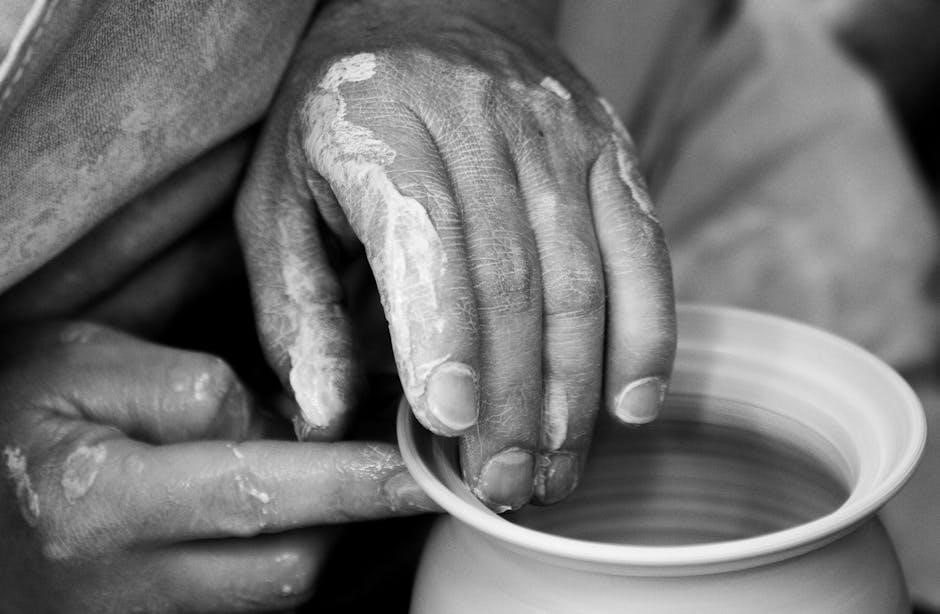
Ear stretching, a body modification practice, involves gradually increasing the size of earlobe piercings․ It’s a commitment requiring patience, diligent care, and a thorough understanding of the process․ Historically, ear stretching has deep cultural roots, signifying status, spirituality, or beauty across various societies – a practice as intricate as Google’s search algorithms․

This guide aims to provide a comprehensive overview, from anatomical considerations to potential complications․ Like navigating the vastness of information on Google, successful stretching demands informed decisions․ We’ll explore different methods, materials, and crucial aftercare routines․ Remember, prioritizing safety and hygiene is paramount, mirroring Google’s commitment to secure browsing with Chrome․

Understanding the commitment and potential risks is vital before embarking on this journey․ This isn’t a quick fix; it’s a gradual transformation, much like Google’s continuous innovation․

Understanding the Anatomy of the Ear

Before stretching, grasping the ear’s anatomy is crucial․ The earlobe, primarily composed of soft tissue and fat, lacks bone or cartilage – similar to how Google organizes information without rigid structures․ Stretching focuses on the lobule, the fleshy lower portion․ However, the surrounding skin and underlying tissues are delicate and prone to damage․

Blood supply to the earlobe is vital for healing; compromised circulation increases risk․ Nerves also reside within the lobe, making careful stretching essential to avoid discomfort or nerve damage․ Like Google’s complex network, the ear has interconnected parts․

Understanding these anatomical features informs safe stretching practices․ Ignoring this foundational knowledge is akin to searching Google without keywords – inefficient and potentially problematic․

Different Stretching Methods

Several techniques exist for earlobe modification, each with varying timelines and risk profiles․ Tapering, a common method, involves gradually increasing the gauge of a tapered plug․ Ice picking, though controversial, utilizes frozen implements to create small openings – a method discouraged due to high risk․ Orbital stretching employs rings to distribute pressure, potentially accelerating the process․

Choosing a method depends on individual tolerance and commitment․ Like selecting the right Google search tool, the best approach varies․ Tapering offers control, while orbital stretching demands careful monitoring․ Ice picking, similar to unreliable search results, is best avoided․

Each method requires patience and diligent aftercare for optimal results and minimal complications․

Tapering

Tapering is a widely used ear stretching method involving gradually increasing the gauge of a tapered plug; This process mimics Google’s iterative improvements to its search algorithms – slow, steady, and refined․ Begin with a comfortable gauge and incrementally increase, typically by 1 gauge (0․8mm) at a time․

High-quality steel or glass tapers are recommended, ensuring smooth insertion and minimal trauma․ Lubrication with a safe, water-based lubricant is crucial, reducing friction and discomfort․ Patience is paramount; rushing can lead to blowouts or tearing․

Like navigating Google’s vast information landscape, tapering requires careful attention and a measured approach for successful results․

Ice Picking

Ice picking, a controversial ear stretching method, involves using a hollow needle to create a small opening, then gradually increasing the gauge․ This technique, like exploring uncharted territories within Google’s search results, carries significant risks and is generally discouraged by reputable piercers․

The primary concern is tissue damage and increased susceptibility to infection․ The process lacks the controlled expansion of tapering and can easily lead to blowouts or tearing․ While some individuals advocate for its speed, the potential complications outweigh the benefits․

Prioritize safer, established methods․ Remember, responsible stretching, similar to Google’s commitment to user safety, is paramount․

Orbital Stretching

Orbital stretching is a more advanced technique involving a circular implant placed under the skin, creating the illusion of a larger gauge without directly stretching the lobe․ It’s akin to Google’s complex algorithms – a sophisticated system working beneath the surface․

This method requires a skilled professional for implantation and removal․ It’s not a beginner technique and carries risks like migration, infection, and scarring if performed incorrectly․ The initial procedure involves an incision and careful placement of the orbital․

Proper aftercare is crucial for successful healing․ Consider orbital stretching only after fully understanding the process and potential complications, prioritizing safety like Google prioritizes data security․

Materials Used for Stretching

Selecting appropriate materials is paramount for a healthy stretch, much like choosing the right tools for Google’s innovative projects․ Common materials include glass, stone, wood, acrylic, and steel – each with unique properties․

Glass and steel are non-porous, minimizing bacterial buildup, and are ideal for initial stretches․ Stone offers a natural aesthetic but requires careful sealing․ Wood, while visually appealing, is porous and demands diligent cleaning․ Acrylic is lightweight and affordable, suitable for larger gauges․

Tapers, used to gradually increase size, are typically made of steel or glass․ O-rings provide a secure fit and prevent plugs from falling out․ Prioritize biocompatible materials to reduce irritation and promote healing․

Plugs (Materials: Glass, Stone, Wood, Acrylic, Steel)

Ear plugs, the visible component of stretched ears, come in a diverse range of materials, mirroring Google’s diverse services․ Each material offers distinct advantages and considerations for comfort and healing․

Glass plugs are hypoallergenic and easy to clean, ideal for sensitive skin․ Stone plugs, like jade or obsidian, provide a natural look but require sealing․ Wood plugs offer unique aesthetics but are porous and need regular oiling․ Acrylic plugs are lightweight and affordable, perfect for daily wear․

Steel plugs are durable and resistant to bacteria․ Choosing the right plug material is crucial for preventing irritation and ensuring a smooth stretching process, much like Google prioritizes user experience․

Tapers (Materials: Steel, Glass)

Tapers are essential tools for gradually increasing earlobe gauge, functioning like Google’s search algorithms – progressively refining results․ They feature a conical shape, allowing for incremental stretching with minimal trauma․

Steel tapers are incredibly durable and maintain their shape well, making them a reliable choice for larger stretches․ However, they aren’t biocompatible for initial stretches․ Glass tapers are a popular option for beginners due to their smooth surface and hypoallergenic properties, reducing irritation․

Proper taper selection and careful insertion are vital․ Like Google’s commitment to secure browsing, prioritizing quality and technique minimizes risks during the stretching process․

O-Rings

O-rings serve as temporary placeholders during stretching, similar to Google’s ‘did you mean’ feature – offering a flexible alternative․ These small, circular pieces of jewelry are inserted after a taper to maintain the newly achieved gauge before inserting a plug․

They prevent the hole from shrinking between stretches, ensuring consistent progress․ O-rings are typically made from flexible silicone or rubber, offering comfort and ease of use․ Choosing the correct size is crucial; too small, and they’ll be uncomfortable, too large, and they won’t stay in place․

Like Google’s adaptable search results, O-rings provide a temporary, adjustable solution for maintaining stretched earlobes․

Preparing Your Ears for Stretching

Proper preparation is paramount, akin to Google indexing webpages for optimal search results – a foundational step․ Before initiating any stretching, assess your earlobe’s health․ Look for existing irritation, scars, or signs of infection․ Healthy lobes are crucial for a smooth process․

Begin by gently massaging your lobes daily to increase blood flow and elasticity․ This promotes healing and reduces discomfort․ Ensure your ears are clean and free of jewelry for several days prior to starting․

Like ensuring secure browsing with Google’s safety features, preparation safeguards your ear health during stretching․

Hygiene and Sterilization

Maintaining impeccable hygiene is non-negotiable, mirroring Google’s commitment to secure online experiences․ Sterilize all jewelry – tapers, plugs, and tools – before each use․ Use surgical steel, glass, or implant-grade materials to minimize allergic reactions․

Clean your ears twice daily with a sterile saline solution․ Avoid harsh soaps or alcohol-based cleaners, as these can cause irritation and dryness․ Wash your hands thoroughly before handling your jewelry or touching your ears․

Just as Google filters harmful content, diligent hygiene prevents infection and promotes healthy stretching․ A clean environment is vital for optimal healing and a positive outcome․

Assessing Ear Lobe Health

Before embarking on stretching, evaluate your earlobe’s condition, akin to Google’s diagnostic tools․ Ensure your lobes are naturally healthy, free from existing piercings that haven’t fully healed, or any signs of irritation․ Check for adequate elasticity; gently tug your lobe – it should have some give․

Individuals with keloids or a history of hypertrophic scarring should exercise extreme caution or avoid stretching altogether․ Consider your overall health; a compromised immune system can hinder healing․

Like Google’s search algorithms prioritizing reliable information, a healthy foundation is crucial for a successful and safe stretching journey․

The Stretching Process: A Step-by-Step Guide

Initiate stretching with a high-quality, sterile taper, mirroring Google’s precision․ Begin with a gauge 16 or 18, gently inserting the taper․ Apply lubricant generously – think of it as streamlining a search query․

Once inserted, secure with an O-ring․ Maintain this gauge for several weeks, prioritizing lobe health․ Gradually increase the gauge, never forcing it․ Patience is key, like refining a complex algorithm․

Regularly assess for irritation or tearing․ Remember, consistent, slow progression is paramount, ensuring a comfortable and safe stretching experience, much like Google’s continuous improvement․

Initial Stretch (Gauge 16-18)

The first stretch, utilizing a 16 or 18 gauge taper, is foundational․ Sterilize both taper and earlobe meticulously – akin to Google’s data security protocols․ Apply a water-based lubricant liberally to facilitate smooth insertion, minimizing trauma․

Gently insert the taper, rotating slowly․ If resistance is met, stop․ Forcing can cause tearing․ Secure the taper with a small O-ring to prevent slippage, maintaining consistent pressure․

Leave the initial taper in for several hours, then replace with a glass or implant-grade steel ring of the same gauge․ Monitor for redness, swelling, or pain – early detection is crucial, like Google Alerts․

Increasing Gauge Gradually

Patience is paramount when increasing gauge; avoid rushing the process․ A typical progression is to increase by only one or two gauges at a time, mirroring Google’s iterative product development․ Wait at least 4-6 weeks between stretches, allowing the tissue to fully adapt․

Use only high-quality, sterilized tapers and jewelry․ Lubricate generously before each insertion; Monitor your lobes closely for signs of stress – redness, thinning, or pain․ If irritation occurs, downsize immediately․

Remember, stretching is a long-term commitment, demanding consistent care and attention, much like maintaining a secure online presence with Google’s tools․

Stretching Schedule and Timeline

A realistic timeline is crucial; avoid comparing your progress to others․ Initial stretches (16-18g) may take 2-3 months to settle․ Moving to a 14g can take another 2-4 months, and so on․ This mirrors Google’s continuous improvement cycle․

A sample schedule: 16g (2 months), 14g (3 months), 12g (4 months), 10g (5 months), 8g (6 months), and beyond․ Adjust based on individual healing rates․ Consistent monitoring and proper aftercare are vital for success․

Remember, setbacks can occur․ Don’t hesitate to downsize if needed, prioritizing lobe health over speed, similar to Google’s focus on user experience․

Potential Risks and Complications

Ear stretching isn’t without potential issues․ Blowouts, where tissue tears, are common with rapid or improper stretching․ Tearing can occur from forceful insertion or inadequate healing․ Infections pose a significant risk if hygiene is neglected, mirroring security vulnerabilities․

Symptoms include redness, swelling, pain, and discharge․ Ignoring these signs can lead to severe complications․ Scar tissue formation is also possible, impacting future stretching or jewelry choices․ Like debugging software, addressing issues promptly is key․

Prioritize prevention through slow, consistent stretching and meticulous aftercare․ Recognizing early warning signs is crucial for minimizing long-term damage․

Blowouts

Blowouts occur when the stretching process exceeds the skin’s capacity to expand․ This results in a tear of the tissue behind the jewelry, often appearing as a raised bump․ They’re frequently caused by forcing larger gauges or stretching too quickly, similar to system overload․

Initial symptoms include pain, swelling, and noticeable distortion of the earlobe’s shape․ Mild blowouts may resolve with downsizing and diligent aftercare, but severe cases require professional attention․ Ignoring a blowout can lead to scarring and hinder future stretching․

Prevention is paramount: progress slowly, listen to your body, and ensure adequate lubrication during insertion․ Treat blowouts like critical errors – address them immediately!

Tearing

Tearing represents a more significant trauma than a blowout, involving a complete split of the earlobe tissue․ This often happens with rapid, forceful stretching or snagging jewelry, akin to a system crash․ Unlike a recoverable error, tearing frequently requires medical intervention․

Symptoms include sharp pain, bleeding, and a visible split in the lobe․ Immediate action is crucial: clean the wound, control bleeding, and seek professional medical attention․ Surgical repair may be necessary to close the tear and restore the lobe’s integrity․

Prevention centers on gentle stretching, secure jewelry, and avoiding trauma․ A tear can permanently alter the earlobe’s appearance, emphasizing the importance of caution․

Infections

Infections are a serious risk during ear stretching, stemming from bacteria entering the open wound created by the jewelry․ Poor hygiene, contaminated jewelry, or handling stretched ears with dirty hands dramatically increase the likelihood, similar to a virus corrupting a system․

Signs include redness, swelling, pain, pus-like discharge, and warmth around the piercing․ Ignoring these symptoms can lead to severe complications․ Immediate cleaning with saline solution and medical attention are vital․

Prevention relies on meticulous hygiene, sterile jewelry, and consistent aftercare․ An untreated infection can necessitate temporary removal of jewelry and antibiotic treatment․

Preventing and Treating Complications

Proactive care is paramount to avoiding stretching issues․ Maintaining impeccable hygiene, utilizing sterile jewelry, and adhering to a gradual stretching schedule are crucial preventative measures, akin to robust cybersecurity protocols․

For minor irritation, saline soaks and temporary downsizing can help․ Blowouts require immediate attention – do not force jewelry through․ Tearing necessitates professional medical care for proper closure․

Recognizing early infection signs (redness, swelling, discharge) is vital; seek medical advice promptly․ Consistent aftercare, including regular cleaning and jewelry rotation, minimizes risks and promotes healthy healing․

Recognizing Signs of Infection

Early detection is key when it comes to ear stretching infections․ Be vigilant for persistent redness extending beyond the immediate jewelry area, indicating inflammation․ Noticeable swelling, warmth to the touch, and increased sensitivity are also warning signals, much like identifying anomalies in a system․

Discharge – any fluid, especially if yellow, green, or foul-smelling – is a serious concern․ Pain that intensifies rather than diminishes over time requires immediate attention․ Fever or swollen lymph nodes signal a systemic infection needing medical intervention․

Don’t hesitate to consult a healthcare professional; self-treating can worsen the condition․

Proper Aftercare

Consistent aftercare is paramount for healthy ear stretching․ Twice-daily cleaning with saline solution is essential, gently removing any crust or debris․ Avoid harsh soaps, alcohol, or hydrogen peroxide, as these can irritate the skin and impede healing, similar to disrupting a delicate search algorithm․

Rotate your jewelry regularly, but only after ensuring your hands are thoroughly clean․ Minimize touching your lobes unnecessarily․ Be mindful of snagging jewelry on clothing or hair, which can cause trauma;

Maintain a healthy lifestyle, as overall wellness supports tissue repair․ A balanced diet and adequate hydration contribute to optimal healing․

Downsizing and Healing

Downsizing involves temporarily reducing jewelry gauge to encourage shrinkage and full healing of the stretching․ This is crucial after reaching a desired size or if taking a break from stretching, akin to refining search results for accuracy․

Gradually decrease the gauge, allowing weeks or months between changes․ Monitor for any signs of irritation or tearing․ Complete healing can take considerable time, even after downsizing․

Maintaining diligent aftercare during downsizing is vital․ Consider using emu oil or vitamin E to support skin health․ Patience is key; forcing a smaller gauge can cause damage and setbacks․

Long-Term Ear Care

Maintaining stretched ears requires consistent care, even after fully healed․ Regular cleaning with saline solution prevents buildup and minimizes infection risk, similar to Google’s constant indexing of web pages․

Avoid harsh chemicals or abrasive cleaners․ Rotate jewelry occasionally to promote airflow and prevent stagnation․ Be mindful of snagging, especially with larger gauges, as this can cause tearing․

Continued monitoring for any signs of irritation, migration, or blowouts is essential․ Lifestyle adjustments, like removing jewelry during sports, can protect your ears․ Prioritize healthy habits for lasting ear health․

Choosing the Right Jewlery

Selecting appropriate jewelry is crucial for comfortable and safe stretching․ Opt for high-quality materials like glass, surgical steel, or titanium, minimizing allergic reactions – much like Google prioritizes relevant search results․

Ensure jewelry is smooth, free of imperfections, and properly sized for your current gauge․ Avoid materials like nickel or plated metals, which can cause irritation․ Consider the weight of larger gauges to prevent stretching or tearing․

Regularly inspect jewelry for cracks or damage․ Proper fit and material selection contribute significantly to long-term ear health and prevent complications․

Alternatives to Ear Lobe Stretching

For those hesitant about permanent modification, several alternatives exist․ Temporary stretching with weighted hangers offers a gauge preview without commitment, similar to Google’s ‘try on’ features for products․

Ear weights can create the illusion of stretched lobes, providing a visual effect without the gradual process․ Consider decorative ear cuffs or illusion jewelry for a similar aesthetic․

Ultimately, exploring these options allows individuals to express their style without the long-term commitment of stretching․ Researching and understanding all possibilities is key to making an informed decision․

Cultural Significance of Ear Stretching

Ear stretching boasts a rich history, deeply interwoven with diverse cultural traditions worldwide․ Indigenous tribes in Africa and the Amazon have practiced ear modification for centuries, signifying status, beauty, and spiritual connection – akin to Google’s global reach connecting diverse cultures․

Historically, larger lobe sizes often denoted higher social standing or marked rites of passage․ Modern interpretations vary, ranging from personal expression to aesthetic preference․

Respecting these origins is crucial when engaging in ear stretching․ Understanding the historical context fosters appreciation and avoids cultural appropriation, promoting mindful body modification practices․

Finding a Reputable Piercer

Selecting a skilled piercer is paramount for a safe and successful stretching experience․ Just as Google prioritizes reliable information, you must prioritize a piercer with impeccable hygiene standards and extensive experience in ear stretching – not just initial piercings․

Look for a studio that utilizes autoclaves for sterilization, demonstrating a commitment to preventing infections․ Observe their practices; a clean, organized environment is essential․

Don’t hesitate to ask about their stretching techniques, aftercare advice, and experience with various gauges․ A reputable piercer will gladly answer your questions and ensure you feel comfortable and informed․

Resources and Further Information

Expanding your knowledge is crucial for responsible ear stretching․ Like Google’s vast information network, numerous resources are available to support your journey․ Online forums dedicated to body modification offer peer support and shared experiences, but verify information carefully․

Reputable piercing and modification websites provide detailed guides and aftercare instructions․ Remember, consistency in care is key, mirroring Google’s reliable service․

Consult with experienced piercers for personalized advice․ Explore books and articles on body art and anatomy․ Prioritize credible sources and always prioritize your ear health above trends․

all clad slow cooker user manual

All-Clad Slow Cooker User Manual: A Comprehensive Guide

Welcome! This comprehensive guide details operation, safety, and care for your All-Clad slow cooker, ensuring delicious results every time. Explore features and troubleshooting tips.

Discover how to maximize your cooking experience with detailed instructions and helpful recipes, all within this user manual.

All-Clad elevates home cooking with its renowned quality, and slow cookers are no exception. These appliances offer convenience and consistent results, perfect for busy lifestyles.

Designed for effortless meal preparation, All-Clad slow cookers utilize even heat distribution, ensuring food is cooked thoroughly and remains flavorful. From hearty stews to tender roasts, explore a world of culinary possibilities;

This manual provides essential information for optimal performance, safety guidelines, and maintenance tips, helping you unlock the full potential of your All-Clad slow cooker.

Understanding Your All-Clad Model

All-Clad offers various slow cooker models, each with unique features. Common models include the 6.5 QT Electric Slow Cooker (99007) and the 7Qt Plus Multi-cooker with browning capabilities.

Familiarize yourself with your specific model’s capacity, control panel layout, and available cooking settings. Some models feature programmable timers, sauté functions, and digital displays. Refer to the model number on your appliance for accurate information.

Understanding these distinctions ensures you utilize the correct settings and maximize the performance of your All-Clad slow cooker.

Key Features and Benefits

All-Clad slow cookers boast several key features, including durable ceramic inserts for even heating and easy cleanup. Many models offer multiple cooking settings – Low, High, and Warm – providing versatility for diverse recipes.

The browning/sauté function (on select models) allows for searing meats directly in the cooker, reducing dishwashing. Programmable timers offer convenience, while the stainless steel construction ensures longevity.

Benefits include flavorful, tender meals with minimal effort, and consistent cooking results.

Components of the Slow Cooker

Your All-Clad slow cooker consists of several essential components. These include the outer housing, providing structural support and housing the heating element. A removable ceramic insert facilitates easy serving and cleaning. The tight-fitting lid, often with a cool-touch handle, seals in moisture and heat.

The control panel allows for setting cooking time and temperature. Some models feature a separate glass lid for monitoring food without lifting. Understanding each component ensures safe and effective operation.

Ceramic Insert Details

The All-Clad slow cooker’s ceramic insert is designed for even heat distribution and easy cleanup. It’s removable, allowing for convenient serving and dishwasher-safe cleaning. Avoid sudden temperature changes, as this could cause cracking.

Inspect the insert for chips or cracks before each use. Do not use abrasive cleaners, as they can damage the surface. The ceramic insert is a key component for flavorful, slow-cooked meals, ensuring durability and safety.

Control Panel Overview

The All-Clad slow cooker’s control panel features intuitive settings for effortless operation. Typically, you’ll find Low, High, and Warm functions, alongside a digital timer for precise cook time programming. Some models include a browning/sauté function for searing ingredients directly in the insert.

The display clearly shows the remaining cook time. Familiarize yourself with the button layout for easy adjustments. Refer to the operating instructions for detailed explanations of each setting and function.

Lid and Sealing Mechanism

The All-Clad slow cooker lid is designed for a secure fit, trapping heat and moisture for optimal cooking. Ensure the lid is properly aligned and sealed before operation to maintain consistent temperatures. A tight seal prevents flavor loss and ensures efficient slow cooking.

Some models feature a condensation groove on the lid to collect moisture, preventing drips. Avoid removing the lid unnecessarily during cooking, as this releases heat and extends cook times. Handle the lid with care, especially when hot.

Initial Setup and Preparation

Before your first use, carefully unpack your All-Clad slow cooker and remove all packaging materials. Wash the ceramic insert and lid with warm, soapy water; rinse thoroughly and dry completely. Wipe down the exterior of the cooker with a damp cloth.

Familiarize yourself with all components and the control panel. Ensure the slow cooker is placed on a stable, heat-resistant surface away from flammable materials. Review the safety precautions outlined in this manual before operation.

First-Time Use Instructions

To condition your All-Clad slow cooker, perform a test run without food. Add 2 cups of water to the ceramic insert, cover with the lid, and set to ‘High’ for 1-2 hours. This helps eliminate any manufacturing odors.

After the cycle completes, carefully drain and discard the water. Wash the insert and lid again. This initial process prepares the cooker for optimal performance and ensures a clean, odor-free cooking experience. Now you are ready to begin slow cooking!

Safety Precautions

Always ensure proper voltage compatibility before operation, referencing the cooker’s base and manual. Never immerse the appliance base in water or other liquids. Avoid using extension cords; plug directly into a grounded outlet.

Use caution when handling the hot ceramic insert and lid. Allow to cool completely before cleaning. Do not operate the appliance if the cord or plug is damaged. Keep away from flammable materials during operation. Supervise children when the slow cooker is in use.

Operating Instructions

Begin by placing food inside the ceramic insert, then secure the lid. Select your desired cooking setting: Low for slow, gentle cooking; High for quicker results; or Warm to maintain temperature. Program the cook time using the control panel, adjusting as needed.

If your model features a browning/sauté function, utilize it before slow cooking to sear meats or soften vegetables. Always monitor the cooking process and follow recipe guidelines for optimal results.

Cooking Settings Explained (Low, High, Warm)

The Low setting provides gentle, consistent heat, ideal for tenderizing tougher cuts of meat over extended periods – typically 6-8 hours. High setting cooks food faster, usually in 3-4 hours, but may result in less tender results.

Warm setting maintains food temperature after cooking is complete, preventing spoilage. It’s not intended for initial cooking. Remember, cooking times are estimates; always ensure food reaches a safe internal temperature.

Programming the Cook Time

To program cook time, utilize the control panel’s hour and minute buttons. Press “Hour” then use the arrow keys to set the desired cooking duration. Repeat for “Minute.” Confirm your settings by pressing “Start.”

Some models feature a delay start function. Press “Delay” and set the desired start time. The slow cooker will automatically begin cooking at the programmed time. Always double-check the programmed time before leaving the appliance unattended.

Using the Browning/Sauté Function (if applicable)

If your All-Clad model includes a browning or sauté function, it allows for searing meats and vegetables directly in the ceramic insert before slow cooking. Select the “Brown” or “Sauté” setting on the control panel.

Add oil to the insert and heat. Carefully add ingredients and brown to your liking. Exercise caution as the insert and exterior will become hot. Once browned, select your desired slow cooking setting (Low, High, or Warm) to continue cooking.

Recipes and Cooking Tips

Unlock culinary possibilities with your All-Clad slow cooker! Recommended cooking times vary; tougher cuts benefit from longer, low-temperature cooking. For optimal flavor, ensure ingredients are submerged in liquid – adjust ratios as needed.

To thicken sauces, remove a cup of cooking liquid near the end and whisk with cornstarch or flour before returning to the cooker. Experiment with herbs, spices, and seasonings for personalized dishes. Enjoy!

Recommended Cooking Times for Various Foods

Beef chuck roast typically requires 6-8 hours on low or 3-4 hours on high. Pork shoulder benefits from 8-10 hours on low, becoming incredibly tender. Chicken pieces cook in 4-6 hours on low or 2-3 on high.

Dried beans need 6-8 hours on low (do not pre-soak!). Root vegetables like carrots and potatoes soften in 4-6 hours on low. Always check for doneness, adjusting time as needed for your All-Clad model.

Liquid Ratios for Slow Cooking

Generally, cover ingredients with enough liquid to come about halfway up the sides – avoid completely submerging. For most meats, ½ to ¾ cup of liquid per pound is sufficient.

Remember, slow cookers retain moisture, so less liquid is needed than traditional methods. Thicker sauces may require additional liquid initially. Adjust based on desired consistency; you can always thicken later!

Thickening Sauces and Juices

To achieve a richer consistency, remove approximately one cup of cooking liquid towards the end of the cooking cycle. Whisk this liquid with a tablespoon of cornstarch or flour to create a slurry.

Return the slurry to the slow cooker and continue cooking on high for 10-15 minutes, or until thickened. Alternatively, mash some of the cooked vegetables into the sauce for natural thickening. Avoid adding too much flour directly, as it can clump.

Care and Maintenance

Maintaining your All-Clad slow cooker ensures longevity and optimal performance. Always unplug the unit and allow it to cool completely before cleaning. The ceramic insert is dishwasher safe, but hand washing is recommended to preserve its finish. Avoid abrasive cleaners on both the insert and exterior.

Wipe the exterior and control panel with a damp cloth. Store the slow cooker in a cool, dry place when not in use, with the lid slightly ajar to prevent odors. Never immerse the base in water.

Cleaning the Ceramic Insert

For easy cleaning, the All-Clad ceramic insert is dishwasher safe, offering convenience after delicious slow-cooked meals. However, hand washing with warm, soapy water is recommended to maintain its pristine condition and prevent potential damage over time. Avoid using abrasive cleaners, scouring pads, or steel wool, as these can scratch the surface.

Stubborn food residue can be soaked in warm, soapy water before washing. Dry the insert thoroughly before storing or reassembling the slow cooker.

Cleaning the Exterior and Control Panel

To clean the exterior of your All-Clad slow cooker, simply wipe it down with a damp cloth and mild dish soap. Avoid using abrasive cleaners, as they can damage the finish. For the control panel, use a slightly damp cloth – never immerse it in water!

Ensure the cooker is unplugged before cleaning. Stubborn stains can be gently removed with a non-abrasive cleaning solution. Dry both the exterior and control panel thoroughly before use or storage to prevent any electrical issues.

Storage Instructions

Before storing your All-Clad slow cooker, ensure it is completely cool, clean, and dry. Store the unit in a cool, dry place, away from direct sunlight and moisture; Avoid stacking heavy items on top of the cooker, which could cause damage.

The ceramic insert can be stored separately, ensuring it’s protected from chipping. If storing for an extended period, consider placing a layer of paper between the lid and the base to prevent any potential sticking.

Troubleshooting Common Issues

If your slow cooker isn’t turning on, verify the power cord is securely plugged into a functioning outlet. For food not cooking properly, ensure the lid is sealed correctly and the correct cooking setting (Low, High, Warm) is selected.

Error codes indicate specific problems; consult the manual for their meanings. If issues persist, avoid disassembly and contact All-Clad customer support. Always check voltage compatibility before use to prevent electrical problems.

Slow Cooker Not Turning On

If the unit fails to power on, first confirm the power cord is firmly connected to both the slow cooker and a working electrical outlet. Test the outlet with another appliance to rule out an outlet issue. Check the fuse or circuit breaker; a tripped breaker can prevent operation.

Ensure the control panel is not locked, if applicable. If problems continue, do not attempt to repair the unit yourself; contact All-Clad customer support for assistance and potential service options.

Food Not Cooking Properly

If food isn’t cooking as expected, verify the slow cooker is set to the correct cooking setting (Low, High, or Warm). Ensure the lid is securely in place; significant heat loss occurs with an improper seal. Check liquid levels – insufficient liquid can hinder cooking.

Avoid frequently lifting the lid during cooking, as this releases heat and extends cooking time. Confirm the power cord is securely connected. If issues persist, consult recommended cooking times for various foods.

Error Codes and Their Meanings

Should your All-Clad slow cooker display an error code, consult this section for clarification. While specific codes vary by model, common issues include “E1” indicating a temperature sensor malfunction, or “E2” signaling a heating element problem. “E3” might suggest a lid-sealing issue.

If an error persists after troubleshooting, disconnect the unit and contact All-Clad customer support with the error code for assistance. Do not attempt self-repair, as this could void your warranty.

Warranty Information

All-Clad slow cookers are warranted against defects in materials and workmanship for a period of three years from the date of original purchase. This warranty covers normal household use and does not include damage from misuse, abuse, or unauthorized repairs.

To make a warranty claim, contact All-Clad customer service with proof of purchase. The warranty does not cover normal wear and tear, or damage resulting from improper cleaning or maintenance. See full details online.

Downloading the PDF Manual

For convenient offline access, you can download the complete All-Clad slow cooker user manual in PDF format from the official All-Clad website. This allows you to easily reference instructions, recipes, and troubleshooting tips without an internet connection.

Two viewing options are available: full-screen viewing directly on the website or downloading the PDF file to your computer or mobile device. Ensure you have a PDF reader installed to open and view the downloaded manual.

Hob/Cooker Top Suitability

The All-Clad Stainless Steel collection, encompassing many slow cooker components, demonstrates exceptional versatility and compatibility with various hob or cooker top types. It’s specifically designed to perform optimally on all surfaces, including gas, electric, ceramic, and induction cooktops.

Notably, it excels when used on induction cookers, providing efficient and even heat distribution. However, remember that the slow cooker insert itself is not intended for direct use on a hob/cooker top.

Voltage and Electrical Instructions

Ensure your All-Clad slow cooker is operated using a voltage compatible with your household electrical supply. Always refer to the appliance’s base or packaging for specific voltage requirements. Crucially, All-Clad instructions emphasize using the cooker with the correct voltage to prevent damage or safety hazards.

Do not utilize adapters or converters unless absolutely necessary and properly grounded. Improper electrical connections can void the warranty and pose a risk of electric shock. Inspect the power cord regularly for damage.

certificate of medium of instruction

What is a Certificate of Medium of Instruction (MOI)?

The Medium of Instruction (MOI) certificate verifies the language used for teaching your coursework; it’s frequently required for various processes․

Essentially, it’s an official statement from your school confirming the language of your degree program, proving your educational background․

This document certifies the language in which an individual received their education, acting as official verification of linguistic instruction․

Definition and Core Purpose

A Medium of Instruction Certificate (MOI) is a formally recognized document issued by an educational institution․ It explicitly states the language utilized for delivering instruction throughout a specific academic program – typically a degree․ The core purpose of this certificate is to provide official validation that a student was taught primarily in a particular language, often English, but not exclusively․

This isn’t merely a statement of language preference; it’s a confirmation of the actual language of teaching․ It serves as proof that the student has been immersed in an academic environment where the specified language was the primary means of communication and knowledge transfer․ The MOI certificate is crucial for individuals needing to demonstrate their language proficiency for purposes beyond standard English proficiency tests․

It’s a direct attestation from the educational provider regarding the linguistic environment of the completed studies, offering a specific and verifiable record of instructional language․

The Role of Language in Education

Language is fundamentally integral to the educational process, serving as the primary vehicle for knowledge acquisition and critical thinking․ The language of instruction directly impacts a student’s comprehension, engagement, and overall academic success․ When instruction aligns with a student’s linguistic capabilities, learning is significantly enhanced․

The Medium of Instruction Certificate (MOI) acknowledges this crucial relationship․ It recognizes that a student’s academic experience is deeply shaped by the language in which they receive their education․ Demonstrating proficiency through an MOI certificate validates a student’s ability to thrive in an academic setting utilizing that specific language․

Furthermore, it highlights the institution’s commitment to providing education in a defined language, assuring recipients of a consistent and linguistically appropriate learning environment․ This certificate underscores the importance of language as a cornerstone of effective education․

Why is an MOI Certificate Required?

An MOI certificate is often required for immigration, higher education admissions, and employment verification, serving as proof of linguistic instruction․

Immigration Purposes

The MOI certificate frequently plays a crucial role in immigration applications, particularly when demonstrating English language proficiency is a requirement for visa approval or permanent residency․

Immigration authorities often accept an MOI certificate as valid evidence that an applicant received education in English, potentially waiving the need for standardized English proficiency tests like IELTS or TOEFL․

This is especially relevant for individuals who completed their degrees in countries where English is not the native language, but instruction was delivered in English․

The certificate serves as official documentation confirming the medium of instruction, satisfying immigration criteria and streamlining the application process․ It provides a clear and verifiable record of linguistic competence gained through formal education․

However, specific immigration requirements vary by country, so it’s essential to confirm acceptance of MOI certificates with the relevant immigration authorities․

Higher Education Admissions

Universities and colleges globally often require applicants to demonstrate English language proficiency for admission․ The MOI certificate presents a viable alternative to traditional tests like TOEFL, IELTS, or PTE in certain circumstances․

If a student completed their prior education – such as a bachelor’s degree – in a program where the medium of instruction was entirely English, the MOI certificate can fulfill the language requirement․

This eliminates the need for applicants to retake an English proficiency test, saving both time and expense․ Institutions recognize the certificate as proof of a student’s ability to understand and engage with academic material in English․

However, acceptance policies differ; some universities may only accept MOI certificates from recognized institutions, while others might require a minimum duration of English-medium instruction․

Always verify the specific requirements of the target university regarding MOI certificate acceptance․

Employment Verification

Employers, particularly in multinational corporations or roles requiring frequent international communication, frequently verify an applicant’s English language skills․ The MOI certificate can serve as valuable documentation in this process, demonstrating a candidate’s established proficiency․

For individuals whose prior education was conducted entirely in English, the certificate offers concrete evidence of their ability to comprehend, articulate, and operate effectively in an English-speaking professional environment․

It can streamline the verification process, potentially reducing the need for separate English language assessments conducted by the employer․ This is especially useful when applying for positions abroad or with companies prioritizing English fluency․

The certificate confirms the candidate’s academic background involved consistent use of English, indicating a strong foundation in both written and spoken communication․ However, employers may still consider other factors alongside the MOI certificate․

Ultimately, it strengthens a candidate’s profile and showcases their linguistic capabilities․

Issuing Institutions and Validity

Universities and colleges officially issue MOI certificates, alongside recognized educational boards, confirming the language of instruction used during studies․

Universities and Colleges

Universities and colleges are the primary issuers of Medium of Instruction (MOI) certificates, serving as the official source for verifying the language used during a student’s academic program․ These institutions have established procedures for requesting and providing these documents, typically involving a formal application process through the registrar’s office or a designated student services department․

When a student requires an MOI certificate, they generally need to submit a request to their former university or college, often including details like their student ID, program of study, and the specific dates of enrollment․ If the original certificate is lost or damaged, universities usually offer a re-issuance service, potentially with a small administrative fee․ However, it’s important to note that processing times can vary significantly depending on the institution’s workload and internal procedures․ Some universities may also require an official letter explaining the reason for needing the certificate, especially if it’s for immigration or employment purposes․

Recognized Educational Boards

While universities and colleges are the most common issuers, certain recognized educational boards may also be authorized to provide Medium of Instruction (MOI) certificates, particularly for secondary or vocational education․ These boards often operate under the authority of national or regional education ministries, ensuring their certificates are widely accepted․

However, the acceptance of MOI certificates from educational boards can be less consistent than those from universities․ Immigration authorities or educational institutions may have specific lists of recognized boards, and certificates from non-listed boards might not be accepted․ Therefore, it’s crucial to verify the board’s recognition status with the relevant receiving institution or government agency before applying for the certificate․ Furthermore, the documentation requirements from these boards may differ, potentially including attestation from the relevant ministry of education to confirm the certificate’s authenticity and validity․

Certificate Validity Period

The validity period of a Medium of Instruction (MOI) certificate isn’t universally standardized; it largely depends on the issuing institution and the purpose for which the certificate is being used․ Many universities issue certificates with an indefinite validity, meaning they don’t have an expiration date explicitly stated on the document․

However, immigration authorities or educational institutions often impose their own validity timelines․ Generally, an MOI certificate is considered valid for two to five years from the date of issue․ If a certificate is older than this timeframe, it may be rejected, necessitating a re-issuance․ If your university cannot reissue the certificate promptly, an official letter explaining the delay can sometimes be accepted as temporary proof․ Always check the specific requirements of the organization requesting the certificate to ensure compliance and avoid potential issues․

MOI Certificate vs․ English Proficiency Tests

A Medium of Instruction Certificate serves as an alternative to tests like IELTS, TOEFL, or PTE, verifying language skills through prior education․

Acceptance as an Alternative

The MOI certificate is increasingly recognized as a viable alternative to standardized English proficiency tests, offering a pathway for students who completed their prior education in English․

Many universities and immigration authorities now accept it as proof of English language competency, streamlining the application process for eligible individuals․ This acceptance stems from the understanding that sustained instruction in English demonstrates a functional level of language proficiency․

However, acceptance isn’t universal; policies vary significantly between institutions and countries․ Some may only accept MOIs from recognized educational boards or universities, while others might require a minimum duration of study in English․ It’s crucial to verify specific requirements with the intended recipient before relying on an MOI certificate․

Essentially, the MOI provides documented evidence of English language immersion within an academic setting, offering a practical demonstration of language skills acquired through formal education․

Situations Where MOI is Preferred

The MOI certificate is particularly preferred in scenarios where applicants have completed substantial portions of their education in English-speaking environments, but lack recent standardized test scores․

It’s often favored by students from countries where English is a widely used language of instruction, offering a more direct and relevant demonstration of their language abilities․ Furthermore, it can be a cost-effective alternative to expensive proficiency tests like IELTS or TOEFL, reducing financial burdens on applicants․

Immigration authorities sometimes prioritize MOI certificates when assessing applications from individuals with educational backgrounds in Commonwealth countries or other regions with established English-medium education systems․ It’s also beneficial when a university cannot reissue a previous English proficiency test result․

Ultimately, the MOI certificate provides a practical and verifiable record of sustained English language exposure within a formal academic context․

Comparison with IELTS, TOEFL, and PTE

While IELTS, TOEFL, and PTE directly assess an individual’s current English language proficiency, the MOI certificate demonstrates prior sustained exposure to English as the language of instruction․

Unlike standardized tests focusing on reading, writing, listening, and speaking skills, the MOI confirms the medium through which education was delivered․ It’s an alternative, not a direct equivalent, often accepted where significant education occurred in English․

IELTS, TOEFL, and PTE scores are typically valid for two years, requiring retakes․ An MOI certificate, however, reflects a completed educational period․ It’s particularly useful when recent test scores aren’t available or desired․

Essentially, proficiency tests measure current ability, while the MOI certificate validates past immersive learning, offering a different, yet valuable, form of evidence․

Required Documentation and Application Process

Typically, applications demand a university letter, official transcripts, completed forms, and associated fees to obtain a valid MOI certificate efficiently․

University Letter Requirements

Universities requesting an MOI certificate often necessitate an official letter confirming the medium of instruction used during your studies․ This letter must be issued on the institution’s letterhead, clearly stating the program name, duration of study, and crucially, the language in which instruction was primarily delivered․

The letter should explicitly mention that the course was taught in English (or the relevant language) and should be signed by an authorized university official – typically from the registrar’s office or academic department․ Some institutions may have a specific template for this letter, so checking their requirements beforehand is vital․

If the university is unable to reissue the original MOI certificate, the official letter serves as acceptable documentation, confirming the inability to provide the original or outlining the expected reissuance timeline․ This is particularly useful when dealing with older certificates or institutions with lengthy processing times․

Official Transcript Submission

Alongside the university letter, submitting an official academic transcript is frequently a mandatory component of the MOI certificate application process․ This transcript serves as supporting documentation, verifying the courses completed and the period of enrollment at the educational institution․ It must be an official, sealed copy sent directly from the university to the requesting authority․

The transcript doesn’t explicitly state the medium of instruction, but it corroborates the information provided in the university letter, establishing the validity of your academic record․ Ensure the transcript clearly displays your name, date of birth, program of study, and the grades achieved․

Some institutions may require a translated transcript if the original is not in English․ Always check the specific requirements of the requesting organization to ensure full compliance and avoid delays in processing your application․

Application Forms and Fees

Most institutions issuing MOI certificates require applicants to complete a dedicated application form․ These forms typically request personal details, academic history, and specifics about the program for which the certificate is needed․ Downloadable forms are often available on the university’s website, or you may need to request one directly from the registrar’s office․

Alongside the completed form, a processing fee is almost always applicable․ The fee amount varies significantly depending on the institution and the urgency of the request․ Payment methods can include online transfers, bank drafts, or on-campus payments;

Carefully review the application instructions and ensure all sections are filled accurately to avoid rejection․ Retain a copy of the completed form and payment receipt for your records․

Common Challenges and Solutions

Lost or damaged certificates require requesting a duplicate, while delays can be addressed by following up with the issuing institution promptly․

Lost or Damaged Certificates

Dealing with a lost or damaged Medium of Instruction (MOI) certificate can be stressful, but solutions are readily available․ The primary step involves contacting the issuing institution – your university or college – immediately to report the loss or damage․ Most institutions have a specific procedure for requesting a duplicate copy․

This typically involves submitting a formal application, potentially accompanied by a small fee․ Be prepared to provide identifying information, such as your student ID number, date of birth, and details about your program of study․ Some institutions may also require a police report if the original certificate was lost due to theft․

If the institution is unable to reissue the original certificate quickly, an official letter confirming this situation, and outlining when a replacement will be available, can often be accepted as a temporary solution․ This is particularly useful when facing urgent deadlines for immigration, education, or employment purposes․ Always keep a digital copy of any application submitted and any correspondence received․

Delayed Certificate Issuance

Experiencing delays in receiving your Medium of Instruction (MOI) certificate is unfortunately common, often due to administrative backlogs at the issuing institution․ If you’ve applied and haven’t received your certificate within the expected timeframe, proactive communication is crucial․ Begin by contacting the relevant department at your university or college to inquire about the status of your application․

Document all communication, including dates, times, and the names of individuals you speak with․ If the delay persists, request a formal letter from the institution explaining the reason for the delay and providing an estimated date of issuance․ This letter can be invaluable when submitting applications for immigration, higher education, or employment․

In some cases, an official letter stating the institution cannot currently reissue the certificate, along with the anticipated issuance date, may be accepted as a temporary substitute․ Maintaining patience and persistent follow-up are key to resolving this issue efficiently․

Non-Recognized Institutions

A significant challenge arises when attempting to obtain an MOI certificate from an institution that isn’t officially recognized by relevant authorities․ Immigration departments, universities, and employers typically require certificates from accredited educational boards or universities․ If your educational institution falls outside these parameters, securing an MOI certificate becomes considerably more difficult․

In such scenarios, alternative documentation may be necessary․ This could include official transcripts accompanied by a sworn affidavit attesting to the language of instruction․ Some organizations may accept a letter from a qualified translator verifying the language used in your coursework․

However, acceptance isn’t guaranteed, and it’s crucial to verify specific requirements with the requesting entity beforehand․ Thorough research and proactive communication are essential to navigate this complex situation and explore all possible avenues for demonstrating your medium of instruction․

modine heater manual

Modine Heater Manual: A Comprehensive Guide

This manual provides essential guidance for installing, operating, and maintaining Modine heating solutions, including the Hot Dawg, Effinity93, and MEW series.

It covers troubleshooting common issues like flame loss, ignition failures, and pilot light problems, ensuring efficient and safe heater performance for owners.

Modine Manufacturing Company stands as a prominent leader in the HVAC industry, renowned for its innovative and efficient heating solutions. With a legacy spanning decades, Modine consistently delivers high-quality heaters designed for diverse applications, from commercial spaces to industrial facilities.

Their product portfolio encompasses a wide range of heaters, including the popular Hot Dawg series, the high-efficiency Effinity93 unit heaters, and the corrosion-resistant MEW electric heaters. Modine’s commitment to technological advancement ensures optimal performance and reliability, making them a trusted choice for heating needs.

Understanding Modine Heater Types

Modine offers a diverse selection of heaters tailored to specific heating requirements. The Hot Dawg series provides robust and cost-effective heating for various environments, while the Effinity93 unit heaters deliver exceptional efficiency, boasting up to 93% efficiency.

For applications demanding corrosion resistance, the MEW electric heaters offer a reliable and durable solution. Understanding the unique features of each series – BTU output, efficiency ratings, and construction materials – is crucial for selecting the optimal heater for your needs.

Hot Dawg Series Heaters

Modine’s Hot Dawg heaters are renowned for their durability and straightforward operation, making them a popular choice for diverse applications. These gas-fired unit heaters are known for their compact design and efficient heat output.

Troubleshooting common issues like flame loss often involves checking gas pressure and the igniter. Regular inspection of the heat exchanger is vital to prevent pilot light problems. Proper maintenance ensures reliable performance, providing consistent warmth and cost-effective heating solutions.

Effinity93 Unit Heaters

The Effinity93 represents Modine’s commitment to high-efficiency heating, boasting an impressive 93% efficiency rating. Available in models ranging from 135,000 to 310,000 BTU/hr, these gas-fired unit heaters deliver substantial warmth for various commercial and industrial spaces.

Understanding the Effinity93’s advanced controls is key to optimal performance. Regular maintenance, including burner inspection, ensures continued efficiency. Proper installation and gas line safety checks are crucial for reliable and safe operation of these powerful heaters.

MEW Corrosion-Resistant Electric Heaters

Modine’s MEW series offers a robust solution for challenging environments, specifically designed with corrosion resistance in mind. These electric heaters are ideal for locations exposed to harsh chemicals or saltwater, ensuring long-lasting performance where standard heaters might fail.

Proper electrical wiring and grounding are paramount for safe operation. Understanding the heater’s control settings allows for precise temperature management. Regular inspection of electrical connections and the heating elements is vital for preventing issues and maintaining efficiency.

Installation Procedures for Modine Heaters

Correct installation is crucial for safe and efficient operation of your Modine heater. Begin by carefully selecting a proper location, considering ventilation requirements and accessibility for maintenance, as highlighted by Modine experts. Securely mount the heater following the manufacturer’s guidelines.

Always prioritize gas line safety, performing thorough leak checks after connection. Ensure proper electrical wiring and grounding to prevent hazards. Consult the manual for specific model instructions, and adhere to all local codes and regulations during the installation process.

Proper Heater Location and Mounting

Selecting the right location is paramount for optimal heater performance. Ensure adequate clearance around the unit for airflow and servicing. Mount the heater securely to a stable surface, utilizing appropriate hardware for the wall or ceiling type.

Avoid obstructions that could impede airflow or pose a fire hazard. Consider proximity to gas and electrical connections to minimize installation complexity. Heating experts Jamie Tuinstra and Bob Fritcher emphasize calculating heat requirements to ensure proper sizing and placement for effective heating.

Gas Line Connection and Safety Checks

Prioritize safety during gas line connection. Always engage a qualified professional for this critical step. Verify the gas supply pressure matches the heater’s specifications. Thoroughly inspect all connections for leaks using a soap solution – never a flame!

Ensure proper ventilation to prevent gas accumulation. Adhere to local gas codes and regulations. Regularly check for gas leaks, as highlighted in safety precautions, to mitigate potential hazards and maintain a secure heating system.

Electrical Wiring and Grounding

Proper electrical wiring and grounding are paramount for safe heater operation. Always disconnect power before commencing any electrical work. Utilize wiring of the correct gauge and type, adhering to local electrical codes. Ensure a secure ground connection to prevent electrical shock hazards.

Double-check all connections for tightness and insulation integrity. Inspect the ignition control board’s wiring, as issues here can cause ignition failures. Follow the manufacturer’s wiring diagrams meticulously to avoid damage or malfunction.

Operating Instructions for Modine Heaters

Before initial startup, verify all installation steps are complete and safe. Confirm gas supply connections are secure and leak-free. Turn on the gas supply and follow the heater’s lighting sequence, typically involving a pilot light ignition. Set the thermostat to the desired temperature, monitoring for proper heating function.

Regularly check the heater’s operation, ensuring consistent heat output. Familiarize yourself with thermostat settings for optimal comfort and energy efficiency. Implement routine maintenance, as detailed in the manual, to prolong heater lifespan.

Initial Startup and System Checks

Prior to the first use, meticulously inspect all gas and electrical connections, ensuring they adhere to safety standards. Slowly open the gas supply valve, carefully monitoring for any potential leaks using a soapy water solution. Follow the manufacturer’s specific lighting instructions, typically involving pilot light ignition and system checks.

Observe the flame pattern for consistent, blue combustion. Verify proper airflow and heat distribution. Test the thermostat’s functionality, confirming accurate temperature control. Document these checks for future reference and maintenance records.

Thermostat Control and Settings

Modine heaters utilize thermostats for precise temperature regulation. Familiarize yourself with the thermostat’s interface, understanding its modes – heat, off, and auto. Adjust the setpoint to your desired temperature, allowing the heater to cycle on and off accordingly. Explore programmable features, if available, for scheduled heating.

Ensure the thermostat is positioned away from direct sunlight or drafts for accurate readings. Experiment with different settings to optimize comfort and energy efficiency. Regularly check battery levels in digital thermostats to maintain functionality.

Routine Maintenance Procedures

Regular maintenance extends your Modine heater’s lifespan and ensures optimal performance. Inspect the air filter monthly, replacing it when dirty to maintain airflow. Periodically check the burner assembly for debris or obstructions, ensuring clean combustion. Visually inspect the venting system for any damage or blockages, crucial for safety.

Clean the heater’s exterior with a damp cloth. Consider professional inspection annually, including heat exchanger evaluation. Document all maintenance activities for tracking and warranty purposes.

Troubleshooting Common Modine Heater Issues

Addressing issues promptly prevents further damage and ensures continued heating. Flame loss can stem from low gas pressure or a faulty igniter; verify gas supply and ignition components. No ignition often indicates a problem with the ignition control board or flame sensor – inspect for dirt or malfunctions.

Pilot light issues may involve a dirty pilot assembly or gas valve problems. Consult the handbook for Power Vented unit troubleshooting, and carefully inspect the heat exchanger.

Flame Loss Troubleshooting

Sudden flame loss requires immediate attention to ensure safety and restore heating. Begin by checking the gas supply line for blockages or leaks, as low gas pressure is a frequent cause. Inspect the igniter for proper function; a failing igniter won’t consistently light the burner.

Carefully examine the heat exchanger near the pilot for holes, which can disrupt the flame pattern. Ensure proper ventilation and address any drafts that might extinguish the flame.

No Ignition Troubleshooting

When a Modine heater fails to ignite, systematically check potential causes. Start with the ignition control board, observing for a flashing green light indicating an issue. Thoroughly inspect the flame sensor for dirt or obstructions, as a dirty sensor prevents proper flame detection.

Verify the gas valve is open and receiving adequate gas pressure. Confirm the thermostat is set correctly and calling for heat. A faulty wiring connection can also prevent ignition; inspect all connections carefully.

Pilot Light Problems and Solutions

A consistently failing pilot light often indicates airflow issues or a compromised gas supply. Carefully inspect the heat exchanger near the pilot for holes, allowing fan airflow to extinguish the flame. Ensure the pilot orifice is clear of debris, restricting gas flow.

Check the gas valve for proper operation and sufficient gas pressure. A drafty environment can also blow out the pilot; shield it from direct airflow. If problems persist, consult a qualified technician for safe and effective repair.

Diagnosing and Repairing Modine Heaters

Effective diagnosis begins with a thorough inspection of the heat exchanger, looking for cracks or obstructions that compromise efficiency. The ignition control board should be checked for flashing lights, indicating error codes requiring attention. A dirty or faulty flame sensor prevents proper ignition; cleaning or replacement is often necessary.

Always disconnect power before any repair work. Refer to the Modine troubleshooting handbook for specific model guidance. If unsure, contact a qualified HVAC technician to ensure safe and correct repairs.

Inspecting the Heat Exchanger

Carefully examine the heat exchanger for any signs of corrosion, cracks, or holes, particularly near the pilot light area. A compromised heat exchanger can allow combustion gases to leak, posing a safety hazard. Use a flashlight to inspect hard-to-reach areas, looking for evidence of soot buildup or damage.

If a hole is detected, the heater must be repaired or replaced immediately. Do not attempt to weld or patch the heat exchanger; professional replacement is crucial for safety and efficiency.

Checking the Ignition Control Board

Inspect the ignition control board for any visible signs of damage, such as burnt components or loose connections. Observe the board’s indicator lights; a flashing green light often signals an issue. Ensure the board is receiving proper voltage according to the manufacturer’s specifications.

If the board appears faulty, it may require replacement. Disconnect power before handling the board and consult a qualified technician for diagnosis and repair. A malfunctioning control board can prevent ignition.

Flame Sensor Inspection and Cleaning

Regularly inspect the flame sensor for dirt, corrosion, or oil buildup, as these contaminants can interfere with its ability to detect the flame. Gently clean the sensor with fine steel wool or a specialized sensor cleaning pad, ensuring not to scratch the surface.

Reinstall the cleaned sensor and verify proper flame detection. A dirty or faulty flame sensor is a common cause of flame loss, preventing the heater from operating safely and efficiently. Proper maintenance extends the sensor’s lifespan.

Safety Precautions When Working with Modine Heaters

Always prioritize safety when installing or servicing Modine heaters. Before any work, disconnect electrical power and shut off the gas supply. Utilize a gas leak detector to confirm no leaks are present.

Ensure adequate ventilation to prevent carbon monoxide buildup. Follow all electrical safety guidelines, including proper grounding. Be aware of the risks of burns from hot surfaces. Never attempt repairs beyond your skill level; consult a qualified technician.

Gas Leak Detection and Prevention

Regularly inspect gas lines and connections for any signs of damage or corrosion. Utilize a commercially available gas leak detector solution to check for leaks – bubbles indicate a potential issue. If a leak is suspected, immediately shut off the gas supply at the source.

Never use an open flame to check for leaks. Ensure proper ventilation in the heater’s vicinity. Promptly repair any detected leaks by a qualified professional. Adhere to all local gas safety regulations.

Electrical Safety Guidelines

Always disconnect power to the heater at the breaker before performing any electrical work. Verify proper grounding of the unit to prevent electrical shock. Inspect wiring for damage, fraying, or loose connections. Use appropriately sized wiring and overcurrent protection devices.

Never work with electrical components when hands or surroundings are wet. If unsure about electrical procedures, consult a qualified electrician. Ensure all electrical connections are tight and secure. Follow all local electrical codes and regulations.

Carbon Monoxide Awareness

Carbon monoxide (CO) is a colorless, odorless, and deadly gas. Ensure proper ventilation when operating your Modine heater. Install CO detectors near the heater and in living areas. Regularly test CO detectors to confirm functionality. Recognize the symptoms of CO poisoning: headache, dizziness, nausea, and confusion.

If a CO alarm sounds, evacuate immediately and call emergency services. Never ignore a CO alarm. Annual inspection by a qualified technician is crucial. Proper heater maintenance minimizes CO risk.

Modine Heater Parts and Replacement

Identifying the correct replacement parts is vital for maintaining your Modine heater’s efficiency and safety. Consult your heater’s model number and parts diagram. Commonly replaced components include igniters, flame sensors, and control boards. Sourcing genuine Modine parts ensures compatibility and performance.

Authorized Modine distributors and the official website offer a wide selection of parts. Always disconnect power before replacing any components. Professional installation is recommended for complex repairs. Proper part replacement extends heater lifespan.

Identifying Heater Components

Understanding Modine heater components is crucial for maintenance and repair. Key parts include the heat exchanger, burner assembly, gas valve, ignition control board, and flame sensor. The heat exchanger transfers heat, while the burner ignites the fuel source.

The gas valve regulates gas flow, and the control board manages operation. The flame sensor confirms a stable flame. Refer to your heater’s parts diagram for precise locations and names. Proper identification ensures correct replacement and troubleshooting.

Sourcing Replacement Parts

Obtaining genuine Modine replacement parts is vital for maintaining heater performance and safety. The Modine official website is a primary source, offering a comprehensive catalog and online ordering. Authorized Modine distributors also stock a wide range of components.

When ordering, have your heater’s model and serial number readily available. Ensure the part number matches the original component. Using non-genuine parts can void warranties and compromise safety. Prioritize quality and compatibility for optimal results.

Resources and Support for Modine Heater Owners

Modine provides extensive resources to assist owners with their heating systems. The Modine official website (modine.com) offers detailed product information, manuals, and FAQs. For direct assistance, technical support is available via phone or email, providing expert guidance on installation, operation, and troubleshooting.

Additionally, online forums and communities offer peer-to-peer support and shared experiences. Authorized Modine distributors can also provide local support and parts availability. Leverage these resources to ensure optimal heater performance and longevity.

Modine Official Website

The Modine official website, located at modine.com, serves as a central hub for all product-related information. Users can access comprehensive documentation, including detailed heater manuals, specification sheets, and installation guides. The site features a robust search function to quickly locate specific models and resources.

Furthermore, Modine’s website provides access to warranty information, frequently asked questions, and contact details for technical support. It’s a valuable resource for owners seeking to understand their heater and maintain optimal performance.

Technical Support Contact Information

For direct technical assistance with your Modine heater, contacting their support team is crucial. While specific contact details may vary, Modine generally offers support via phone and email. Checking the official Modine website (modine.com) is the best way to find the most current contact information.

Many resources, including troubleshooting guides and FAQs, are also available online. Having your heater’s model number readily available will expedite the support process. Prompt and knowledgeable assistance ensures efficient resolution of any issues.