dr seuss coloring pages pdf

Dr. Seuss‚ born Theodor Geisel‚ brings his whimsical world to life through coloring pages. Featuring characters like the Cat in the Hat and Horton‚ these PDFs inspire creativity and fun for all ages.

1.1 Who Was Dr. Seuss?

Dr. Seuss‚ born Theodor Seuss Geisel‚ was a renowned American children’s author‚ political cartoonist‚ and animator. Best known for his whimsical stories and zany illustrations‚ he created beloved characters like the Cat in the Hat and Horton the Elephant. His imaginative books have captivated readers of all ages‚ making him a timeless figure in children’s literature. His legacy lives on through his colorful stories and the joy they bring to fans worldwide.

1.2 The Popularity of Dr. Seuss Coloring Pages

Dr. Seuss coloring pages are widely popular due to their whimsical designs and beloved characters. Fans of all ages enjoy bringing iconic figures like the Cat in the Hat and Horton to life with vibrant colors. These pages are perfect companions to Dr. Seuss’s stories‚ offering a creative outlet that fosters imagination and fun. Their availability in free PDF formats makes them easily accessible for home and classroom use‚ further boosting their popularity.

Benefits of Dr. Seuss Coloring Pages for Kids

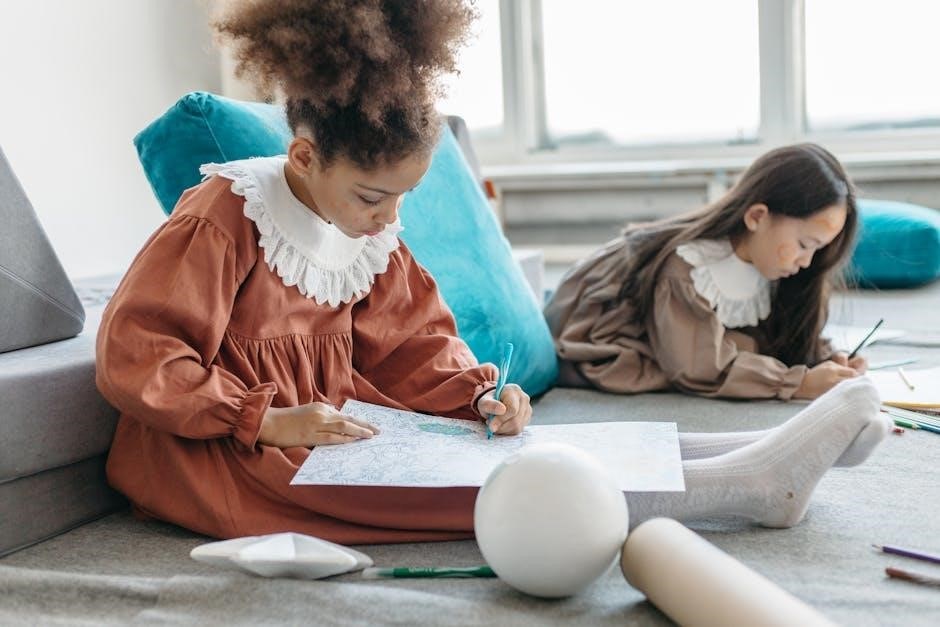
Dr. Seuss coloring pages enhance cognitive development‚ foster creativity‚ and provide educational value. They inspire imagination and fine motor skills while connecting kids to Dr. Seuss’s timeless stories.

2.1 Cognitive Development Through Coloring

Engaging with Dr. Seuss coloring pages fosters cognitive development in children by enhancing problem-solving skills and hand-eye coordination. The whimsical designs and rhymes stimulate memory and recognition‚ while the act of coloring improves focus and concentration. These activities also encourage creativity and logical thinking‚ helping kids develop spatial awareness and fine motor skills. The playful plots and characters make learning fun‚ supporting overall brain development in a engaging and interactive way.

2.2 Creativity and Imagination

Dr. Seuss coloring pages spark creativity and imagination in children by offering vibrant‚ whimsical designs inspired by his iconic characters and stories. Coloring allows kids to express themselves freely‚ experimenting with colors and patterns to bring the fantastical world of Dr. Seuss to life. This creative outlet encourages kids to think outside the box‚ fostering their artistic skills and imaginative thinking while having fun with beloved characters like the Cat in the Hat and Horton.

2.3 Educational Value Linked to Dr. Seuss Books

Dr. Seuss coloring pages complement his books by reinforcing literacy and storytelling skills. These activities introduce children to rhyming words‚ imaginative plots‚ and memorable characters‚ making learning fun. Coloring while reading enhances focus and comprehension‚ helping kids connect visuals with narratives. This integration fosters a deeper understanding and appreciation of Dr. Seuss’s works‚ turning playtime into an educational opportunity that’s both engaging and enriching for young minds.

Popular Dr. Seuss Characters in Coloring Pages

Dr. Seuss coloring pages feature beloved characters like the Cat in the Hat‚ Horton the Elephant‚ the Grinch‚ and Sam-I-Am‚ bringing his whimsical stories to life for fans of all ages.

3.1 The Cat in the Hat

The Cat in the Hat is one of the most recognizable Dr. Seuss characters‚ known for his mischievous personality and iconic red and white stripes. Coloring pages featuring this beloved character often include scenes from the classic story‚ showcasing his playful antics and companions‚ Thing 1 and Thing 2. These pages are perfect for kids who love adventure and humor‚ allowing them to bring their favorite character to life with vibrant colors. The Cat in the Hat’s enduring popularity makes him a staple in Dr. Seuss coloring collections‚ inspiring creativity and storytelling.

3.2 Horton the Elephant

Horton the Elephant‚ a kind-hearted hero from Dr. Seuss’s “Horton Hears a Who!”‚ is a popular character in coloring pages. His gentle nature and iconic ears make him a favorite among children. Coloring sheets often depict Horton standing on a clover‚ listening to the Whos‚ emphasizing themes of kindness and bravery. These pages encourage kids to explore their creativity while learning about empathy and friendship through Horton’s story.

3.3 The Grinch

The Grinch‚ a grouchy yet beloved character from Dr. Seuss’s “How the Grinch Stole Christmas!”‚ is a favorite in coloring pages. His iconic green appearance‚ red eyes‚ and Santa-like hat make him instantly recognizable. Coloring sheets often depict the Grinch stealing Christmas or interacting with the Whos‚ emphasizing themes of kindness and redemption. These pages allow kids to explore their creativity while engaging with the Grinch’s heartwarming story.

3.4 Sam-I-Am and Other Beloved Characters

Sam-I-Am‚ from “Green Eggs and Ham‚” is a cheerful character featured in Dr. Seuss coloring pages. His relentless optimism and iconic red hat make him a fan favorite. Alongside Sam-I-Am‚ other cherished characters like the Lorax‚ Thing 1 and Thing 2‚ and the Sneetches inspire creativity. These characters‚ with their unique designs‚ encourage imaginative coloring and storytelling‚ capturing the whimsical spirit of Dr. Seuss’s timeless tales for both kids and adults.

Themes and Designs in Dr. Seuss Coloring Pages

Dr. Seuss coloring pages feature whimsical rhymes‚ quirky characters‚ and imaginary places‚ bringing his playful stories to life. The designs are vibrant and imaginative‚ inspiring creativity.

4.1 Whimsical Rhymes and Imaginary Places

Dr. Seuss coloring pages captivate with whimsical rhymes and imaginary worlds. Each design transports you to fantastical lands‚ like the settings of The Lorax or Horton Hears a Who!. These vibrant‚ playful scenes inspire creativity and imagination‚ making them perfect for fans of all ages. The intricate details and zany illustrations bring Dr; Seuss’s beloved stories to life‚ offering endless fun and artistic expression.

4.2 Quirky Characters and Zany Illustrations

Dr. Seuss coloring pages are filled with quirky characters and zany illustrations that captivate both kids and adults. From the mischievous Cat in the Hat to the endearing Horton the Elephant‚ these designs bring Dr. Seuss’s whimsical world to life. The intricate‚ playful artwork encourages creativity and imagination‚ making every coloring session a fun and engaging experience. Each page is a visual delight‚ perfectly capturing the unique charm of Dr. Seuss’s beloved stories.

4.3 Playful Plots and Storybook Scenes

Dr. Seuss coloring pages often feature playful plots and storybook scenes that bring his iconic tales to life. From whimsical landscapes to imaginative storylines‚ these designs allow fans to immerse themselves in Dr. Seuss’s fantastical world. Each page captures the essence of his books‚ offering a fun and creative way to engage with beloved stories. The vibrant‚ storybook-style illustrations inspire both kids and adults to explore their artistic side while enjoying Dr. Seuss’s timeless adventures.

How to Download and Print Dr. Seuss Coloring Pages PDF

Dr. Seuss coloring pages are easily downloadable from various websites like GetColorings.com. Available in PDF‚ PNG‚ and JPG formats‚ they’re perfect for printing and coloring fun for all ages.

5.1 Free Resources and Websites

Discover free Dr. Seuss coloring pages on websites like GetColorings.com and Pinterest. These platforms offer a wide variety of PDF‚ PNG‚ and JPG formats featuring beloved characters like the Cat in the Hat and Horton. Perfect for kids and adults‚ these resources provide easy access to downloadable and printable designs‚ ensuring endless fun and creativity for fans of Dr. Seuss’s whimsical world.

5.2 Step-by-Step Guide to Printing

To print Dr. Seuss coloring pages‚ select your preferred PDF from websites like GetColorings.com or Pinterest. Download the file‚ open it in a PDF viewer‚ and choose the print option. Select high-quality paper for vibrant colors. Adjust printer settings for optimal results. Ensure the page fits correctly and print on both sides if desired. Use color or black-and-white settings based on your preference for a fun and creative experience.

5.3 Tips for Using PDF Formats

When using Dr. Seuss coloring pages in PDF format‚ ensure your printer settings match the page size for optimal results. Choose high-quality paper for vibrant colors and durability. Scale the pages as needed to fit your requirements. Use color or black-and-white printing options depending on preference. For digital use‚ open PDFs in apps like Adobe Acrobat or coloring software for editing. Save multiple copies for repeated use and share easily across devices.

Dr. Seuss Coloring Pages for Adults

Dr. Seuss coloring pages offer adults a creative outlet for relaxation and nostalgia. Complex designs provide detailed coloring opportunities‚ blending whimsy with artistry for both kids and adults.

6.1 Relaxation and Stress Relief

Dr. Seuss coloring pages offer adults a therapeutic escape from daily stress. The whimsical designs‚ reminiscent of childhood‚ provide a calming and nostalgic experience. Engaging in coloring can help reduce anxiety and promote mindfulness. With free PDF downloads available‚ adults can easily access these pages and unwind while revisiting beloved characters. The process fosters relaxation and serves as a creative outlet‚ perfect for unwinding after a busy day.

6.2 Nostalgia and Fun for Adults

Dr. Seuss coloring pages evoke childhood memories‚ offering adults a playful way to reconnect with beloved characters like the Cat in the Hat and Horton. The whimsical designs provide a fun outlet for creativity‚ allowing adults to revisit the joy of Dr. Seuss’s stories. Coloring these pages can be a lighthearted activity‚ perfect for unwinding or sharing with family and friends. It’s a celebration of nostalgia and imagination for all ages.

6.3 Complex Designs for Detailed Coloring

Dr. Seuss coloring pages for adults often feature intricate designs‚ offering a challenge for those who enjoy detailed work. These complex patterns‚ inspired by characters like the Cat in the Hat and Horton‚ allow for creative expression and precision. The whimsical yet elaborate illustrations provide a therapeutic outlet‚ making them ideal for adults seeking relaxation and artistic fulfillment. High-quality PDFs ensure crisp details for a satisfying coloring experience.

Activities and Crafts to Pair with Dr. Seuss Coloring Pages

Pair Dr. Seuss coloring pages with storytime‚ DIY crafts‚ and classroom activities for enhanced creativity. These engaging projects complement the whimsical themes‚ fostering fun and learning for kids and adults alike.

7.1 Storytime and Reading Activities

Combine Dr. Seuss coloring pages with storytime for a immersive experience. Read aloud from classic books like The Cat in the Hat or Horton Hears a Who! while kids color. This activity sparks imagination‚ linking visual creativity with literary exploration. Encourage discussions about the stories and their whimsical themes‚ fostering a deeper connection to Dr. Seuss’s world. It’s a perfect way to blend learning and fun‚ making reading and coloring a joyful‚ interactive adventure for all ages.

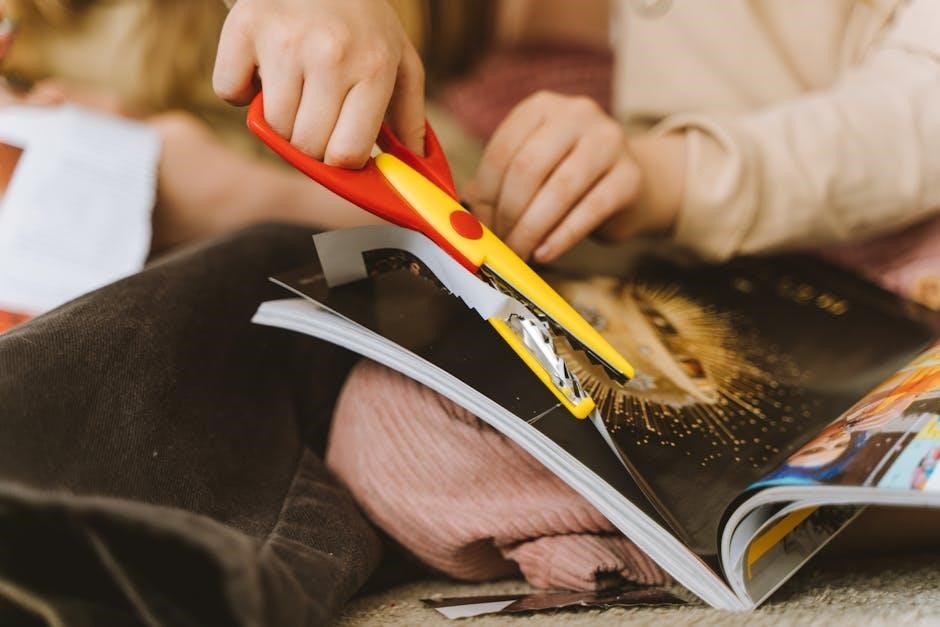
7.2 DIY Crafts Inspired by Dr. Seuss

Dr. Seuss’s whimsical characters and stories inspire creative DIY crafts. Kids and adults can craft headbands‚ photo props‚ and decorations featuring the Cat in the Hat and Horton. Use coloring pages as templates for paper cutouts or collages. DIY projects like Seuss-themed puppets or 3D art bring his imaginative world to life. These crafts‚ paired with coloring‚ offer a fun way to engage with Dr. Seuss’s legacy while encouraging creativity and hands-on learning.

7.3 Classroom and Party Ideas

Dr. Seuss coloring pages are perfect for classroom activities and themed parties. Use them for Read Across America Day celebrations or birthday parties. Decorate with Seuss-inspired props and crafts‚ such as Cat in the Hat headbands or Lorax mustaches. Pair coloring with storytime‚ quizzes‚ or games for an engaging experience. These activities foster teamwork and creativity‚ making them ideal for schools and family gatherings while celebrating Dr. Seuss’s whimsical world.

The Cultural Impact of Dr. Seuss Coloring Pages

Dr. Seuss coloring pages celebrate his legacy‚ inspiring creativity and literacy worldwide. They bridge generations‚ fostering a love for reading and art‚ while promoting cultural engagement and education through playful designs.

8.1 Celebrating Dr. Seuss’s Legacy

Dr. Seuss’s legacy endures through his whimsical stories and iconic characters‚ inspiring generations. Coloring pages featuring his beloved creations‚ like the Cat in the Hat and Horton‚ keep his imaginative world alive. These pages not only entertain but also educate‚ fostering a love for reading and creativity. By engaging with these designs‚ fans of all ages celebrate Dr. Seuss’s timeless impact on literature and culture‚ ensuring his stories remain relevant and cherished.

8.2 Promoting Literacy Through Coloring

Dr. Seuss coloring pages serve as a vibrant tool for promoting literacy‚ especially among children. By pairing colorful illustrations with beloved storybook characters‚ these pages spark an interest in reading and storytelling. They often accompany Dr. Seuss books‚ reinforcing themes and making learning fun. This interactive approach helps kids connect visually with the narratives‚ fostering a deeper appreciation for literature and encouraging early reading skills in an engaging way.

8.3 Community Engagement and Events

Dr. Seuss coloring pages foster community engagement through events like Read Across America Day‚ classroom activities‚ and library programs. These gatherings often include group coloring sessions‚ contests‚ and storytime‚ promoting unity and creativity. Schools and libraries distribute these PDFs to celebrate Dr. Seuss’s legacy‚ encouraging participation from kids and adults alike. Such events not only entertain but also educate‚ reinforcing literacy and a shared love for Dr. Seuss’s whimsical world.

Dr; Seuss Coloring Pages for Special Occasions

Celebrate special days with Dr. Seuss PDF coloring pages. Perfect for birthdays‚ holidays‚ and events like Read Across America Day‚ these sheets add whimsical fun to any occasion.

9.1 Read Across America Day

Read Across America Day‚ celebrated on Dr. Seuss’s birthday‚ is a perfect occasion to use themed coloring pages. These PDFs feature beloved characters like the Cat in the Hat and Horton‚ fostering a love for reading and creativity. Schools and families often pair coloring with storytime‚ making it an engaging way to honor Dr. Seuss’s legacy and promote literacy. Free printable pages are widely available‚ adding fun to this special event.

9.2 Birthday Parties and Celebrations

Dr. Seuss coloring pages are a delightful addition to birthday parties. Featuring characters like the Cat in the Hat and Horton‚ these PDFs offer fun activities for guests. Parents can print and distribute them‚ pairing coloring with storytime or themed crafts; This creative element adds a playful touch‚ making celebrations memorable while connecting kids with Dr. Seuss’s whimsical world. They are easy to download and customize‚ fitting any party theme perfectly.

9.3 Holiday-Themed Dr. Seuss Coloring Pages

Holiday-themed Dr. Seuss coloring pages bring festive joy to celebrations. From Christmas with the Grinch to Halloween adventures‚ these PDFs feature iconic characters in seasonal settings. They offer a fun way for kids and adults to engage with Dr. Seuss’s whimsical designs during holidays. Easily downloadable and printable‚ these pages add a playful‚ imaginative touch to seasonal activities‚ making them a great addition to family traditions and themed events.

Digital Dr. Seuss Coloring Apps and Tools

Digital Dr. Seuss coloring apps and tools offer a modern way to enjoy creativity. Apps like the Cat in the Hat iPad app provide interactive coloring experiences for fans of all ages.

10.1 iPad and Tablet Coloring Apps

iPad and tablet coloring apps bring Dr. Seuss’s whimsical world to life digitally. The Cat in the Hat iPad app offers interactive coloring‚ letting users explore vibrant colors and creative designs. These apps cater to both kids and adults‚ providing a modern twist on traditional coloring. With touch-screen technology‚ fans can color their favorite characters and scenes while enjoying the convenience of digital art. This innovative approach enhances creativity and storytelling‚ keeping Dr. Seuss’s legacy fresh and engaging.

10.2 Interactive Digital Coloring Experiences

Interactive digital coloring experiences offer a fresh way to engage with Dr. Seuss’s beloved characters. Apps feature vibrant animations‚ color-matching games‚ and story-driven activities. Users can bring the Cat in the Hat or Horton to life with interactive tools. These digital platforms combine traditional coloring with modern technology‚ fostering creativity and storytelling. They provide an immersive experience‚ perfect for both kids and adults‚ while preserving the timeless charm of Dr. Seuss’s imaginative world.

10.4 Combining Tradition with Technology

Digital coloring apps seamlessly blend traditional creativity with modern innovation. Users can color Dr. Seuss characters using touchscreens‚ digital brushes‚ and vibrant animations. These tools enhance the classic coloring experience‚ offering features like color-matching games and story-driven activities. Apps like the Cat in the Hat iPad app bring Dr. Seuss’s world to life‚ appealing to both kids and adults. This fusion of tradition and technology keeps the timeless charm of Dr. Seuss while embracing the future of creative play.

www.vivitar.com user manual

Vivitar user manuals provide essential guidance for optimizing your device’s performance. Available online as PDF downloads‚ these manuals cover setup‚ features‚ and troubleshooting for cameras‚ drones‚ and more‚ ensuring seamless operation and maintenance of Vivitar products.

Overview of Vivitar Products

Vivitar offers a diverse range of consumer electronics‚ including digital cameras‚ action cameras‚ drones‚ and accessories. Their products are known for innovative features‚ user-friendly designs‚ and affordability. From DSLR cameras to compact point-and-shoot models‚ Vivitar caters to both casual photographers and professionals. Additionally‚ their drone lineup includes models with advanced flight controls and HD video capabilities. Action cameras are designed for rugged use‚ with mounting options for various activities. Vivitar also provides accessories like chargers‚ lenses‚ and memory cards to enhance user experiences. With a focus on quality and versatility‚ Vivitar’s product line aims to meet the needs of modern consumers seeking reliable and high-performance devices.

Importance of Reading the User Manual

Reading the Vivitar user manual is crucial for unlocking your device’s full potential. It provides step-by-step instructions for setup‚ operation‚ and troubleshooting‚ ensuring you understand all features and functions. Manuals highlight safety precautions‚ optimal usage tips‚ and maintenance advice‚ which are essential for prolonging device lifespan. By following the guide‚ you can avoid common errors and make the most of your Vivitar product. Whether it’s a camera‚ drone‚ or action camera‚ the manual serves as an invaluable resource for both beginners and experienced users‚ helping them achieve professional results and troubleshoot issues efficiently.

Where to Find Vivitar User Manuals

Vivitar user manuals can be easily accessed through various online platforms. The official Vivitar website (www.vivitar.com) offers downloadable PDF versions of manuals for their products‚ including cameras‚ drones‚ and action cameras. Additionally‚ third-party websites like ManualsLib‚ ManualsOnline‚ and All-Guides Database provide comprehensive collections of Vivitar manuals‚ covering over 300 products. Some manuals‚ such as the Vivitar 360 Sky View Video Drone manual‚ are available for free download‚ while others may require purchase. For specific models‚ customer support can also be contacted to request a manual. These resources ensure users can easily find and access the guidance they need for their Vivitar devices.

Setting Up Your Vivitar Device

Setting up your Vivitar device involves unboxing‚ charging the battery‚ and installing necessary software. Follow the user manual’s step-by-step guide for a seamless initial setup experience.

Unboxing and Initial Setup

Unboxing your Vivitar device is an exciting first step. Carefully remove the device and accessories from the packaging‚ ensuring all components are included. Refer to the user manual for a detailed list of what’s inside. Before powering on‚ inspect the device for any visible damage. Next‚ locate the charger and any additional accessories like memory cards or mounts. Follow the manual’s initial setup guide to configure basic settings‚ such as date‚ time‚ and language. For devices requiring software‚ install the necessary programs to ensure full functionality. This step ensures a smooth start and prepares your device for optimal performance.

Charging the Battery

Properly charging your Vivitar device’s battery is crucial for optimal performance. Locate the charger provided in the box and connect it to a power source. Gently insert the charging cable into the device’s charging port‚ ensuring it clicks securely. For cameras and drones‚ the battery may be removable; refer to the manual for specific instructions. Allow the device to charge fully‚ which typically takes 2-4 hours‚ depending on the model. Avoid overcharging‚ as it may reduce battery life. Some devices feature charging indicators‚ such as LED lights‚ that turn green when fully charged. Always use the original charger to prevent damage. For drones‚ ensure the battery is properly seated and secured before flight.

Installing Necessary Software

Installing the required software for your Vivitar device ensures optimal functionality and enhances your user experience. For cameras and action cams‚ download Vivitar Image Manager or Vivitar Experience software from the official website. These programs allow you to transfer photos‚ videos‚ and adjust settings. For drones‚ install the companion app‚ which may include firmware updates and flight control features. Visit the Vivitar support page‚ select your product category‚ and download the corresponding software. Run the installer‚ follow on-screen instructions‚ and restart your device if prompted. Ensure your device is connected to your computer via USB or Wi-Fi for seamless software integration. This step is crucial for unlocking advanced features and maintaining compatibility. Always use official Vivitar software to avoid compatibility issues.

Understanding Vivitar Camera Manuals

Vivitar camera manuals offer detailed guides for operating cameras‚ including basic functions‚ advanced settings‚ and troubleshooting tips. They ensure users maximize their device’s capabilities effectively and efficiently.

Basic Camera Operations

Understanding basic camera operations is crucial for capturing stunning photos. Vivitar manuals guide users through turning on the camera‚ navigating menus‚ and using auto mode for effortless photography. They explain how to adjust settings like brightness‚ zoom‚ and flash‚ ensuring optimal image quality. Additionally‚ manuals cover essential functions such as reviewing photos‚ deleting unwanted images‚ and formatting memory cards. Troubleshooting tips are also included to address common issues like battery depletion or device malfunction. By following these steps‚ users can master foundational camera operations and enhance their photography skills. These guides are designed to be user-friendly‚ making it easy for beginners to get started and enjoy their Vivitar camera.

Advanced Features and Settings

Vivitar cameras offer advanced features to enhance your photography experience. Manual mode allows precise control over aperture‚ shutter speed‚ and ISO‚ enabling creative customization. White balance settings help achieve accurate colors in various lighting conditions. Autofocus modes‚ such as continuous AF‚ ensure sharp images of moving subjects. Burst shooting captures rapid sequences‚ perfect for action photography. Customizable presets let you save preferred settings for quick access. Advanced noise reduction and image stabilization improve low-light performance. The user manual provides detailed instructions on accessing and utilizing these features‚ helping photographers of all skill levels unlock their camera’s full potential and achieve professional-grade results with ease and precision.

Troubleshooting Common Issues

Resolving common issues with Vivitar devices is straightforward with the user manual’s guidance. Battery and charging problems can often be fixed by resetting the device or ensuring proper charging cable connections. For connectivity issues‚ restarting the device and checking Wi-Fi or Bluetooth settings usually resolves the problem. If the camera fails to turn on‚ check the battery level or try a different power source. Firmware updates can address software-related glitches‚ while resetting to factory settings can resolve persistent issues. The manual provides step-by-step solutions‚ ensuring users can quickly diagnose and fix problems‚ minimizing downtime and optimizing their Vivitar device’s performance.

Vivitar Drone User Manuals

Vivitar drone manuals offer comprehensive guides for assembly‚ calibration‚ and operation. They detail flight controls‚ safety tips‚ and maintenance procedures to ensure optimal performance and safe usage.

Assembling and Calibrating the Drone

Assembling and calibrating your Vivitar drone ensures proper functionality and safe operation. Begin by carefully unpacking all components‚ including the drone‚ remote controller‚ and accessories. Follow the manual’s step-by-step guide to attach rotors‚ connect the battery‚ and sync the controller. Calibration involves balancing the drone and setting up the compass. Refer to the user manual for precise calibration steps‚ such as leveling the drone and initializing the gyroscopes. Ensure all firmware is updated before the first flight. Proper assembly and calibration are critical for stable performance and accurate navigation. Always follow safety guidelines and pre-flight checks to avoid issues during operation.

Flight Controls and Safety Guidelines

Mastering flight controls and adhering to safety guidelines is essential for a safe and enjoyable Vivitar drone experience. Familiarize yourself with the remote controller’s joysticks and buttons‚ which manage throttle‚ yaw‚ pitch‚ and roll. Always conduct pre-flight checks‚ ensuring the drone and controller are fully charged and synced; Choose open‚ obstacle-free areas for flights‚ avoiding restricted zones like airports or populated spaces. Keep the drone within line of sight and respect local aviation regulations. Follow the user manual’s safety protocols‚ such as proper takeoff and landing procedures. Regularly update firmware and calibrate the drone to maintain stability. Safe flying practices ensure both operator and bystander safety while maximizing drone performance.

Drone Maintenance Tips

Regular maintenance ensures optimal performance and longevity of your Vivitar drone. Clean the drone’s body‚ propellers‚ and camera lens with a soft cloth to remove dirt and debris. Store the drone in a dry‚ cool place‚ away from direct sunlight and moisture. Battery care is crucial—avoid extreme temperatures and fully charge the battery before long-term storage. Inspect propellers for damage and replace them if necessary. Update the drone’s firmware regularly to enhance functionality and fix issues. Follow the user manual’s maintenance schedule for calibrations and system checks. Proper upkeep ensures safe flights‚ reliable operation‚ and extends the life of your Vivitar drone.

Vivitar Action Camera Manuals

Vivitar action camera manuals offer detailed guides for mounting‚ recording‚ and connecting devices‚ helping users maximize camera features and ensure smooth‚ high-quality photo and video capture.

Mounting and Accessories

Vivitar action cameras come with versatile mounting options‚ including adhesive mounts‚ suction cups‚ and clips‚ ensuring secure attachment to various surfaces. Accessories like waterproof cases‚ chargers‚ and remote controls enhance functionality. The user manual provides detailed instructions for assembling and securing mounts‚ ensuring stable video capture. Additionally‚ compatibility with third-party accessories is highlighted‚ offering users flexibility. Proper mounting techniques and accessory usage are clearly outlined to maximize camera performance and durability‚ making it easy for users to customize their setup for different environments and activities. This section is crucial for those seeking to explore the full potential of their Vivitar action camera.

Recording Video and Capturing Photos

Vivitar action cameras offer high-quality video recording and photo capture capabilities. Users can shoot in 4K resolution with image stabilization for smooth footage. The camera features burst mode for capturing multiple photos in quick succession and time-lapse for creative effects. To start recording‚ simply switch to video mode and press the shutter button. For photos‚ select the photo mode and adjust settings like resolution and ISO for optimal results. The user manual details how to access advanced settings‚ such as frame rates and exposure control‚ ensuring customizable captures. Reviewing footage and photos on the LCD screen allows for immediate quality checks‚ and files can be transferred to a computer via USB or Wi-Fi for further editing and sharing. This section helps users master the basics and explore advanced features for stunning visuals.

Connecting to Smart Devices

Vivitar action cameras seamlessly connect to smart devices via Wi-Fi‚ enabling easy video and photo transfers. Using the Vivitar Experience app‚ users can pair their camera to a smartphone or tablet by scanning a QR code or entering a password. Once connected‚ the app allows for live preview‚ remote control‚ and instant sharing of content. The camera can also stream footage directly to paired devices‚ enhancing creativity and convenience. For troubleshooting‚ the user manual provides step-by-step guides to resolve connectivity issues‚ ensuring a smooth experience. This feature-rich connection capability makes it easy to manage and share your captures on the go‚ compatible with both iOS and Android devices.

Vivitar Customer Support and Resources

Vivitar offers comprehensive support through their help desk‚ online communities‚ and detailed warranty information. Contact their team at 800-592-9541 or via the website for assistance.

Contact Information and Help Desk

Vivitar’s customer support team is available to assist with inquiries‚ technical issues‚ and troubleshooting. For immediate help‚ call their support hotline at 800-592-9541 or email support@sakar.com. Additionally‚ users can submit queries through the online contact form on the Vivitar website; The help desk provides detailed guidance for resolving common issues‚ ensuring optimal use of your device. Whether you need assistance with product setup‚ maintenance‚ or repair‚ Vivitar’s support resources are designed to offer quick and effective solutions.

Online Communities and Forums

Engage with Vivitar enthusiasts and experts through online forums and communities. These platforms offer valuable insights‚ troubleshooting tips‚ and discussions on various Vivitar products. Users can share experiences‚ ask questions‚ and access resources contributed by fellow customers and professionals. Online communities provide a collaborative space to enhance your knowledge and resolve issues effectively‚ fostering a supportive environment for all Vivitar device users.

Warranty and Repair Information

Vivitar products are backed by a warranty program‚ typically offering one-year coverage for defects in materials and workmanship. For warranty-related inquiries or repair requests‚ customers can contact Vivitar’s support team at 800-592-9541 or via email at supports@sakar.com. Repairs may require pre-approval and could incur costs if damage is deemed user-related. Ensure to review warranty terms and conditions for specific details. Vivitar also provides repair services for out-of-warranty devices‚ with fees varying based on the product and extent of repairs. Proper documentation and proof of purchase are often required for warranty claims.

lippert components slide out manual

Welcome to the Lippert Components Slide-Out Manual, your comprehensive guide to understanding, maintaining, and troubleshooting your RV slide-out system․ This manual covers installation, operation, and care tips to ensure optimal performance and longevity of your slide-out mechanisms․ Whether you’re a seasoned RV owner or a new user, this guide provides essential insights to maximize your RV experience․

Overview of Lippert Slide-Out Systems

Lippert Components offers a range of slide-out systems designed for RVs, including electric, hydraulic, and manual models․ These systems enhance living space by smoothly extending and retracting rooms․ Key components include motors, gears, and rollers, ensuring reliable operation․ The Schwintek motor and rack-and-pinion mechanism are popular for their durability and ease of use․ Lippert slide-outs are known for their quiet operation, minimal maintenance, and robust construction․ Whether for flush-floor or traditional setups, Lippert provides solutions tailored to various RV needs․ This overview highlights the versatility and reliability of Lippert slide-out systems, making them a trusted choice for RV owners seeking convenience and performance․

Importance of Proper Slide-Out Maintenance

Regular maintenance is crucial for the longevity and smooth operation of Lippert slide-out systems․ Neglecting upkeep can lead to binding issues, motor malfunctions, and seal damage․ Cleaning and lubricating moving parts, such as rollers and gears, prevents wear and tear․ Checking roller engagement ensures proper alignment, while inspecting seals helps prevent leaks․ Proper maintenance also extends the life of motors and actuators, ensuring consistent performance․ By following a routine maintenance schedule, RV owners can avoid costly repairs and ensure their slide-outs function reliably for years to come․ Consistent care also enhances safety and maintains the overall integrity of the RV structure․

Key Features of Lippert Slide-Out Mechanisms

Lippert slide-out mechanisms are designed for durability and reliability, featuring advanced components like the Schwintek motor and rack-and-pinion gear system․ These mechanisms ensure smooth and consistent operation, with minimal wear over time․ Key features include a manual override system for emergencies and transit bars that stabilize the slide-out during transport․ The M2 Sync Slide-Out System offers enhanced synchronization for dual-motor setups, ensuring proper alignment and reducing binding issues․ Additionally, Lippert’s electric slide-outs are built with heavy-duty materials and are tested for thousands of cycles to guarantee long-term performance․ These features make Lippert slide-outs a top choice for RV owners seeking dependable and hassle-free operation․

Components and Mechanisms of Lippert Slide-Outs

Lippert slide-outs feature robust mechanisms like the Schwintek motor, rack-and-pinion gears, and transit bars, ensuring smooth operation and stability․ These components work together to provide reliable performance and durability․

Understanding the Electric Slide-Out System

The electric slide-out system by Lippert Components is designed for smooth and efficient operation, utilizing advanced mechanisms like the Schwintek motor and rack-and-pinion gears․ This system allows for effortless extension and retraction of slide-outs with minimal effort․ The motor powers the gears, which move the slide-out room in and out seamlessly․ Proper installation and alignment are crucial to ensure optimal performance․ Regular maintenance, such as cleaning and lubricating moving parts, helps prevent binding issues; The system also includes safety features like manual overrides for emergency situations․ Understanding these components and their functionality ensures trouble-free operation and extends the lifespan of your slide-out system․

Role of the Rack and Pinion Gear

The rack and pinion gear system is a critical component of Lippert slide-outs, enabling smooth and precise movement․ The rack, a toothed bar, interacts with the pinion gear to convert rotational motion from the motor into linear movement, extending or retracting the slide-out room․ Proper alignment and lubrication of the rack and pinion are essential to prevent binding and ensure seamless operation․ Regular inspection and maintenance of these gears are vital to avoid wear and tear, which can lead to performance issues․ This system works in tandem with the Schwintek motor to provide reliable and efficient slide-out functionality for your RV․

Functionality of the Schwintek Motor

The Schwintek motor is a key component of Lippert slide-out systems, providing the power needed to extend and retract the slide-out room smoothly․ It converts electrical energy into mechanical force, ensuring efficient operation․ Designed for durability, the motor withstands frequent use and various environmental conditions․ Proper installation and maintenance are crucial to prevent malfunctions․ Regular checks and timely replacements of worn parts help maintain the motor’s efficiency and longevity․ The Schwintek motor works in synchronization with the control box and gear system, ensuring precise movement․ Common issues like misalignment or power supply problems can be diagnosed and resolved with proper troubleshooting techniques, ensuring optimal performance of the slide-out system․

Importance of Transit Bars

Transit bars are essential for stabilizing the slide-out room during travel, preventing movement and potential damage․ They secure the slide-out in its retracted position, ensuring safety while the RV is in motion․ Proper installation and use of transit bars protect the slide-out mechanism from stress caused by road vibrations and sudden stops․ Neglecting to install transit bars can lead to misalignment issues and wear on moving parts․ Always engage transit bars when the slide-out is not in use, as specified in the manual, to maintain the integrity and functionality of your Lippert slide-out system․ Regular checks ensure they remain in good condition and function effectively․

Installation and Setup of Slide-Out Systems

Ensure proper alignment and secure the slide-out room during installation․ Follow the manual for motor and control box configuration․ Use transit bars for stability during setup and travel․

Step-by-Step Installation Guide

Begin by preparing the RV frame and slide-out room, ensuring all components are aligned properly․ Install the motor and gear system, securing it to the H-column․ Connect the wiring to the control box, following the manufacturer’s diagram․ Engage the transit bars to stabilize the slide-out during setup․ Test the system by extending and retracting the slide-out to ensure smooth operation․ Refer to the manual for specific torque values and wiring connections․ Finally, perform a safety check to confirm all mechanisms are functioning correctly and seals are properly aligned for leak prevention․

Configuring the Control Box

Start by connecting the motor wires to the control box, ensuring proper polarity to avoid damage․ Use the provided wiring diagram to match the correct terminals․ For dual-motor systems, sync the motors by adjusting the alignment switches until both sides move uniformly․ Test the control box by extending and retracting the slide-out to confirm smooth operation․ If issues arise, check for loose connections or misaligned sensors․ Refer to the manual for specific synchronization procedures and troubleshooting steps to resolve common problems like misalignment or uneven movement․ Proper configuration ensures safe and efficient slide-out operation․

Syncing Motors for Proper Alignment

Syncing motors ensures smooth operation and prevents binding․ Begin by retracting the slide-out fully and disconnecting the motor wires from the control box․ Engage the manual override system to align the room manually․ Once aligned, reconnect the wires and test the system․ If misalignment persists, adjust the motor synchronization settings on the control box․ For dual-motor systems, refer to the manual for specific calibration steps․ Proper alignment prevents damage and ensures even movement․ Regular syncing is crucial, especially after repairs or replacements, to maintain optimal performance and extend the lifespan of your slide-out system․

Operating the Slide-Out System

Ensure all windows are closed and the coach is stable․ Use the control box to extend or retract the slide-out smoothly․ Always monitor movement and use manual override if needed for safe operation․

Extending and Retracting the Slide-Out

To extend the slide-out, ensure the area is clear and the coach is stable․ Close all windows and secure the room before operation․ Use the control box to initiate extension, monitoring the slide-out’s movement․ If it binds, stop immediately and inspect for obstructions․ Retraction follows a similar process, ensuring alignment and proper sealing․ Always actuate the manual override if automatic operation fails․ Keep the system well-maintained to ensure smooth functionality and prevent damage․ Regular checks on rollers and gears are crucial for optimal performance․ Follow the manual’s guidelines for troubleshooting and maintenance to extend the lifespan of your slide-out system․

Manual Override System

The manual override system allows operation of the slide-out when the electric motor fails․ Locate the crank extension, typically under the chassis or inside the frame, and insert the crank handle․ Ensure the coach is stable and apply firm, steady pressure to turn the handle, moving the slide-out manually․ This feature prevents system failure from halting operations․ Always engage stabilizers before using the override․ Ensure the area is clear and follow safety guidelines to avoid injury or damage․ Regular inspection of the override mechanism ensures reliability when needed․ This system is a vital backup for maintaining functionality during electrical or motor issues․

Troubleshooting Common Operational Issues

Common operational issues with Lippert slide-outs include incomplete extension or retraction, uneven movement, and motor malfunctions․ First, ensure the system is properly powered and all controls are functioning․ Check for obstructions or debris that may block the slide-out․ If the slide-out stops mid-operation, inspect the motor and gears for wear or damage․ Verify that all electrical connections are secure and not corroded․ For binding issues, lubricate moving parts and ensure proper alignment․ If problems persist, consult the manual or contact Lippert support for assistance․ Regular maintenance and inspections can prevent many of these issues from arising․

Maintenance and Care for Lippert Slide-Outs

Regular cleaning and lubrication of moving parts are essential to ensure smooth operation․ Inspect rollers, gears, and seals for wear or damage to prevent leaks and binding issues․

Cleaning and Lubricating Moving Parts

Proper cleaning and lubrication are crucial for maintaining the longevity of your Lippert slide-out system․ Start by wiping down all moving components, such as gears and rollers, with a clean cloth to remove dirt and debris․ Apply a high-quality silicone-based lubricant to these parts to ensure smooth operation and prevent corrosion․ Avoid using petroleum-based products, as they can attract dust and degrade over time․ Regular lubrication will help reduce friction and wear, ensuring your slide-out system operates seamlessly․ Always refer to the manufacturer’s recommendations for the best lubricants to use on your specific Lippert components․

Checking Roller Engagement

Regularly inspect the rollers to ensure proper engagement and alignment․ Visually check for wear, misalignment, or debris accumulation․ Rollers should move smoothly along their tracks without binding or digging into the slide-out floor․ If rollers appear worn or misaligned, adjust or replace them as needed․ Clean the tracks and rollers periodically to remove dirt and dust, which can interfere with smooth operation․ Proper roller engagement is essential for the slide-out system to function efficiently and prevent damage․ Refer to your Lippert manual for specific adjustment instructions tailored to your system․ Addressing issues early ensures optimal performance and extends the system’s lifespan․

Inspecting Seals and Preventing Leaks

Inspect seals around the slide-out to ensure they are free from wear, cracks, or damage․ Clean and lubricate the seals periodically to maintain their integrity and prevent leaks․ Check for any gaps or misalignment that could allow water or air to enter․ If damage is found, replace the seals promptly to avoid further issues․ Properly align the slide-out room during retraction to ensure seals fit snugly against the RV wall․ Regular maintenance helps prevent leaks and ensures a watertight seal, protecting your RV from moisture damage․ Always follow the manufacturer’s guidelines for seal inspection and replacement to maintain optimal performance․

Troubleshooting Common Problems

Common issues include binding, motor malfunction, and alignment problems․ Check for obstructions, ensure proper lubrication, and verify motor synchronization․ Addressing these promptly prevents further damage and ensures smooth operation․

Diagnosing Binding Issues

Binding issues often occur due to misalignment or obstructions․ Inspect the slide-out rollers for proper engagement and ensure they are not digging into the floor․ Clean and lubricate moving parts regularly․ Check for debris or damage in the track system․ If the slide-out binds, manually override the system to assess resistance․ Verify motor synchronization, as uneven motor operation can cause binding․ For Schwintek systems, ensure the motor is properly aligned and calibrated․ If issues persist, consult the manual or contact Lippert support for further assistance․ Addressing binding promptly prevents further damage and ensures smooth operation․

Addressing Motor Malfunctions

If your Lippert slide-out motor malfunctions, start by disconnecting the power supply and ensuring the system is manually overridden․ Check for loose or damaged wiring connections․ Verify that the motor is properly aligned with the gear system․ For Schwintek motors, refer to the provided motor ID chart to ensure correct installation․ If the motor fails to engage, consult the troubleshooting section of the manual․ In severe cases, replace the motor with a compatible Lippert replacement part․ Always follow safety guidelines to avoid injury or further system damage during repairs․ Proper maintenance can prevent future motor issues and ensure reliable operation․

Fixing Alignment Problems

Alignment issues with your Lippert slide-out can cause binding or uneven movement․ Start by ensuring the transit bars are securely installed, as they help maintain proper alignment during operation․ Check the motor and gear system for misalignment, which may result from improper installation or wear․ If the slide-out drifts or wobbles, inspect the roller engagement and adjust as needed․ For Schwintek systems, verify that the motor is synced correctly with the control box․ If issues persist, consult the manual or contact Lippert support for assistance․ Proper alignment is crucial for smooth operation and to prevent damage to the slide-out mechanism․

Advanced Topics and Accessories

Explore advanced features like upgrading to the M2 Sync Slide-Out System for enhanced performance․ Discover accessories such as motor replacements, controllers, and specialized tools to optimize your setup․

Upgrading to the M2 Sync Slide-Out System

Upgrading to the M2 Sync Slide-Out System enhances performance with synchronized motor operation․ This system ensures smooth, simultaneous extension and retraction of slides, reducing alignment issues․ It features advanced control boxes for seamless integration with existing setups․ The upgrade process involves replacing motors and actuators with M2-compatible components․ Detailed instructions are provided in the M2 Sync Slide-Out System Service Manual․ Benefits include improved reliability, reduced wear on moving parts, and quieter operation․ Ensure compatibility by consulting Lippert’s motor ID chart before installation․ This upgrade is ideal for owners seeking modern, efficient slide-out functionality․

Replacing Motors and Actuators

Replacing motors and actuators on your Lippert slide-out system is a straightforward process when done correctly․ Begin by disconnecting the power supply and motor wires at the control box․ Remove the old motor from the H-column, ensuring the wiring is properly disconnected․ Install the new motor, aligning it with the H-column and securing it firmly․ Reconnect the wiring, following the manufacturer’s diagram․ Test the system to ensure smooth operation․ Always refer to the Lippert Master Owners Manual for specific instructions and torque specifications․ Regular replacement of worn motors and actuators prevents system failure and maintains optimal performance․

Installing Slide-Out Controllers

Installing slide-out controllers requires careful attention to wiring and synchronization․ Begin by mounting the control box in an accessible location, ensuring it is level and secure․ Connect the motor wires to the controller, following the diagram provided in the Lippert Master Owners Manual․ Sync the motors by extending and retracting the slide-out simultaneously to calibrate the system․ Test the operation to ensure smooth movement and proper alignment․ Always disconnect power before starting the installation and refer to the manual for specific torque and wiring specifications․ Proper installation ensures reliable performance and prevents future malfunctions․

For further assistance, visit the Lippert Components website to download the Master Owners Manual, which includes detailed troubleshooting guides and technical specifications․ Explore additional resources like installation manuals and maintenance tips to ensure your slide-out system operates at peak performance․

Final Tips for Optimal Performance

To ensure your Lippert slide-out system performs flawlessly, always follow these key tips: Regularly lubricate moving parts to reduce friction and wear․ Conduct thorough inspections of rollers, gears, and seals to prevent leaks and binding issues․ Maintain proper alignment by syncing motors and adjusting as needed․ Store transit bars during travel to avoid misalignment․ Clean debris from tracks and keep the system dry to prevent corrosion․ Refer to your manual for specific guidelines and troubleshooting steps․ By adhering to these practices, you’ll extend the lifespan of your slide-out and enjoy smooth, reliable operation for years to come․

Accessing the Lippert Components Website

Visit the Lippert Components website at www․lippertcomponents․com for comprehensive resources, including manuals, troubleshooting guides, and customer support․ Navigate to the “Support” section to find detailed instructions, diagrams, and FAQs for your specific slide-out system․ Download the Master Owners Manual directly from the site for in-depth information on maintenance, operation, and repairs․ Additionally, explore the “Shop” section for genuine replacement parts and accessories․ For assistance, contact their dedicated customer service team via phone or email․ The website is a one-stop solution for all your Lippert slide-out needs, ensuring you have the tools to keep your system running smoothly․

Downloading the Master Owners Manual

To download the Master Owners Manual for your Lippert Components slide-out system, visit the official Lippert Components website at www․lippertcomponents․com․ Navigate to the “Support” or “Manuals” section, where you can search for your specific product․ Enter your slide-out model or product number to access the corresponding manual․ The Master Owners Manual provides detailed instructions for installation, operation, maintenance, and troubleshooting․ It also includes diagrams, warranty information, and contact details for customer support․ Downloading the manual ensures you have all the necessary resources to keep your slide-out system functioning optimally and address any issues promptly․

basic granny square pattern pdf

The Granny Square is a classic crochet design, originating in the 1970s, known for its simplicity and versatility. It uses basic stitches like chain and double crochet, making it perfect for beginners and a great way to use leftover yarn. This timeless pattern has evolved over the years but remains a cornerstone of crochet, offering endless customization options for projects like blankets, pillows, and more.

What is a Granny Square?

A Granny Square is a traditional crochet motif that has become an iconic symbol of crochet craftsmanship. It typically consists of a central ring with multiple rounds of double crochet stitches, separated by chain stitches to create a textured, multi-colored design. Originating in the 1970s, this versatile pattern is loved for its simplicity and adaptability. Each square is usually made as a standalone piece, which can then be joined with others to create larger items like blankets, pillows, or clothing. The Granny Square’s enduring popularity lies in its ease of customization and its ability to use up leftover yarn, making it a favorite among crocheters of all skill levels.

Popularity and Versatility of Granny Squares

The Granny Square has remained a beloved crochet motif since its rise in popularity during the 1970s. Its timeless appeal lies in its simplicity, versatility, and adaptability to various projects. Crocheters of all skill levels appreciate its ease of customization, allowing for endless creativity with colors, patterns, and sizes. Whether used to create cozy blankets, stylish pillow covers, or unique clothing items, the Granny Square’s modularity makes it a go-to choice for crafters. Its ability to use leftover yarn and its portability have further cemented its status as a classic, ensuring its continued relevance in modern crochet culture.

Materials and Tools Needed

To crochet a Granny Square, you’ll need medium-weight yarn, a crochet hook (typically 4mm), scissors, a yarn needle, and a ruler for measuring accuracy.

Yarn Selection for Granny Squares

Choosing the right yarn is essential for your Granny Square project. Medium-weight yarn, such as worsted or acrylic, is ideal for its durability and softness. Cotton yarn is also a popular choice for its breathability. For a vibrant look, opt for yarns in multiple colors to create the classic Granny Square pattern. Consider the project’s size and desired texture when selecting yarn weight. DK yarn is another great option for a lightweight yet sturdy fabric. Ensure your yarn has good stitch definition to showcase the pattern’s details. Proper yarn selection will ensure your Granny Square is both beautiful and long-lasting.

Crochet Hook and Other Essential Tools

A 4mm crochet hook is ideal for most Granny Square patterns, but hook size may vary based on yarn weight. Aluminum or steel hooks are durable choices, while ergonomic handles provide comfort for long crochet sessions. Scissors and a yarn needle are must-haves for cutting yarn and weaving in ends; Stitch markers can help keep track of your place, ensuring even stitching. A tapestry needle is useful for sewing squares together. These tools are fundamental for creating a neat and professional finish. Having them organized ensures a smooth and enjoyable crocheting experience for any Granny Square project.

Basic Stitches for the Granny Square

The Granny Square relies on two primary stitches: the chain stitch (ch) and double crochet (dc). These simple stitches are easy to master, making the pattern ideal for beginners. The chain stitch forms the foundation, while the double crochet creates the signature texture. Together, they provide a versatile and portable project perfect for using leftover yarn. This classic combination ensures a timeless design that can be customized with various colors and yarn weights, offering endless creativity for crocheters of all skill levels.

Chain Stitch (ch)

The chain stitch (ch) is the foundation of most crochet patterns, including the Granny Square. It is created by drawing up loops on the crochet hook to form a series of connected chains. This stitch is essential for starting projects, joining rounds, and shaping the structure of the Granny Square. The chain stitch is simple to learn, making it a great starting point for beginners. In the Granny Square pattern, the chain stitch often serves as a spacer between clusters of double crochet stitches or to connect different rounds seamlessly. Mastery of the chain stitch is crucial for achieving the correct gauge and maintaining the pattern’s integrity. It is a versatile stitch that allows for easy customization and is a fundamental skill for any crocheter.

Double Crochet Stitch (dc)

The double crochet stitch (dc) is a fundamental stitch in crochet, particularly in the Granny Square pattern. It creates a slightly taller stitch than the single crochet, offering a textured and visually appealing fabric. To work a dc, insert the hook into the stitch, yarn over, draw up a loop, yarn over again, and complete the stitch by drawing through both loops on the hook. In the Granny Square, the dc stitch is typically worked in clusters of three, separated by chain stitches, creating the iconic block pattern. Mastery of the dc stitch is essential for maintaining the Granny Square’s structure and achieving the desired texture. It is a versatile stitch that, when executed evenly, adds depth and beauty to any crochet project.

Understanding the Granny Square Pattern

The Granny Square pattern is a timeless, adaptable crochet design that has evolved since its 1970s origins. Its classic structure remains foundational, offering endless customization and versatility.

Structure of a Classic Granny Square

A classic Granny Square consists of a central motif surrounded by concentric rounds of stitches. It typically begins with a chain stitch foundation, forming a small circle or square. Each round expands outward, incorporating double crochet stitches grouped in threes, separated by chain stitches. This creates the signature checkerboard pattern. The square grows symmetrically, maintaining balance through evenly spaced stitches. Color changes at the start of each round enhance the visual appeal. The structure is modular, allowing for endless customization while retaining its iconic look. This timeless design makes it adaptable for blankets, pillows, and other crochet projects.

How to Read Granny Square Patterns

Understanding a Granny Square pattern involves recognizing abbreviations like “ch” for chain stitch and “dc” for double crochet. Patterns detail the number of stitches, rounds, and color changes. Each round typically starts with a chain stitch, followed by grouped double crochet stitches separated by chain stitches. Parentheses indicate repeats, and brackets denote special instructions. Gauge and tension are crucial for consistency. Visual learners can benefit from charts or diagrams alongside written instructions. Patterns often specify yarn weight, hook size, and materials needed. By following the sequence of rounds and stitches, crocheters can create a classic Granny Square, customizing colors as desired for unique designs.

Step-by-Step Guide to Crocheting a Granny Square

Start with a magic ring or chain, then crochet double stitches in groups, separated by chain stitches. Join each round to form the square’s classic structure.

Starting the First Round

To begin, create a magic ring or start with a chain of four stitches. Crochet six double stitches into the ring or the chain loop. Pull the yarn tight to form a small circle. This establishes the center of your Granny Square. Next, join the round with a slip stitch to the starting chain. This method ensures a neat and secure foundation. Alternatively, you can start with a chain and single crochet stitches, but the magic ring method is preferred for a tidy center. Properly securing the first round is crucial for maintaining even tension and a professional finish.

Completing Subsequent Rounds

After the first round, each subsequent round follows a consistent pattern. Begin by chaining three, then work three double crochets in each corner. Continue crocheting along each side, ensuring three stitches per corner. Slip stitch to join the round, maintaining even tension. For color changes, fasten off the previous yarn and join the new color at the start of the next round. Each round builds on the previous one, expanding the square evenly. Keep track of stitch counts to ensure consistency and a professional finish. Properly securing each round is essential for maintaining the square’s shape and symmetry.

Joining Granny Squares

Joining Granny Squares is a crucial step for creating larger projects like blankets or afghans. The most common methods include the Whip Stitch, Single Crochet Join, or sewing with a yarn needle. For the Whip Stitch, align the squares with right sides together and crochet through both layers. The Single Crochet Join involves crocheting directly into the stitches of adjacent squares. Sewing with a yarn needle offers a nearly invisible seam. Regardless of the method, ensure squares are aligned properly and edges are even. Use a consistent yarn color or contrast for a decorative touch. Proper joining ensures a cohesive and polished finish.

Finishing Touches

Finishing touches are essential to complete your Granny Square project. After crocheting and joining the squares, weave in all yarn ends using a tapestry needle for a neat appearance. Block the finished fabric to even out the stitches and give it a professional look. Optionally, add a border around the edges using a contrasting color for a decorative finish. Ensure all seams are secure and tighten any loose stitches. Finally, trim any excess yarn and inspect the work for consistency. These final steps ensure your Granny Square project is polished and ready for use or display.

Tips and Tricks for Beginners

Start with the right hook size and medium-weight yarn for optimal results. Keep tension even to avoid tight or loose fabric. Count stitches regularly to prevent mistakes and ensure consistency in your granny squares, making the process smoother and more enjoyable.

Common Mistakes to Avoid

When crocheting a granny square, beginners often make mistakes such as uneven tension, which can distort the shape, or miscounting stitches, leading to mismatched rounds. Forgetting to chain stitch between double crochet groups is another common error, causing gaps or uneven edges. Additionally, improper joining of squares can result in a misaligned final project. To avoid these issues, count stitches regularly, use stitch markers to track your progress, and maintain consistent tension. Watching tutorials and using patterns with clear instructions can also help minimize errors and ensure a polished finish for your granny square projects.

How to Maintain Tension and Even Stitches

Maintaining consistent tension is key to creating even stitches in a granny square. Too tight, and the fabric becomes stiff; too loose, and it may sag. To achieve even stitches, use a swatch to gauge your tension and adjust your hook size if needed. Keep the yarn at a comfortable tautness, neither pulling too hard nor letting it go slack. Use stitch markers to track your progress and ensure each round starts and ends correctly. Practice crocheting with a relaxed grip to avoid uneven tension. Regularly counting stitches and keeping the hook at a consistent angle will also help maintain uniformity in your work.

Using the Granny Square in Larger Projects

Granny squares are incredibly versatile for creating larger projects like blankets, afghans, and home decor. They can be stitched together to form vibrant, textured designs, offering endless creativity and customization for unique crochet pieces.

Creating Blankets and Afghans

Granny squares are perfect for crafting cozy blankets and afghans, allowing for endless customization. By stitching multiple squares together, you can create vibrant, textured designs. Use leftover yarn to minimize waste, or choose a cohesive color scheme for a uniform look. Patterns like the 4 Color Granny Square offer a dynamic appearance, while traditional designs provide timeless appeal. Whether using DK yarn with a 2.5mm hook or worsted weight yarn, the versatility of granny squares ensures your blanket or afghan will be both beautiful and personalized, making it a cherished handmade item for years to come.

Granny Square Pillow Covers and Other Home Decor

Granny squares are a delightful way to add charm to your home decor. Turn your squares into cozy pillow covers by sewing them together and adding a backing fabric. For a seamless look, use matching yarn colors or mix-and-match for a vibrant patchwork effect. Beyond pillows, granny squares can be transformed into table mats, coasters, or even wall hangings. Their versatility allows you to customize sizes and colors to fit any room’s aesthetic. With patterns like the 4 Color Granny Square or traditional designs, you can create unique, handmade decor that adds a personal touch to your space while using leftover yarn creatively.

Free Granny Square Patterns and Resources

Discover a wide range of free granny square PDF patterns online, from classic designs to intricate 3D squares. Perfect for all skill levels and projects.

Where to Find Free PDF Patterns

Free granny square PDF patterns are widely available online. Websites like Pinterest, Etsy, and crochet blogs offer downloadable designs. Many designers share free patterns, such as the Basic Granny Square and seasonal variations. Platforms like Crochet Geek and Moogly provide step-by-step guides and charts. Additionally, eBooks and tutorials on sites like Amazon and Craftsy include granny square patterns. Some designers, such as Margaret Hubert, offer collections like The Granny Square Book, featuring 35 seasonal patterns. These resources are perfect for beginners, offering clear instructions and versatile designs to suit any project. Always check for downloadable PDF options when exploring these sites.

Recommended Books and Tutorials

For a comprehensive learning experience, consider books like The Granny Square Book by Margaret Hubert, which offers 30 unique designs. Granny Square Flowers provides seasonal variations, while The Complete Book of Granny Squares includes 45 patterns. Online tutorials on platforms like Craftsy and Crochet Geek offer step-by-step video guides. Moogly and The Crochet Crowd also provide free tutorials with detailed instructions. These resources cater to all skill levels, ensuring a smooth transition from basic to advanced projects. They are ideal for mastering the granny square technique and exploring creative variations.

The Basic Granny Square Pattern is a timeless and versatile design, perfect for crocheters of all skill levels. Its simple yet elegant structure allows for endless creativity, making it ideal for projects ranging from cozy blankets to charming home decor. With its foundation in basic stitches like the chain and double crochet, this pattern serves as a great introduction to crochet. The abundance of free PDF patterns, tutorials, and books available online makes it easy for anyone to master and adapt the granny square to their unique vision.

how to heal an avoidant attachment style pdf free download

Understanding Avoidant Attachment Style

Healing an avoidant attachment style often begins with self-reflection and understanding its roots in early relationships. Free PDF guides offer practical strategies to address emotional barriers, fostering healthier connections and personal growth through CBT-based exercises and mindful communication.

Definition and Overview

An avoidant attachment style is one of four primary attachment patterns, characterized by emotional distance and a fear of intimacy. It often develops from early relationships with emotionally unavailable caregivers, leading to difficulty trusting others and forming close connections. Individuals with this style may prioritize independence over intimacy, unintentionally creating barriers in relationships. Understanding this pattern is crucial for healing, as it allows individuals to address deep-rooted fears and work toward building secure, meaningful connections. Free PDF guides provide comprehensive insights and strategies for overcoming avoidant tendencies.

Key Characteristics of Avoidant Attachment

Avoidant attachment is marked by emotional distancing, fear of intimacy, and a tendency to prioritize independence over close relationships. Individuals may struggle with trust, often perceiving emotional vulnerability as a weakness. They may exhibit dismissive behaviors, such as pulling away during conflicts or avoiding deep conversations. These patterns stem from early experiences with emotionally unavailable caregivers, reinforcing the belief that relying on others leads to disappointment. Recognizing these traits is the first step toward healing and fostering healthier relational dynamics.

How Avoidant Attachment Impacts Relationships

Avoidant attachment often leads to strained relationships due to emotional unavailability and a reluctance to engage deeply. Partners may feel unheard, unloved, or suffocated by the emotional distance, causing resentment and conflict. The avoidant individual’s fear of intimacy can create a cycle of push-and-pull dynamics, where one seeks closeness while the other recoils. This imbalance can hinder trust and emotional connection, making it challenging to build a secure and fulfilling relationship. Addressing these patterns is crucial for fostering mutual understanding and growth.

Causes and Development of Avoidant Attachment

Avoidant attachment often stems from early childhood experiences with emotionally unavailable caregivers, leading to insecure attachment patterns and a fear of intimacy in adult relationships.

Early Childhood Experiences and Caregivers

Avoidant attachment often develops from early interactions with emotionally unavailable or inconsistent caregivers. Children who experience neglect or dismissal of their emotional needs may learn to suppress their feelings and avoid intimacy. This pattern, rooted in a lack of secure attachment, can persist into adulthood, making it challenging to form trusting relationships. Free PDF guides and workbooks provide insights into these developmental origins and offer strategies for healing and building healthier attachment patterns.

Emotional Unavailability in Caregivers

Emotionally unavailable caregivers often fail to respond to a child’s emotional needs, leading to avoidant attachment. This unavailability teaches the child to suppress feelings and avoid intimacy. Such caregivers may be distant, dismissive, or inconsistent, causing the child to feel unimportant or unheard. This dynamic laying the groundwork for avoidant patterns in adulthood. Free PDF guides and workbooks explore how these early interactions shape attachment styles and provide practical steps for healing and rebuilding emotional connection.

Developmental Conditions Leading to Avoidance

Developmental conditions, such as early neglect or inconsistent caregiving, often contribute to avoidant attachment. When caregivers are emotionally unavailable or dismissive, children may learn to suppress emotions and avoid intimacy. This early programming can lead to a belief that closeness results in rejection or suffocation. Free PDF guides provide insights into these developmental patterns and offer practical strategies for healing, helping individuals move toward secure attachment and healthier emotional connections.

Self-Reflection and Awareness

Self-reflection is key to healing an avoidant attachment style. Free PDF workbooks offer exercises to identify emotional triggers and patterns, fostering awareness and growth.

Identifying Patterns in Your Relationships

Recognizing patterns in your relationships is crucial for healing an avoidant attachment style. Free PDF guides provide practical steps to identify emotional triggers and behaviors that perpetuate distance. By reflecting on past interactions, you can uncover cycles of withdrawal and understand how they stem from deep-seated fears. These resources often include exercises like journaling and self-reflection to help you pinpoint moments when you pull away emotionally. Mindful communication strategies are also emphasized to foster connection and break avoidant tendencies, promoting healthier relationships and personal growth.

Understanding Your Emotional Triggers

Understanding emotional triggers is vital for healing an avoidant attachment style. Free PDF guides offer insights into recognizing patterns of withdrawal and fear of intimacy. These resources often include exercises to identify specific situations or emotions that lead to avoidance, such as feelings of suffocation or rejection. By exploring these triggers through journaling or mindfulness, individuals can address the root causes of their avoidant behaviors and develop healthier responses to emotional challenges, fostering deeper connections and personal growth.

Recognizing the Need for Change

Recognizing the need for change is the first step in healing an avoidant attachment style. Many individuals struggle with emotional distance and fear of intimacy, often stemming from past experiences. Free PDF guides emphasize the importance of self-reflection to acknowledge these patterns and their impact on relationships. By understanding the emotional barriers that prevent closeness, individuals can begin to address the root causes of their avoidance, paving the way for meaningful connections and personal growth through structured exercises and mindful practices.

Rebuilding Trust and Emotional Connection

Rebuilding trust involves fostering empathy and creating a safe environment for emotional expression. Free PDF guides provide practical steps to encourage vulnerability and strengthen connections, helping individuals gradually overcome avoidance and build meaningful relationships.

Practicing Vulnerability in Relationships

Practicing vulnerability is crucial for healing an avoidant attachment style. It involves gradually expressing emotions and needs in a safe, trusting environment. Free PDF guides suggest starting with small, manageable steps, such as sharing personal feelings or fears with a partner. Active listening and empathy are essential to create a supportive space. Over time, this practice helps build intimacy and reduces the fear of emotional closeness, fostering healthier and more fulfilling connections.

Developing Empathy and Attunement

Developing empathy and attunement is key to healing an avoidant attachment style. Free PDF guides emphasize understanding and resonating with others’ emotions, fostering deeper connections. This involves active listening, recognizing non-verbal cues, and validating feelings. By practicing empathy, individuals can bridge emotional distances and build trust, creating a foundation for secure relationships and personal growth.

Creating a Safe Environment for Emotional Expression

Creating a safe environment for emotional expression is crucial for healing an avoidant attachment style. Free PDF guides emphasize fostering a space where individuals feel comfortable sharing their feelings without fear of judgment. This involves active listening, empathy, and non-verbal cues that convey support. By encouraging open dialogue and validating emotions, you help build trust and security, allowing those with avoidant tendencies to gradually express themselves more freely and authentically.

Effective Communication Strategies

Active listening, open dialogue, and assertive expression are key. Reducing excessive verbalization while using empathy strengthens connections, fostering emotional safety and trust in relationships.

Active Listening and Open Dialogue

Active listening and open dialogue are essential for healing avoidant attachment. Engage fully with your partner, show empathy, and understand their feelings to create a safe space for expression. This fosters trust and intimacy, overcoming avoidance. Regular, honest communication builds connection and security, gradually healing relational wounds. Free guides offer practical strategies to enhance these skills, promoting emotional growth and healthier relationships.

Assertive Communication Without Excessive Verbalization

Assertive communication involves expressing needs clearly without overwhelming others. Avoid excessive talking, which can lead to emotional distance. Instead, focus on concise, heartfelt messages. This approach balances boundaries and connection, fostering trust. Free guides provide exercises to refine this skill, promoting healthy dialogue and emotional closeness, crucial for healing avoidant attachment. Mindful communication strengthens relationships and encourages mutual understanding.

Using Empathy to Strengthen Connections

Empathy is a powerful tool for healing avoidant attachment. By actively listening and understanding others’ emotions, you create a safe space for connection. Free PDF guides offer exercises to cultivate empathy, helping to break down emotional barriers and foster deeper trust. This approach not only strengthens relationships but also encourages mutual support, essential for overcoming avoidant tendencies. Practicing empathy allows for more authentic interactions, promoting emotional healing and secure attachment.

Seeking Professional Help

Therapy is crucial for healing avoidant attachment. Cognitive Behavioral Therapy (CBT) helps identify and change negative patterns. Free PDF guides provide tools to support this journey, encouraging emotional growth and secure connections with the help of a trained therapist.

The Role of Therapy in Healing Attachment

Therapy plays a vital role in addressing avoidant attachment by helping individuals identify and challenge negative patterns rooted in early experiences. A trained therapist can provide a safe space to explore emotions and develop healthier relationship strategies. Cognitive Behavioral Therapy (CBT) is particularly effective in restructuring harmful thought processes. Additionally, free PDF guides and workbooks offer complementary tools to support this journey, emphasizing self-reflection and practical exercises to foster emotional growth and secure connections.

Cognitive Behavioral Therapy (CBT) for Attachment Issues

CBT is a powerful approach to healing avoidant attachment by addressing negative thought patterns and behaviors. It helps individuals identify and challenge unhelpful beliefs about relationships, fostering healthier emotional responses. Through structured exercises, CBT encourages self-reflection and the development of new, adaptive strategies for connection. Free PDF guides often include CBT-based tools, providing practical steps to reframe avoidance and build intimacy. This method empowers individuals to gradually embrace vulnerability and form secure attachments.

Working with a Secure Partner or Therapist

Collaborating with a secure partner or therapist is crucial for healing avoidant attachment. They provide a safe, empathetic environment, helping individuals gradually embrace emotional closeness. A secure partner models healthy communication, while a therapist offers guided strategies. Free PDF guides emphasize the importance of attunement and consistent support, encouraging trust and vulnerability. This collaborative process allows individuals to break free from avoidance and develop secure attachment patterns, fostering deeper, more fulfilling relationships over time.

The Importance of Self-Care

Building self-compassion and engaging in activities that promote emotional healing are vital for recovery. Free CBT-based guides offer practical tools to foster self-care and personal growth.

Building Self-Compassion and Self-Worth

Self-compassion is crucial for healing avoidant attachment. Free PDF guides emphasize the importance of treating oneself with kindness and understanding, fostering self-worth through mindful practices and emotional acceptance. These resources provide practical exercises to help individuals recognize their value and develop a secure sense of self, essential for forming healthy relationships and overcoming attachment insecurities. Regular self-care routines and affirmations can gradually rebuild confidence and encourage emotional resilience, aiding in the journey toward secure attachment.

Engaging in Activities That Promote Emotional Healing

Healing an avoidant attachment style involves engaging in activities that foster emotional growth. Mindfulness practices, journaling, and creative expression can help individuals process emotions and develop self-awareness. Free PDF guides often recommend grounding techniques and self-care routines to manage emotional triggers. These activities encourage individuals to reconnect with their feelings, promoting resilience and emotional balance. By integrating these practices into daily life, individuals can gradually build the capacity for healthier, more intimate relationships and a stronger sense of self.

Education and Resources

Free PDF guides and workbooks on attachment healing provide essential tools for understanding and overcoming avoidant attachment styles. These resources offer practical strategies and exercises for emotional growth.

Free PDF Guides and Workbooks on Attachment Healing

Free PDF guides and workbooks offer comprehensive strategies to heal avoidant attachment styles. These resources include CBT-based exercises, mindfulness practices, and step-by-step approaches to foster emotional growth and healthier relationships. They provide insights into understanding attachment theory, identifying patterns, and rebuilding trust. Designed for self-reflection and practical application, these guides empower individuals to overcome emotional barriers and cultivate secure attachment styles. Downloadable resources are widely available, making healing accessible and convenient for everyone.

Recommended Reading on Attachment Theory

Recommended reading on attachment theory includes works by pioneers like John Bowlby and Mary Ainsworth, offering insights into attachment styles and their impact. Books like Attached by Amir Levine and Rachel Heller provide practical advice for understanding and healing avoidant attachment. These resources explore how early relationships shape adult connections and offer strategies to foster secure attachment. They are invaluable for those seeking to address avoidant patterns and build fulfilling relationships.

Online Communities and Support Groups

Online communities and forums provide a safe space to share experiences and connect with others healing from avoidant attachment. Groups on platforms like Reddit and Facebook offer support, advice, and resources. These communities often share free PDF guides and workbooks, facilitating personal growth and fostering emotional resilience. Engaging with others on similar journeys can enhance understanding and provide practical strategies for building healthier relationships and overcoming attachment challenges.

Building Emotional Resilience

Healing avoidant attachment involves practicing mindfulness and developing healthy coping mechanisms. Free PDF guides offer exercises to enhance emotional resilience, fostering growth and connection in relationships.

Practicing Mindfulness and Presence

Practicing mindfulness helps individuals with avoidant attachment styles stay present in relationships, reducing emotional distancing. Free PDF guides offer exercises to cultivate self-awareness and emotional regulation, fostering a sense of safety and connection. Mindfulness techniques encourage individuals to observe their feelings without judgment, promoting emotional resilience and healthier attachment patterns over time.

Developing Healthy Coping Mechanisms

Developing healthy coping mechanisms is crucial for healing avoidant attachment. Free PDF guides provide strategies to manage emotional distance and build resilience. Techniques like mindfulness and emotional regulation help individuals break negative patterns, fostering a sense of control and connection. By adopting constructive ways to handle stress and relationships, individuals can gradually shift from avoidance to healthier emotional engagement, promoting long-term personal growth and balanced interactions.

Overcoming Fear of Intimacy

Addressing deep-rooted fears and beliefs is key to overcoming intimacy issues. Free PDF guides offer CBT-based exercises and mindfulness practices to help gradually build trust and emotional closeness.

Addressing Deep-Rooted Fears and Beliefs

Healing an avoidant attachment style requires confronting deep-seated fears and beliefs rooted in early relationships. Free PDF guides and CBT-based workbooks provide tools to identify and challenge these patterns. By understanding how childhood experiences shaped emotional distance, individuals can gradually rebuild trust. Therapy and self-reflection are key to addressing these fears, fostering a mindset open to intimacy and connection. Small, consistent steps toward vulnerability can lead to meaningful change and healthier relationships.

Gradual Steps Toward Emotional Closeness

Healing an avoidant attachment style involves gradual steps to foster emotional closeness. Free PDF guides recommend starting with small, manageable interactions, such as sharing feelings in a safe environment. Practicing active listening and empathy helps build trust. Over time, individuals can learn to express needs openly, embracing vulnerability. These steps, supported by CBT exercises and mindful communication, create a foundation for deeper connections, helping to overcome fears and develop secure relationships.

Creating a Supportive Network

Surround yourself with securely attached individuals who foster emotional growth. Free PDF guides emphasize building a community that encourages vulnerability, trust, and open communication, aiding in attachment healing.

Surrounding Yourself with Securely Attached Individuals

Building a network of securely attached individuals can significantly aid in healing an avoidant attachment style. These people model healthy emotional expression and empathy, creating a safe space for vulnerability. By observing and engaging with their positive communication patterns, you can gradually internalize these behaviors, fostering trust and intimacy. Free PDF guides often emphasize the importance of such relationships in reshaping attachment patterns and reducing fear of emotional closeness.

Building a Community That Encourages Growth

Creating a supportive community is vital for healing an avoidant attachment style. Surrounding yourself with like-minded individuals who understand your journey fosters accountability and motivation. Free PDF guides often recommend joining online forums or support groups where people share their experiences and strategies for emotional healing. Such communities provide a sense of belonging and encouragement, helping you stay committed to your growth and gradually build healthier relationship patterns.

Embracing Emotional Vulnerability

Embracing emotional vulnerability is crucial for healing an avoidant attachment style. It involves expressing needs and feelings openly, allowing others to support and connect deeply. Free PDF guides provide practical steps to foster this growth, helping you move toward secure and fulfilling relationships.

Learning to Express Needs and Feelings Openly

Learning to express needs and feelings openly is a transformative step in healing an avoidant attachment style. It begins with identifying emotional patterns and practicing vulnerability in small, safe ways. Free PDF guides offer exercises to help articulate emotions and build trust. By gradually sharing feelings with trusted individuals, you can foster deeper connections and reduce emotional distance. This process requires patience and self-compassion, but it paves the way for more authentic and fulfilling relationships.

Accepting Support and Affection from Others

Accepting support and affection is a crucial step in healing an avoidant attachment style. It involves dismantling emotional barriers and embracing trust. Free PDF guides provide strategies to gradually open up, fostering a sense of safety and connection. By allowing others to offer emotional support, you can build resilience and deepen relationships. This process requires empathy, patience, and consistent effort to create a foundation for mutual understanding and affection.

Maintaining Progress and Growth

Maintaining progress involves tracking growth, using free CBT-based guides, and fostering continuous learning to sustain emotional development and healthier relationships over time.

Tracking Progress in Relationships

Tracking progress in relationships involves regularly assessing emotional openness and communication improvements. Free PDF guides suggest journaling milestones and reflecting on interactions to monitor growth. Over time, individuals can identify patterns of increased vulnerability and trust, signaling progress toward secure attachment. These tools emphasize the importance of consistency and patience, as healing is a gradual journey requiring continuous effort and self-awareness.

Continuous Self-Reflection and Learning

Continuous self-reflection and learning are vital for healing an avoidant attachment style. Free PDF guides recommend regular introspection to identify emotional triggers and patterns. By exploring past experiences and their impact on current relationships, individuals can gain deeper insights and develop healthier coping mechanisms. These resources encourage embracing a growth mindset, fostering resilience, and staying committed to personal development for lasting change and improved emotional connections.

The journey to heal an avoidant attachment style leads to secure connections. Free PDF guides offer tools for transformation, enabling emotional growth and thriving relationships.

The Journey Toward Secure Attachment

Healing an avoidant attachment style is a transformative journey requiring self-reflection, emotional awareness, and a commitment to growth. By understanding the roots of avoidance and engaging in CBT-based exercises, individuals can gradually build trust and foster secure connections. Free PDF guides provide step-by-step strategies to address emotional barriers, encouraging vulnerability and empathy. This journey empowers individuals to embrace intimacy, develop resilience, and cultivate fulfilling relationships, ultimately moving from avoidance to secure attachment.

Final Thoughts on Healing and Growth

Healing an avoidant attachment style is a powerful journey of self-discovery and emotional transformation. Through CBT-based strategies and mindful reflection, individuals can break free from patterns of distance and build meaningful connections. Free PDF guides offer invaluable tools to navigate this process, fostering resilience and emotional intelligence. Embracing vulnerability and empathy, one can transition from avoidance to secure attachment, unlocking the potential for fulfilling relationships and lasting personal growth.

sharp el 1197piii user manual

The Sharp EL-1197PIII is a versatile electronic printing calculator designed for efficiency and durability. It offers advanced functions, a user-friendly interface, and is ideal for both home and office use.

1.1 Overview of the Sharp EL-1197PIII

The Sharp EL-1197PIII is a pocket-sized printing calculator designed for versatility and efficiency. It combines basic arithmetic functions with advanced printing capabilities, making it ideal for home, office, or on-the-go use. The calculator features a 12-digit display and a dual-color ribbon for clear, professional prints. Its compact design allows for easy portability, while the CR2 battery ensures long-lasting power. The EL-1197PIII is known for its durable construction and user-friendly interface, catering to both casual and heavy users. With its versatile functionality and reliable performance, it remains a popular choice for those seeking a balance between simplicity and capability.

1.2 History and Development of the Sharp EL-1197PIII

The Sharp EL-1197PIII is part of Sharp’s legacy of producing innovative calculators. Released in the early 2000s, it was designed to meet the growing demand for portable, efficient printing calculators. Drawing from earlier models like the EL-8 and EL-1197P, Sharp incorporated feedback from users to enhance functionality and durability. The EL-1197PIII features improved printing speed and a more intuitive interface compared to its predecessors. Its development reflects Sharp’s commitment to blending technology with user-centric design, ensuring it remains a reliable tool for various professional and personal needs. This model has stood the test of time, earning a reputation for reliability and performance.

Product Features and Specifications

The Sharp EL-1197PIII is a 12-digit electronic printing calculator designed for high-speed printing and advanced calculations. It features a durable design, high-speed printer, and dual-color ribbon for clear output. Powered by a CR2 battery, it offers portability and reliability for everyday use.

2.1 Design and Build Quality

The Sharp EL-1197PIII features a compact and lightweight design, making it easy to use and transport. Its durable construction ensures long-term reliability, while the ergonomic layout enhances user comfort. The calculator boasts a high-contrast display for clear readability and an intuitive control panel for seamless operation. Built with sturdy materials, it withstands regular use in busy environments. The efficient paper roll system and dual-color ribbon provide crisp, professional prints. Overall, the Sharp EL-1197PIII combines functionality and durability, making it a reliable choice for daily use.

2.2 Key Functions and Capabilities

The Sharp EL-1197PIII offers a wide range of advanced functions tailored for professional and home use. It includes high-speed printing with up to 4.5 lines per second, making it ideal for bulk calculations. The calculator features 12-digit display and large numeric keys for easy input. It supports complex calculations, such as tax, percentage, and markup functions. Additionally, it includes memory recall and specialized formulas for enhanced usability. The dual-color ribbon allows for clear printouts in both black and red ink, while the automatic paper cutter ensures clean results. With its versatile capabilities, the EL-1197PIII is a reliable tool for various financial and business needs.

2.3 Display and User Interface

The Sharp EL-1197PIII features a clear and readable 12-digit LCD display, ensuring precise visibility of calculations and results. The large numeric keyboard is designed for easy navigation, with logically arranged keys to minimize errors. The print preview function allows users to review calculations before printing, enhancing efficiency. Additionally, the calculator includes a dual-color ribbon for printing in black and red ink, making financial records easier to interpret. The intuitive control panel provides quick access to advanced functions, while the automatic power save feature conserves energy when not in use. These features combine to create a user-friendly experience, making the EL-1197PIII ideal for both professionals and home users.

2.4 Technical Specifications

The Sharp EL-1197PIII is equipped with a 12-digit LCD display for clear and precise calculations. It operates on a CR2 battery for reliable power and features a dual-color ribbon for printing in black and red ink. The calculator supports 12-digit printing with high-speed output, making it efficient for heavy use. It is compatible with Sharp 1197P III ribbons and 12-digit paper rolls. The device also includes an automatic power save function to conserve energy when not in use. These technical specifications ensure the EL-1197PIII delivers accurate and efficient performance for various financial and mathematical tasks.

Installation and Setup

To set up the Sharp EL-1197PIII, begin by unboxing and placing it on a flat surface. Install the CR2 battery and ensure it is securely seated. Load the paper roll according to the manual’s instructions, ensuring proper alignment. Connect any required peripheral devices and verify power supply. This initial setup ensures smooth operation and optimal performance for all calculator functions.

3.1 Unboxing and Initial Setup

When you unbox the Sharp EL-1197PIII, carefully remove the calculator, paper roll, and ribbon from the packaging. Inspect all components for damage and ensure no items are missing.

Begin by installing the CR2 battery in the designated compartment, ensuring it is securely seated; Next, load the paper roll by aligning it with the print mechanism and gently pulling the paper through the slot until it is properly fed.

Connect any peripheral devices if required, such as an external power supply or additional accessories. Finally, turn on the calculator to verify that all functions operate correctly. Refer to the user manual for detailed instructions and diagrams to ensure a smooth setup process.

3.2 Power Requirements and Battery Installation

The Sharp EL-1197PIII requires a CR2 lithium battery for operation. To install the battery, locate the battery compartment on the rear or bottom of the calculator.

Open the compartment by sliding it or using a screwdriver, depending on the model. Insert the CR2 battery, ensuring the positive terminal faces the correct direction as indicated by the diagram inside the compartment.

Close the compartment securely to avoid power interruptions. If using an external power supply, plug it into a compatible outlet to ensure continuous operation. Always use the recommended battery type to maintain performance and avoid damage to the calculator.

3.3 Connecting Peripheral Devices

To connect peripheral devices to the Sharp EL-1197PIII, ensure the calculator is turned off to avoid any power surges or malfunctions. Locate the appropriate ports for connecting accessories, such as the power cord or data cables. Plug in the devices securely, following the manufacturer’s guidelines. For external power, connect the adapter to a compatible outlet. If using additional accessories like paper rolls or ribbons, refer to the installation instructions provided in the manual. Turn the calculator on and test the connectivity to ensure proper function. Always use compatible peripherals to maintain optimal performance and avoid potential damage to the device.

Basic Operations

The Sharp EL-1197PIII enables seamless basic operations, including turning the device on/off, navigating the control panel, and performing fundamental arithmetic calculations with ease and precision.

4.1 Turning the Calculator On/Off

To power on the Sharp EL-1197PIII, locate the power button, typically found on the top-right side of the device. Press and hold it for a brief moment until the display lights up. Ensure the calculator is properly powered using the CR2 battery or an AC adapter. If the battery is low, the display will show a low battery indicator. To turn it off, press and hold the same power button until the display turns off. Always power off the device before replacing the battery or ribbon to avoid data loss or mechanical damage. This simple process ensures efficient operation and prolongs the calculator’s lifespan.

4.2 Navigating the Control Panel

The Sharp EL-1197PIII features an intuitive control panel designed for ease of use. The numerical keypad is centrally located, with function keys and operation buttons arranged logically. Users can access basic arithmetic functions like addition, subtraction, multiplication, and division using clearly labeled buttons; The control panel also includes a decimal point key for precise calculations and a print key for producing hard copies of results. The navigation is straightforward, with dedicated buttons for memory functions, specialized calculations, and display adjustments. The print function is particularly useful for keeping records of calculations, making it ideal for professional settings. Familiarizing yourself with the layout ensures efficient operation and maximizes the calculator’s capabilities.

4.3 Performing Basic Arithmetic Operations

The Sharp EL-1197PIII simplifies basic arithmetic operations with its intuitive design. Users can perform addition, subtraction, multiplication, and division by inputting numbers and selecting the appropriate operation key. The calculator features a decimal point key for precise calculations and a print function to generate hard copies of results. Simply enter the first number, press the operation key, input the second number, and press the equals key to see the result. The print button allows users to keep a record of calculations, making it ideal for professional or personal use. The calculator’s speed and accuracy ensure efficient computation, while its clear display makes it easy to review results. This functionality makes the Sharp EL-1197PIII a reliable tool for everyday arithmetic tasks.

Advanced Functions

The Sharp EL-1197PIII offers a range of advanced functions, including printing capabilities, memory functions, and specialized calculations, enhancing its versatility for complex tasks.

5.1 Printing Capabilities

The Sharp EL-1197PIII features robust printing capabilities, enabling high-speed and precise output for various calculations. It supports thermal printing technology, ensuring clear and durable results. The calculator includes a built-in ribbon system for consistent print quality. Users can easily manage paper rolls, with a tear-off mechanism for convenience. The printer is compatible with 12-digit paper rolls, making it suitable for detailed financial and business calculations. Additionally, the calculator allows for customizable print settings, such as adjusting print speed and ink intensity. Regular ribbon replacement ensures long-term performance, while paper roll replacement is straightforward, maintaining productivity. These features make the EL-1197PIII an excellent choice for offices requiring reliable and efficient printing solutions.

5.2 Memory Functions

The Sharp EL-1197PIII incorporates memory functions that enhance its functionality for users. It features an independent memory and a constant memory, allowing users to store and recall specific values for repeated calculations. The memory recall function enables quick access to stored data, streamlining workflows. Additionally, the calculator supports memory addition and subtraction, making it ideal for tasks like budgeting or inventory management. A backup battery ensures that stored memory data is retained even when the main power is off. These memory functions make the EL-1197PIII a practical tool for businesses and individuals needing to track and manage numerical data efficiently over time. Its user-friendly design ensures that memory operations are intuitive and accessible.

5.3 Specialized Calculations

The Sharp EL-1197PIII offers a range of specialized calculations to cater to diverse user needs. It includes statistical functions such as mean, median, and standard deviation, making it suitable for data analysis. Additionally, the calculator features time and date calculations, allowing users to perform date arithmetic and time zone conversions. Its unit conversion capabilities enable quick switching between different measurement units, which is handy for international transactions or scientific applications. Furthermore, the EL-1197PIII supports custom formulas and compound interest calculations, making it a versatile tool for financial planning and complex mathematical tasks. These features ensure that the calculator meets the demands of professionals and enthusiasts alike, providing accurate and efficient results for specialized computations.

Maintenance and Care

Regularly clean the display and print mechanism to ensure optimal performance. Check the ribbon for wear and replace it when faded. Always use genuine parts for replacements.

6.1 Cleaning the Calculator

To maintain the Sharp EL-1197PIII’s performance, regular cleaning is essential. Use a soft, dry cloth to wipe the exterior and keyboard. For the display, gently clean with a slightly damp cloth, avoiding liquid contact. Never use harsh chemicals or abrasive materials, as they may damage the surface. For the print head and internal mechanisms, turn off the calculator and use compressed air to remove dust. Avoid touching the print head to prevent smudging. Clean the paper roll area regularly to ensure smooth printing. For stubborn stains, a mild soap solution on a damp cloth can be used, but ensure the calculator is dry before turning it on. Cleaning helps maintain accuracy and longevity.

6.2 Replacing the Ribbon

To replace the ribbon in the Sharp EL-1197PIII, start by turning off the calculator. Remove the paper roll to access the print mechanism. Open the ribbon compartment, usually located near the print head. Gently pull out the old ribbon spools and discard them. Insert the new ribbon, ensuring it is properly aligned and seated. Close the compartment and reinstall the paper roll. Turn the calculator on and print a few lines to test the ribbon quality. Use only compatible ribbons designed for the Sharp EL-1197PIII to maintain performance. Always handle the ribbon carefully to avoid touching the print head, as oils from skin can cause smudging. Regular replacement ensures crisp and clear prints.

6;3 Paper Roll Replacement

To replace the paper roll in the Sharp EL-1197PIII, begin by turning off the calculator. Open the paper compartment, typically located at the top or side of the device. Gently remove the empty or used paper roll by pulling it straight out. Take the new paper roll and insert it into the compartment, ensuring it is properly aligned with the print mechanism. Close the compartment and turn the calculator back on. The device will automatically feed the paper. Always use compatible paper rolls designed for the EL-1197PIII to ensure smooth operation. If the paper does not feed correctly, check for proper installation and trim the edge of the paper roll if necessary. Regularly replacing the paper roll maintains print quality and prevents jams.

Troubleshooting Common Issues

This section addresses frequent issues with the Sharp EL-1197PIII, such as power problems, printing errors, and error messages. Solutions include checking the battery, cleaning the print head, and resetting the device.

7.1 Power Issues

Power issues with the Sharp EL-1197PIII often stem from low battery levels or improper battery installation. Ensure the CR2 battery is correctly inserted and replace it if necessary. If the calculator fails to turn on, check the power button for functionality or try resetting the device. Prolonged disuse may drain the battery, so regular use or charging is recommended. If problems persist, consult the user manual or contact Sharp support for assistance. Always verify power requirements before troubleshooting.

  • Replace the CR2 battery if power issues occur.
  • Ensure proper installation of the battery.
  • Check the power button for functionality.

This section helps resolve common power-related problems efficiently.

7.2 Printing Problems

Printing issues with the Sharp EL-1197PIII can arise from paper jams, misaligned paper rolls, or ribbon problems. Ensure the paper roll is correctly installed and not torn. If the printout is faint, the ribbon may need replacement. Clean the print head regularly to maintain clarity. Adjust the paper feed mechanism if misalignment occurs. If the calculator fails to print, check for obstructions or loose connections. Resetting the device may resolve software-related issues. Refer to the manual for detailed troubleshooting steps. Proper maintenance can prevent recurring printing problems.

  • Check for paper jams or misalignment.
  • Inspect and replace the ribbon if necessary.
  • Clean the print head for better output.

Regular upkeep ensures smooth printing functionality.

7.3 Error Messages and Solutions

The Sharp EL-1197PIII may display error messages like “Paper Jam”, “Low Battery”, or “Invalid Input”. For a paper jam, turn off the calculator, remove the paper roll, and gently clear the obstruction. If the battery is low, replace or recharge it promptly. An invalid input error occurs when incorrect data is entered; restart the calculation with valid inputs. Other errors may require resetting the device by turning it off and on again. If issues persist, consult the user manual or contact support. Regular maintenance, such as cleaning and updating ribbons, can help prevent errors.

  • Resolve paper jams by clearing obstructions.
  • Replace or recharge batteries when low.
  • Ensure valid input to avoid calculation errors.

Proper troubleshooting ensures optimal performance.

Accessories and Compatibility

The Sharp EL-1197PIII supports compatible paper rolls and printer ribbons for seamless operation. It works with Sharp-branded supplies and select third-party accessories, ensuring versatility.

  • Uses 12-digit paper rolls.
  • Compatible with black/red ribbons.
  • Supports third-party ink cartridges.

This ensures long-term functionality.

8.1 Recommended Accessories

The Sharp EL-1197PIII is compatible with a range of accessories to enhance its functionality. For optimal performance, Sharp recommends using original or compatible paper rolls and ink ribbons. These ensure crisp, clear prints and extend the life of the printer. Additionally, a high-quality power adapter is essential for consistent operation. For extended use, consider replacement batteries or a backup power supply. Protective cases and dust covers are also available to safeguard the calculator. These accessories are designed to maintain efficiency and durability, ensuring the EL-1197PIII remains a reliable tool for years. Always opt for Sharp-branded accessories for guaranteed compatibility and performance.

  • Paper rolls (12-digit compatible).
  • Ink ribbons (black/red dual rolls);
  • Power adapter or backup battery.
  • Protective case or dust cover.

8.2 Compatible Paper Rolls and Ribbons

For the Sharp EL-1197PIII, using compatible paper rolls and ribbons is crucial for optimal performance. The calculator supports 12-digit paper rolls, which are widely available and designed to fit seamlessly. Sharp recommends using original or high-quality compatible ribbons, such as the black/red dual roll, to ensure crisp and clear prints. When selecting paper rolls, choose standard 57.5mm x 30.5m rolls for consistent printing. Always opt for Sharp-branded or verified third-party accessories to maintain print quality and avoid jams. Using the correct supplies ensures longevity of the printer mechanism and delivers professional results.

  • 12-digit paper rolls (57.5mm x 30.5m).
  • Black/red dual ribbon rolls.
  • Sharp-branded or compatible supplies recommended.

8.3 Third-Party Compatibility

The Sharp EL-1197PIII supports various third-party accessories, offering flexibility for users. Compatible paper rolls and ribbons from trusted brands ensure consistent performance. While Sharp recommends original supplies, many users opt for third-party alternatives without issues. However, it’s crucial to verify compatibility to maintain print quality and functionality. Always check specifications to ensure third-party products meet the calculator’s requirements. This approach allows users to explore cost-effective solutions while preserving the device’s efficiency.

  • Compatible with standard 12-digit paper rolls.
  • Supports universal calculator ribbons.
  • Third-party accessories must meet Sharp’s specifications.

User Reviews and Feedback

Users praise the Sharp EL-1197PIII for its efficiency and durable design. Many highlight its ease of use and reliable performance in daily operations. However, some note Printing issues and ribbon replacement challenges.

9.1 Positive Aspects of the Sharp EL-1197PIII

The Sharp EL-1197PIII has received widespread acclaim for its efficiency and durable design. Users often highlight its ease of use and reliable performance, making it a favorite for both personal and professional settings. Many appreciate its high-speed printing capabilities and clear display, which enhance productivity. The calculator’s long battery life and portability are also frequently praised, allowing users to work on-the-go without interruptions. Additionally, its user-friendly interface ensures that even those less familiar with advanced calculators can navigate its features effortlessly. Overall, the Sharp EL-1197PIII is celebrated for its versatility and dependability, making it a trusted tool for various computational needs.

9.2 Common Complaints and Criticisms

Despite its popularity, the Sharp EL-1197PIII has faced some criticism. Users have reported occasional power issues, particularly with the battery life during heavy use. Some find the printing mechanism prone to jamming if not maintained properly. Additionally, a few users have noted that the error messages can be unclear, requiring further consultation of the manual. The calculator’s design has also been criticized by some for being slightly outdated compared to newer models. However, these issues are relatively rare and do not overshadow the calculator’s overall performance. With proper care and usage, the Sharp EL-1197PIII remains a reliable tool for most users.
The Sharp EL-1197PIII is a reliable and efficient electronic printing calculator, balancing performance with minor drawbacks. It remains a solid choice for those seeking efficiency and durability in their daily tasks.

10.1 Final Thoughts on the Sharp EL-1197PIII

The Sharp EL-1197PIII is a reliable and efficient electronic printing calculator that balances performance with minor drawbacks. Its user-friendly interface and durable design make it a solid choice for both personal and professional use. While it may lack some advanced features compared to modern calculators, its print capabilities and long-lasting battery life are significant advantages. Users have praised its ease of use and consistent performance, making it a trustworthy tool for everyday calculations. For those seeking a dependable and versatile printing calculator, the Sharp EL-1197PIII remains a strong contender in its class.

10.2 Recommendations for Potential Buyers

The Sharp EL-1197PIII is an excellent choice for those needing a dependable printing calculator. For home users, it offers simplicity and essential features, while business users will appreciate its durability and printing capabilities. First-time buyers should ensure they understand their specific needs, such as print frequency or advanced functions, before purchasing. Check compatibility with available accessories like paper rolls and ribbons. Read user reviews to gauge real-world performance and consider the budget, as it may vary depending on the seller. Overall, the Sharp EL-1197PIII is a solid investment for anyone seeking a reliable printing calculator with a user-friendly design.